Plugin configuration
1. Connect the robot to your EYE+
Connect an Ethernet cable between the Denso Ethernet port and the EYE+ robot port.
2. Configure robot network settings
You must set the robot’s IP address to the same subnet as the robot’s port on your EYE+. From the Teach Pendant, go to
Setting/Communication and Token/Network and Permission and set the Ethernet port configuration accordingly.
Note
To check the robot port settings, go in EYE+ Studio under and go to
Communication > TCP/IP Communication > Communication.
To get more information about network configuration, please refer to communication_tcp_ip_communication.
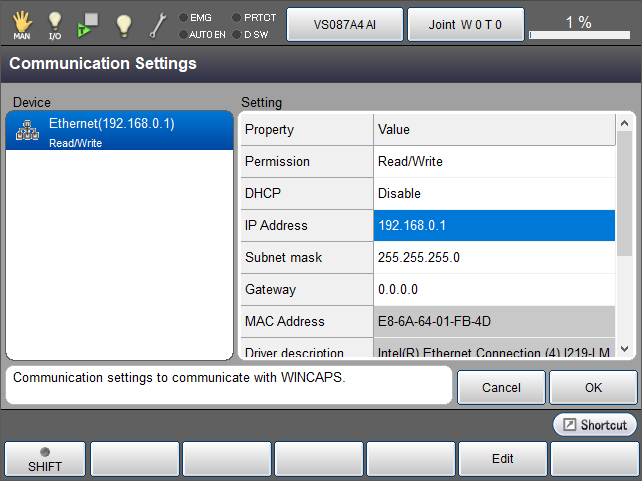
Fig. 2 Communication Settings - Ethernet configuration
You can try to ping your EYE+ from Setting/Communication and Token/Ping. Enter the EYE+ IP address and click
Ping.
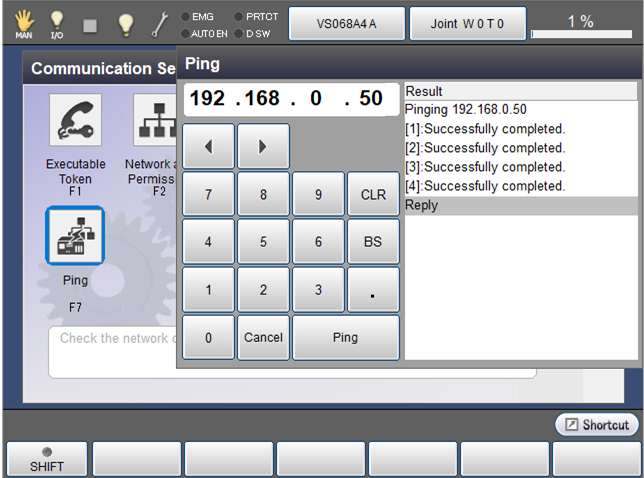
Fig. 3 Communication Settings - Ping EYE+ to check the communication settings
3. Configure the communication
You must setup two client communications. From the Teach Pendant, go to
Settings/Communication and Token/Data Communication and select Ethernet, #4-7,8-15.
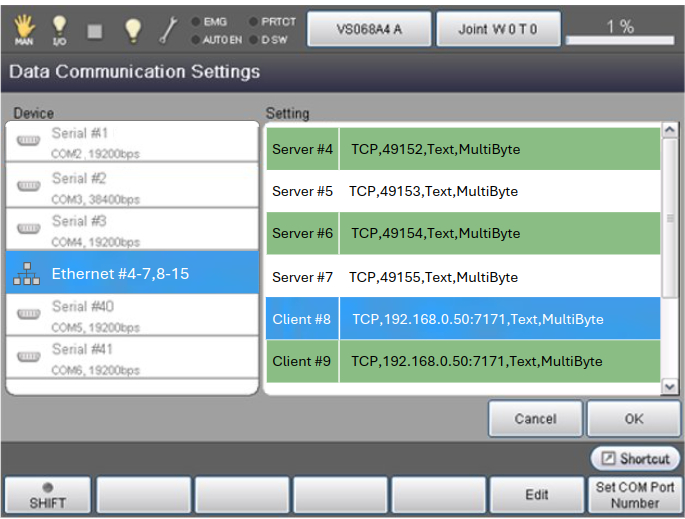
Fig. 4 Data Communication Settings - Select client #8
Then on the right side, select two TCP clients and set the configuration as presented in Fig. 5.
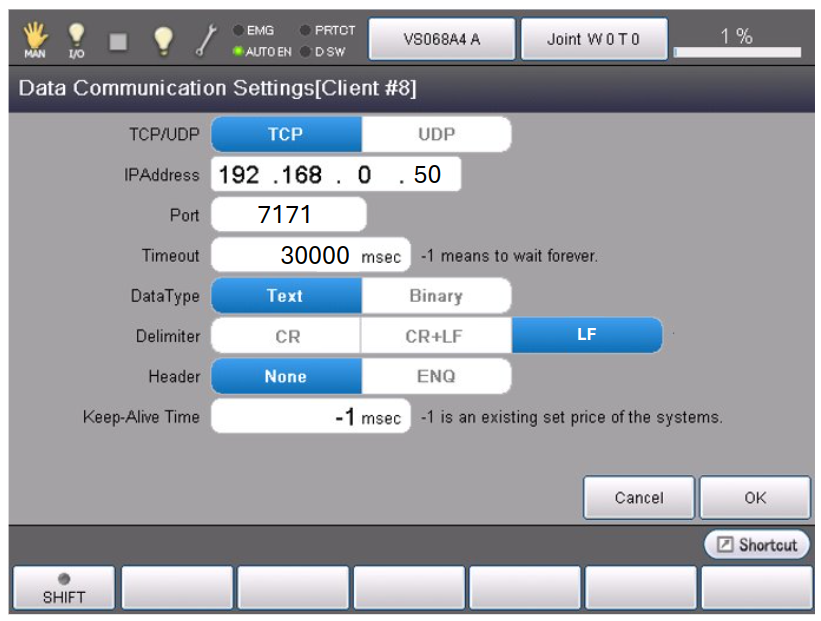
Fig. 5 Data Communication Settings - Configure client #8
Important
Once the clients are chosen, consider them both reserved by Asyril.
1. Check the end of line character
Your Denso robot can communicate with the EYE+ Controller via TCP/IP protocols. To be able to communicate, you must
select the correct end of line character: LF in EYE+ Studio under , in
Communication > TCP/IP Communication > TCP/IP Configuration section (Fig. 6).
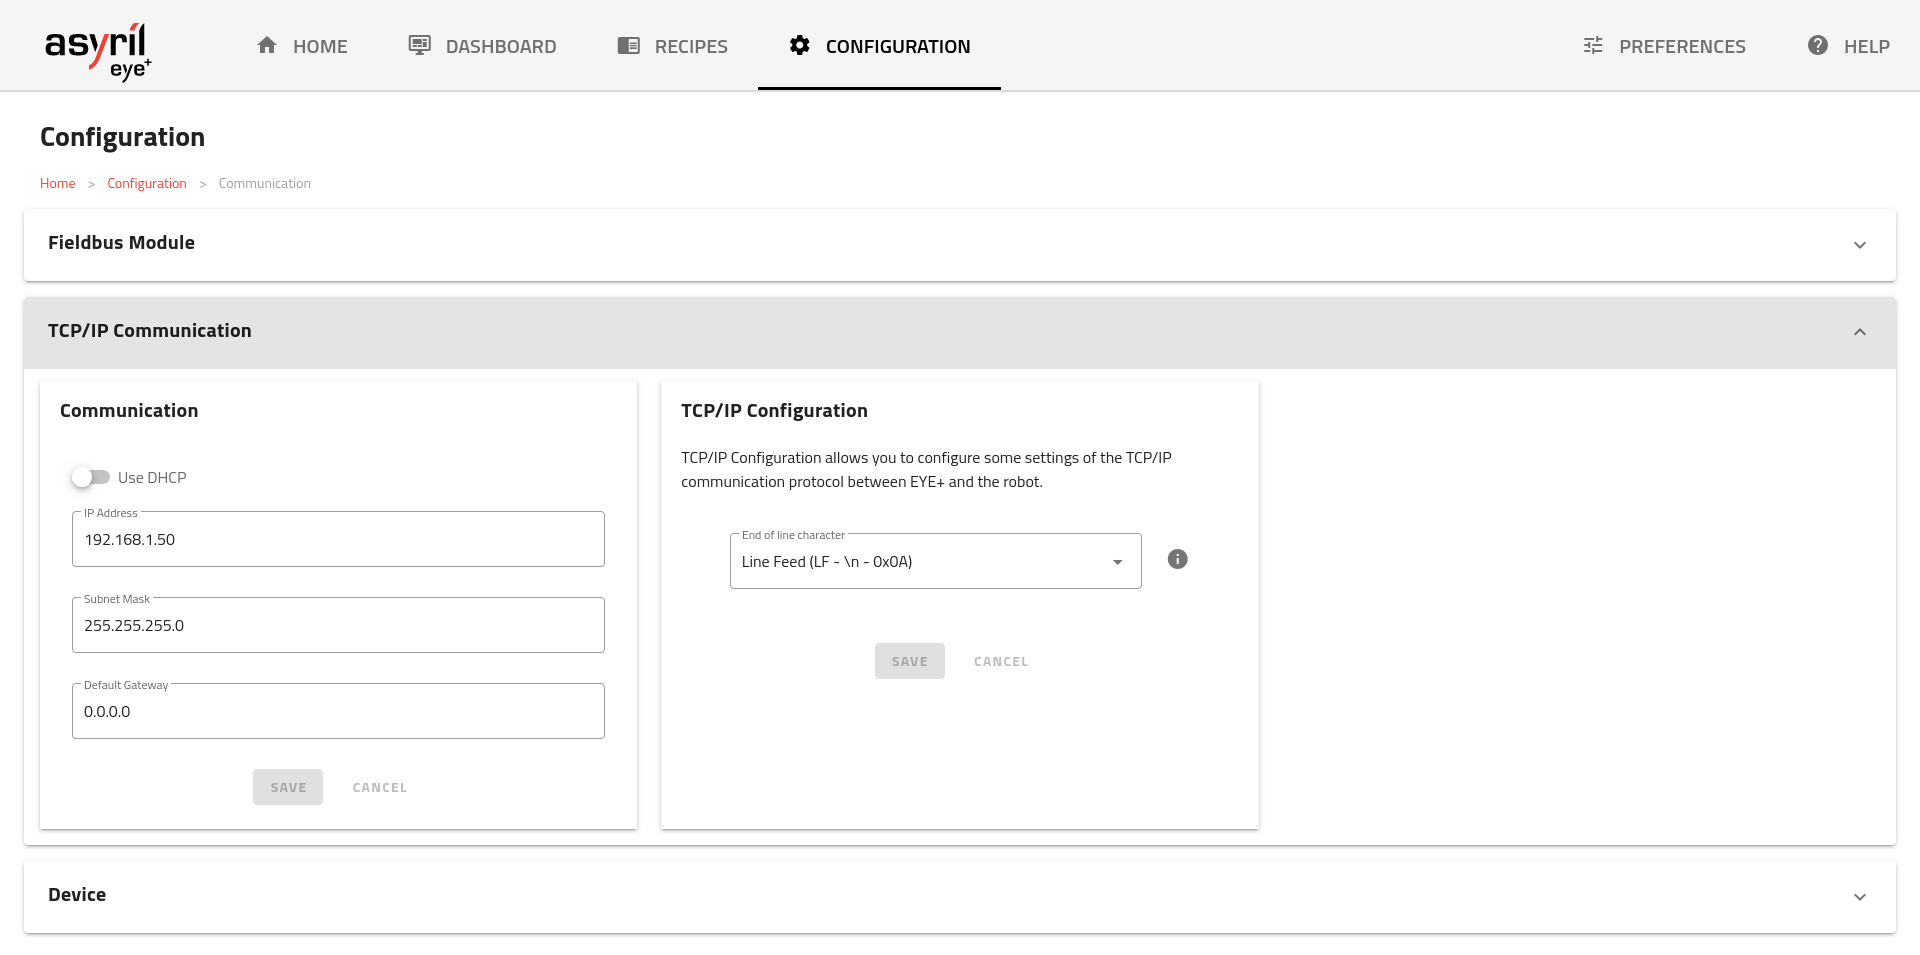
Fig. 6 TCP/IP Configuration - end of line character