Sample program
Here we introduce an example of a program to perform a basic pick and place.
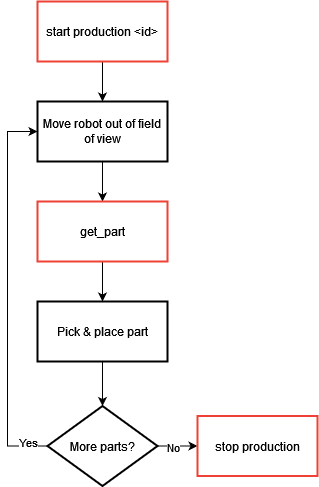
Fig. 10 Production scenario with get_part
It is necessary at this stage to have already performed the camera configuration, as well as the creation of a recipe with its hand-eye calibration.
Initialization
1. Prepare the robot:
Initialize robot frame and tool.
Initialize the robot gripper.
Move the robot out of the field of view.
2. Initialize the communication: Call the command EYE_CONFIGURE with the correct client number.
3. Start EYE+ in production: Stop the current state of the EYE+ if needed and start the production with the desired recipe.
Cyclic part of robot program
4. Get the part coordinates: Call the command EYE_GET_PART to get the coordinates of the part to be picked. These coordinates will be stored in the reserved position register.
5. Check if no error occurs while requesting the part coordinates: Call the command EYE_CHECK_LAST_ERROR and check if it returns 0. If it does not, an error has occurred (e.g., a timeout)
6. Calculate position: Create an intermediate position EYEPosDZ from the EYEPos to make sure to not hit anything when picking the part, whether it is the Asycube or another part.
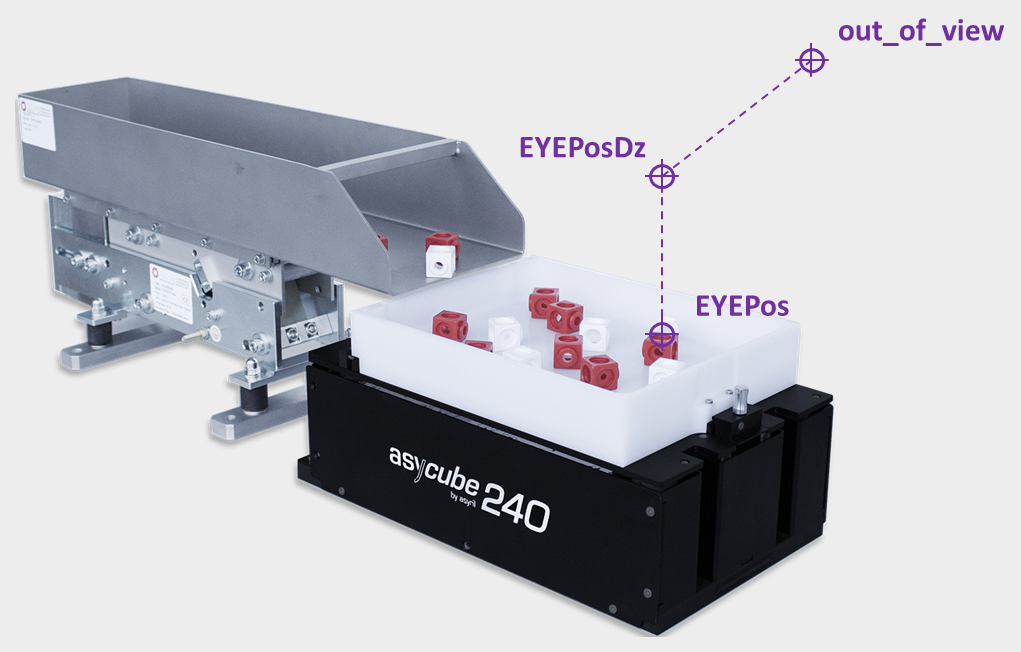
Fig. 11 Path to pick the part
7. Pick: Follow the path from out_of_view to EYEPosDZ to EYEPos and pick the part with your gripper.
8. Place: Follow the path from EYEPos to EYEPosDZ to out_of_view to EYEPlace and place the part with your gripper.
Out of cyclic part
9. Stop EYE+ state: Stop the EYE+ production state by calling the command EYE_STOP. This command will also stop the communication.