Warning
You are reading an old version of this documentation. If you want up-to-date information, please have a look at 5.4 .5.1 Acquisition Settings
You have to define the acquisition settings to be used for the angle point positioning. By default, the same settings are used as for the previous step (pick point teaching). If you can not define the pick point angle from this image you should select other acquisition settings by pressing the “+” button.
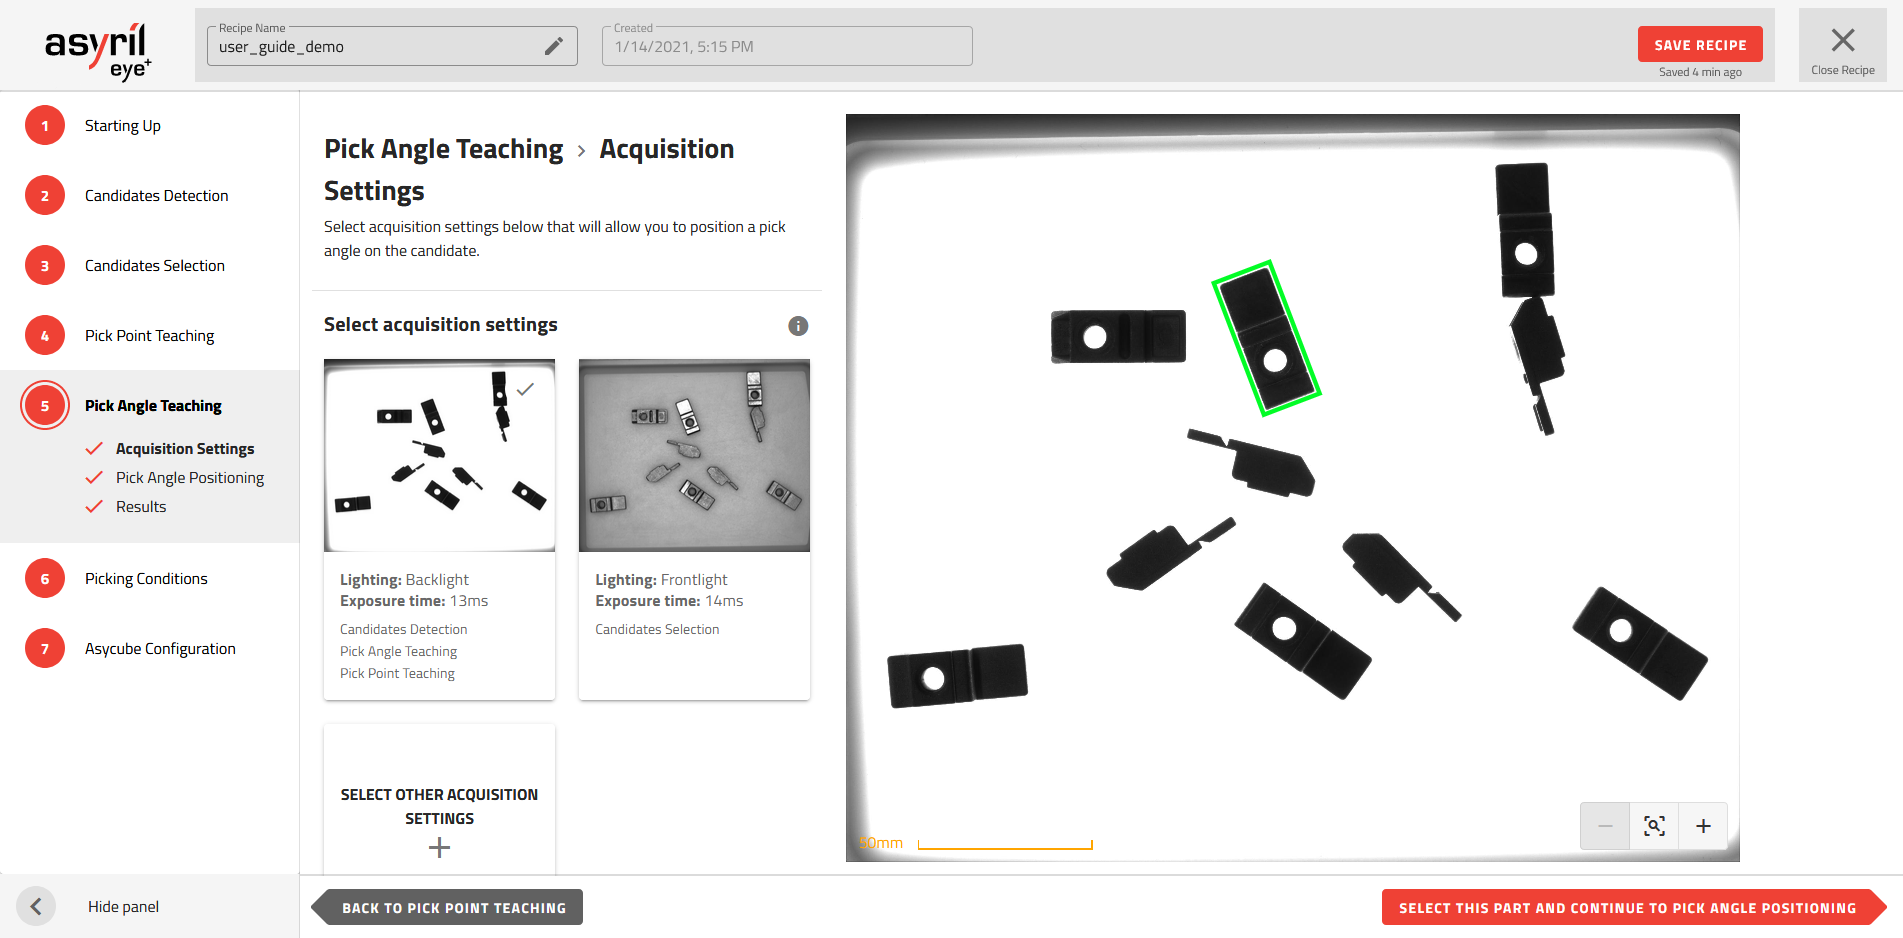
Fig. 120 Pick Angle Teaching - Acquisition Settings
An example of a part requiring different lighting conditions for the pick angle is provided in Fig. 121.
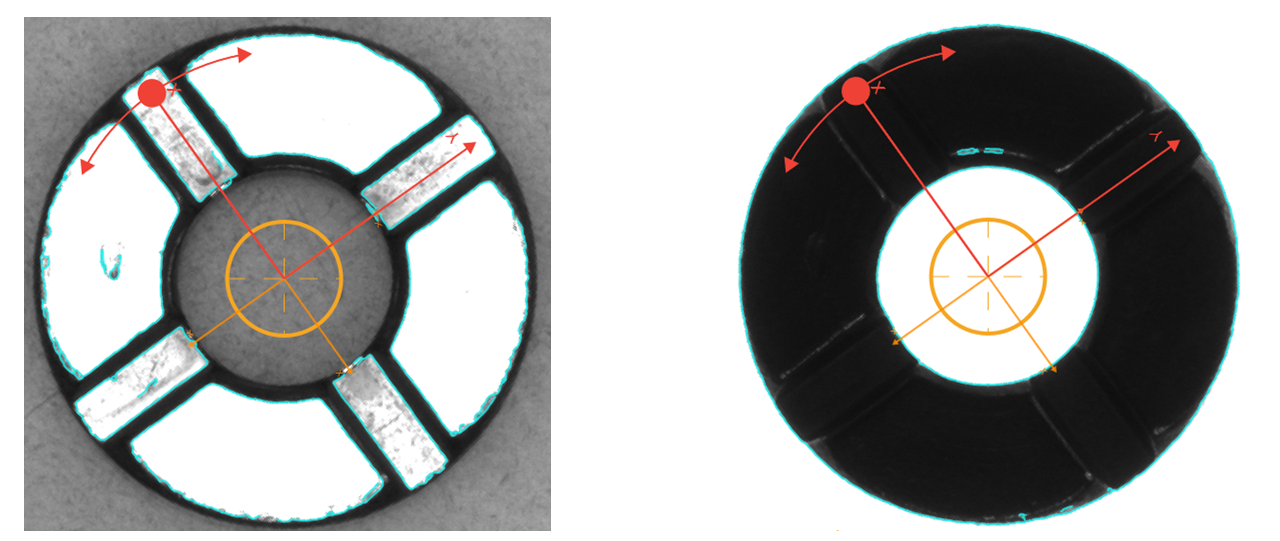
Fig. 121 Pick angle positioning with a specific orientation that requires Frontlight (Frontlight: left, Backlight: right)
Note
If possible, use the same acquisition settings as in the previous step.