Plugin configuration
Step 1: Connect the robot to your EYE+
Connect an Ethernet cable between the Epson controller port and the EYE+ robot port.
Step 2: Configure robot network settings
You must set the robot’s IP address to the same subnet as the robot’s port on your EYE+.
From EPSON RC+, go to
Setup > System Configuration > Controller > Configuration.Fill the section with the following settings:
IP Address / IP Mask: IP Address and Mask to set the robot on the same subnet as the robot port on your EYE+.
IP Gateway: Use IP Gateway if you are connecting different devices on different networks. If not, let this section with default value
0.0.0.0.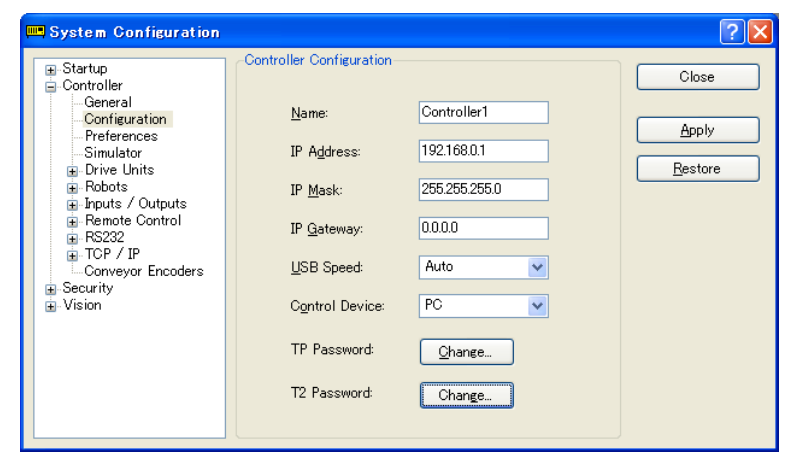
Fig. 2 System Configuration - Configuration
Click on
ApplyandClose.
Step 3: Configure your EYE+ controller
Your Epson robot can communicate with the EYE+ controller via TCP/IP protocols. To be able to communicate, you
must select the correct end of line character: LF in EYE+ Studio under , in
Communication > Robot TCP/IP > TCP/IP Configuration (Fig. 3).
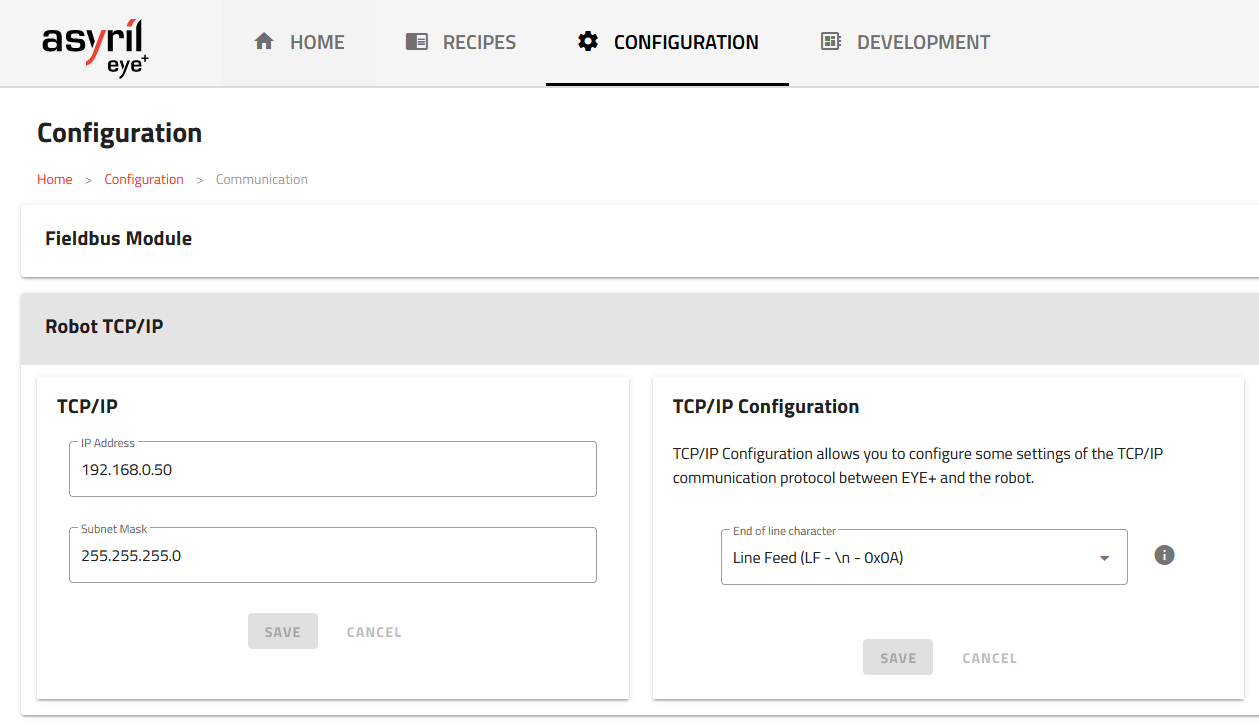
Fig. 3 Robot TCP/IP section - end of line character