Warning
You are reading an old version of this documentation. If you want up-to-date information, please have a look at 1.4 .Plugin configuration
1. Connect the robot to your EYE+
Connect an Ethernet cable between the FANUC controller port #1 and the EYE+ robot port.
2. Setup TCP/IP protocol
You have to specify the TCP/IP configuration of your EYE+ to the robot. From the IPendant touch, go to
MENU > SETUP > Host Comm. Select the TCP/IP protocol. Set the static IP address and subnet mask of the robot to be
on the same subnet as the robot port of your EYE+.
Note
You can try to ping EYE+ by creating a local host with the same IP address as your EYE+ Controller and
clicking on PING. The following message should appear Ping ... succeed.
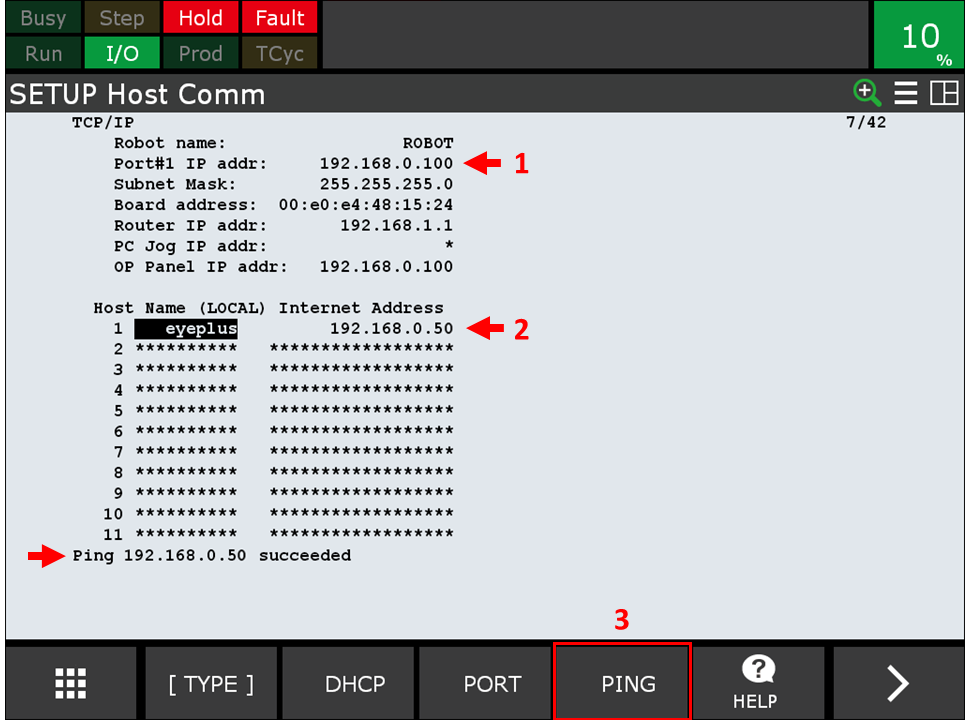
Fig. 7 Configure the EYE+ host
Note
To check the robot port settings, under in EYE+ Studio, go to the
Communication > Robot TCP/IP > TCP/IP. To get more information about network configuration, please refer to
Communication.
3. Configure the client services
Communication settings is configured directly in your program using the EYE_CONFIGURE command. You need to specify as inputs the client numbers and the IP address and the port number of the EYE+.
Note
Restart the robot controller after calling the command EYE_CONFIGURE if the clients you have chosen have never been configured before.
4. Check the end of line character
Your robot can communicate with the EYE+ Controller via TCP/IP protocols. To be able to communicate, you must
select the correct end of line character: LF in EYE+ Studio under , in
Communication > Robot TCP/IP > TCP/IP Configuration section (Fig. 8).
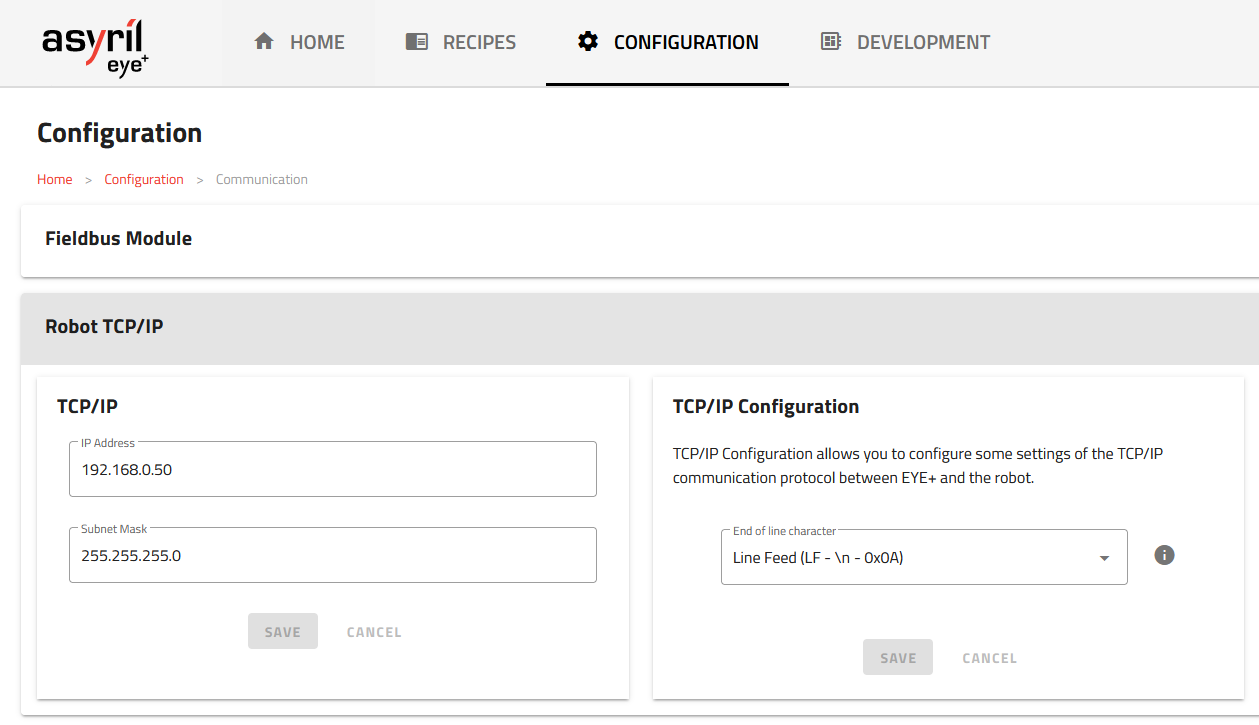
Fig. 8 TCP/IP Configuration - end of line character