Warning
You are reading an old version of this documentation. If you want up-to-date information, please have a look at 2.0 .Plugin configuration
The configuration of the plugin for the IRC5 controller is similar to the configuration for the OmniCore controller. The following documentation only explains how to configure the plugin on the OmniCore controller, but the same process must be done with the IRC5 controller.
Step 1: Connect the robot to your EYE+
Connect an Ethernet cable between the ABB controller public port WAN and the EYE+ robot port.
Step 2: Configure robot network settings
You must set the robot’s IP address to the same subnet as the robot’s port on your EYE+.
On your teach pendant, go to
Application > Settings > Network > Public NetworkSelect
Use the following IP Addressand fill the sections to be on the same subnet as your EYE+ robot port.
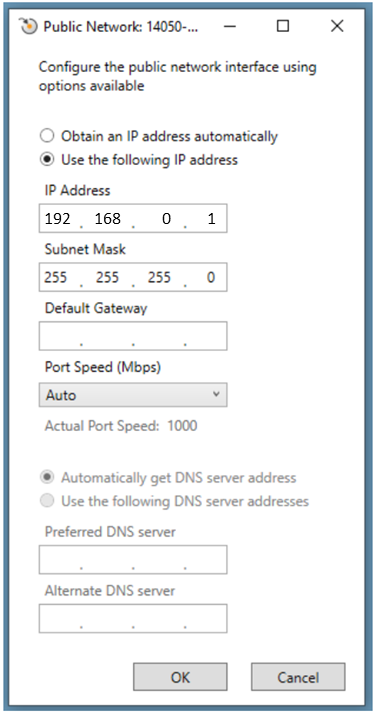
Fig. 11 Public Network
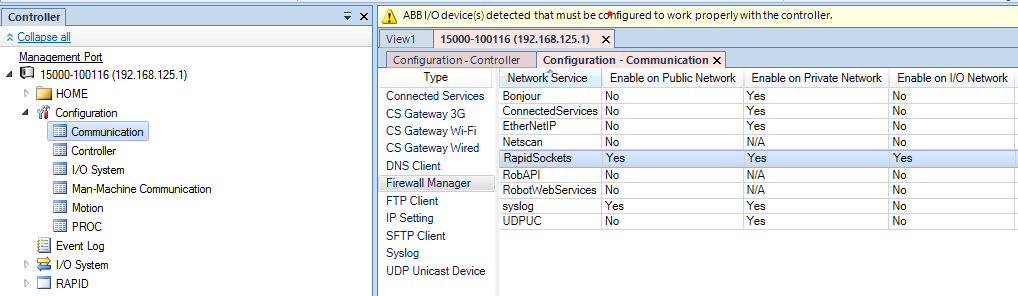
Step 3: Enable socket messaging
Step 4: Configure your EYE+ controller
Your ABB robot can communicate with the EYE+ Controller via TCP/IP protocols. To be able to communicate, you must
select the correct end of line character: LF in EYE+ Studio under , in
Communication > Robot TCP/IP > TCP/IP Configuration section (Fig. 13).

Fig. 13 TCP/IP Configuration - end of line character