Warning
You are reading an old version of this documentation. If you want up-to-date information, please have a look at 2.0 .Plugin installation
Installing the plugin for the IRC5 controller is similar to installing the plugin for the OmniCore controller. The following documentation only explains how to install the plugin on the OmniCore controller, but the same process can be applied with the IRC5 controller.
Important
If you are working with an IRC5 controller, you must have checked the following option before
creating your project: PC 616-1 interface.
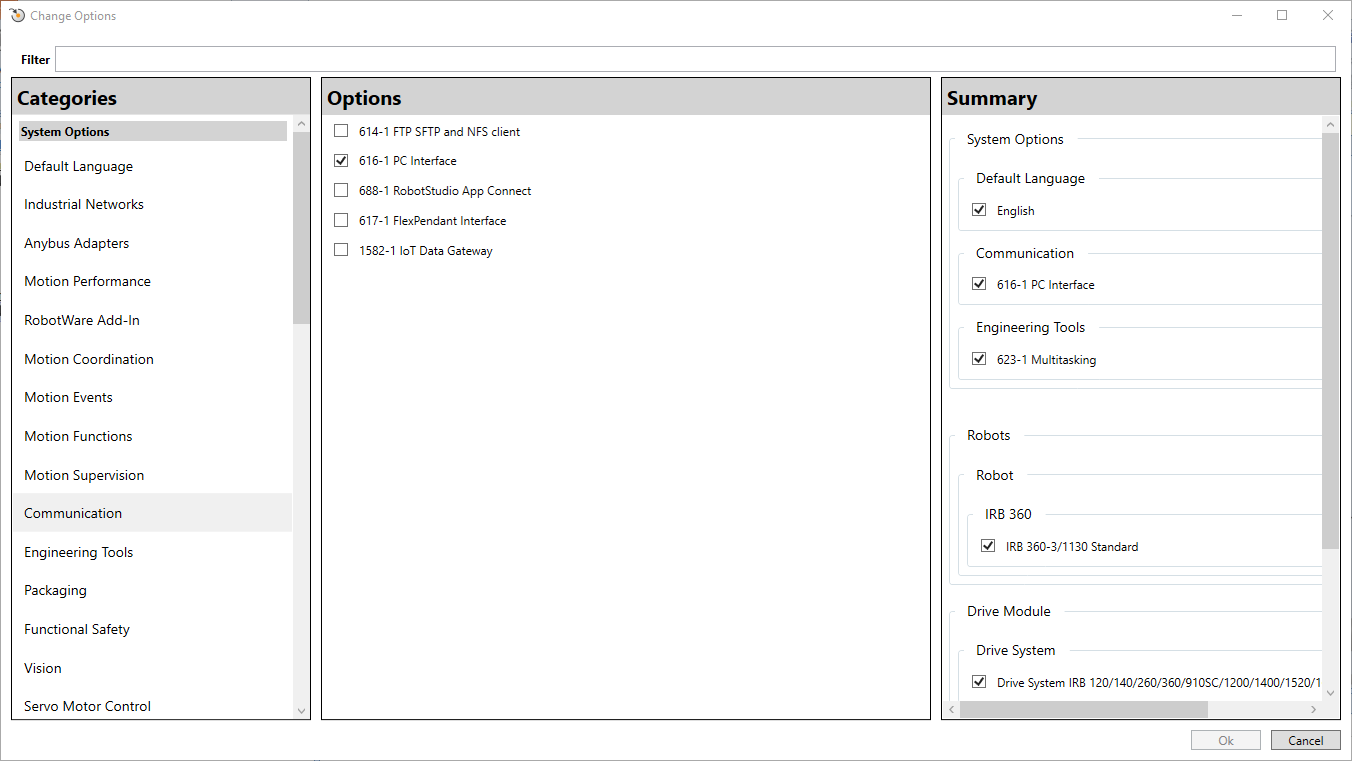
Fig. 3 IRC5 controller - Required communication option
Step 1: Check your RobotWare version
Open your solution in RobotStudio and go to tab
Controllerand selectInstallation Manager 7.Select your controller and check the RobotWare version in the overview. The version must be
7.6.1or higher.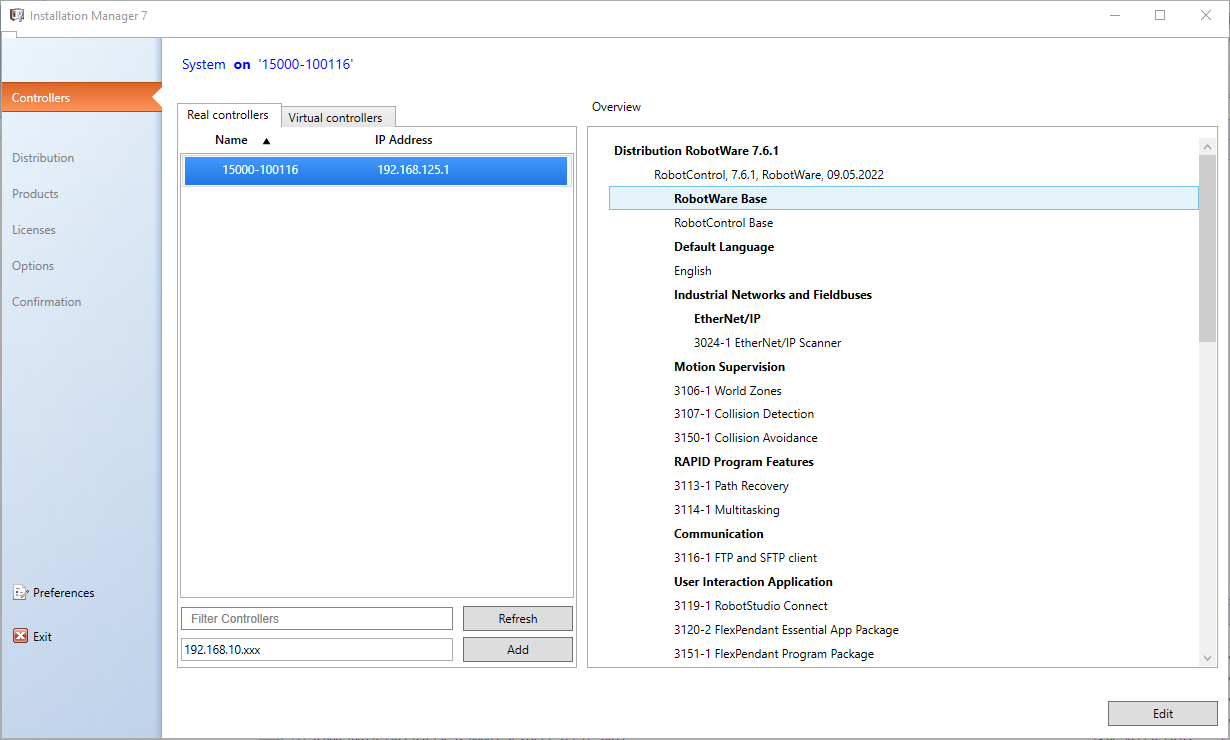
Fig. 4 Installation Manager 7 - Distribution RobotWare 7.6.1
Note
If you are using IRC5 controller, you must use Installation Manager 6 and check your RobotWare version to
be equal or higher to 6.13.02.
Step 2: Download the plugin
Download the plugin zip file abb-eyeplusPlugin-version.zip here. It must contain the following files:
Asyril.Eyeplus.RW6-1.0.0.rspak
Asyril.Eyeplus.RW7-1.0.0.rspak
Step 3: Install the RobotWare Add-In in RobotStudio
Open your solution in RobotStudio and go to tab
Add-Ins.Click on
Install Packageand select the plugin file Asyril.Eyeplus.RW7-1.0.0.rspak.The following information must appear:

Fig. 5 RobotWare Add-In
Asyril.Eyeplus.RW7 1.0.0installed
Note
If you are using IRC5 controller, you must install the plugin file Asyril.Eyeplus.RW6-1.0.0.rspak.
Step 4: Install Add-In system module
Connect your PC to the
MGMTEthernet port.Set your PC network settings in DHCP mode.
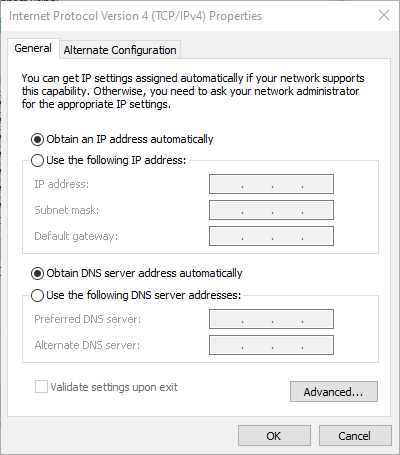
Fig. 6 Internet Protocol Version 4 (TCP/IP) Properties
Open your solution in RobotStudio and go to tab
Controllerand selectInstallation Manager 7.Note
If you are using IRC5 controller, you must follow all those steps with
Installation Manager 6.Select your controller and select
Yes, connect to this controller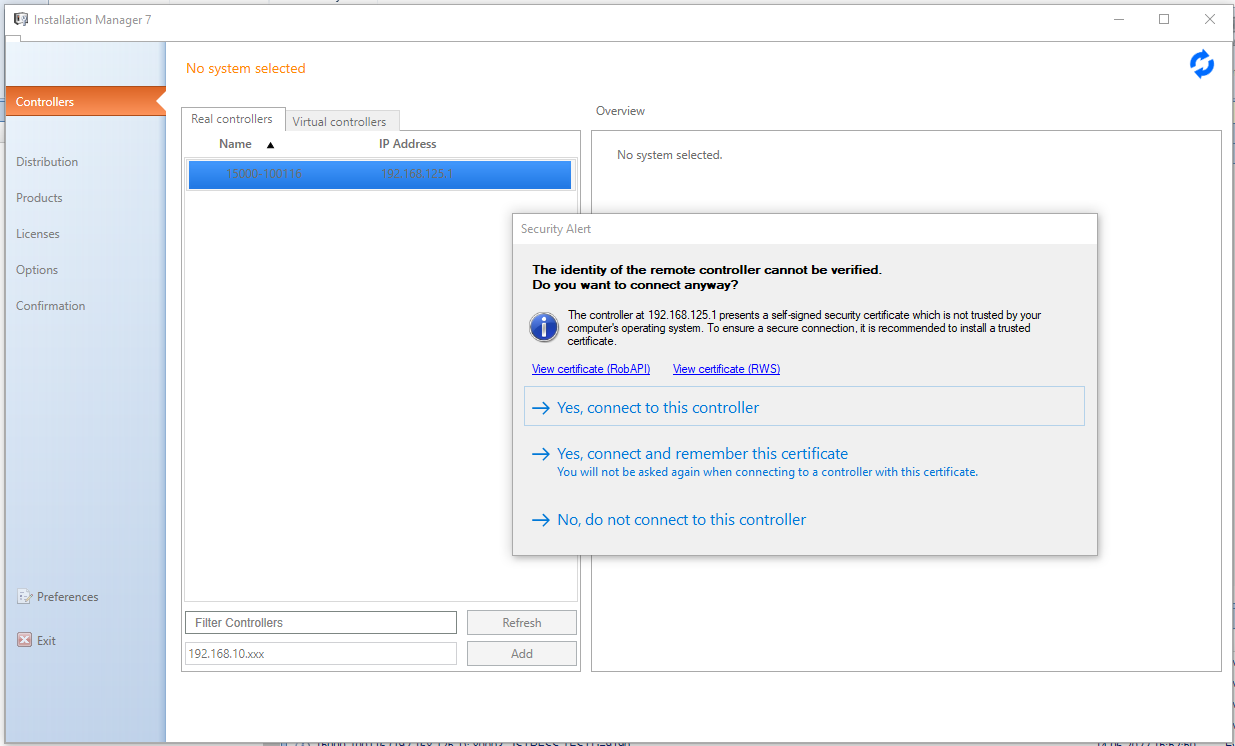
Fig. 7 Installation Manager 7 - Select your controller
Select
Edit, then fromProductstab, click onAdd...and selectEYE+product andOK: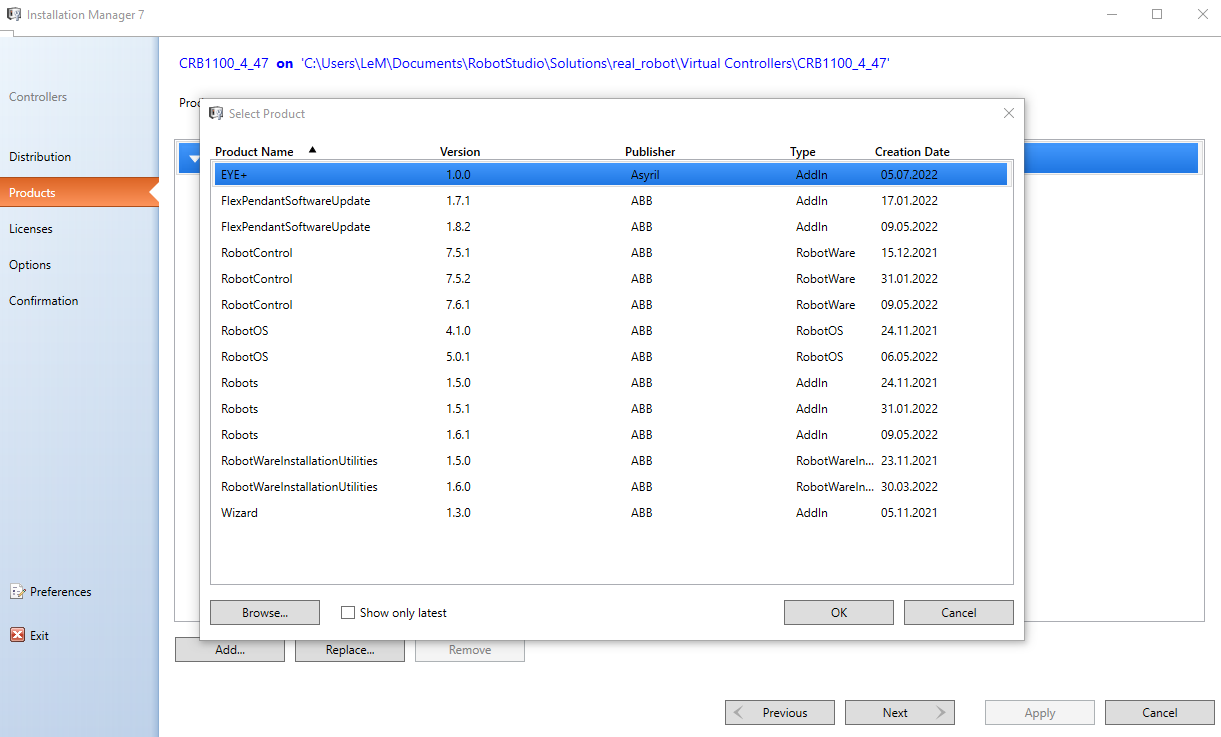
Fig. 8 Installation Manager 7 - Distribution - Select
EYE+productGo to
Confirmationand clickApply.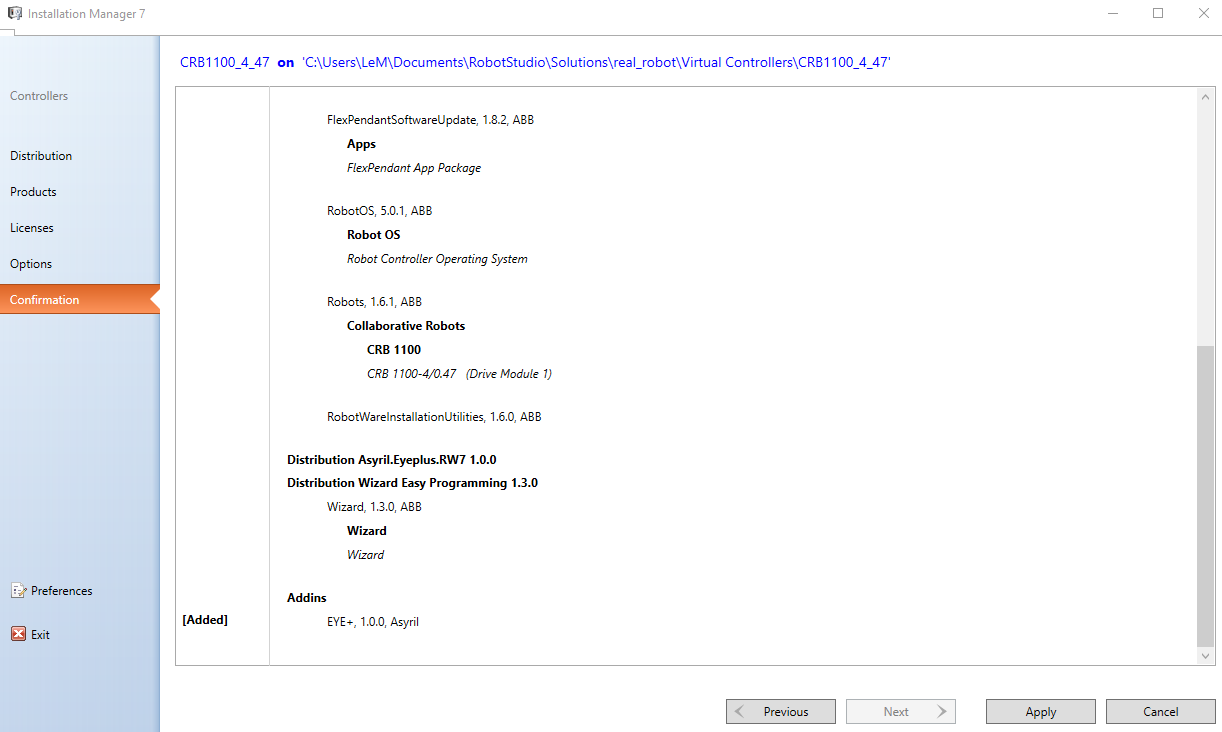
Fig. 9 Installation Manager 7 - Confirmation
From the
Controllertab, restart your controller using modeRestart (Warmstart).
Finally, the system module abb_eyeplus_plugin.sys must appear in each of your robot task.
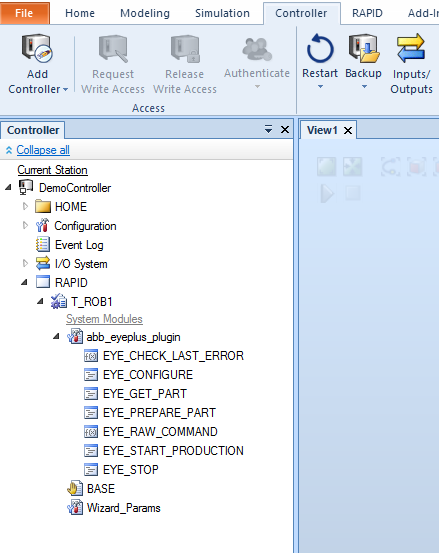
Fig. 10 System module abb_eyeplus_plugin.sys installed