Plugin installation
1. Check robot software
Check the software version of your robot under ROBOT/Informations next to System.
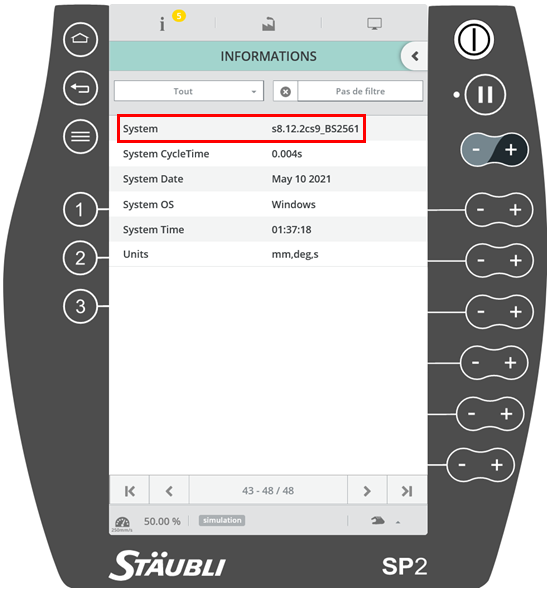
Fig. 1 Robot software version 8
2. Download the plugin
Download the plugin zip file staubli-eyeplusplugin-version.zip here. It should contain a folder named eyeplusPlugin which itself contains 15 files:
E_CHECK_ERR.pgx
E_CONFIGURE.pgx
E_GET_PART.pgx
E_PREPARE_PART.pgx
E_RAW_COMMAND.pgx
E_RESET.pgx
E_START_PROD.pgx
E_STOP.pgx
EYECoordinates.pgx
EYEInternalCmd1.pgx
EYEInternalCmd2.pgx
EYERaiseError.pgx
EYERobotType.pgx
eyeplusPlugin.dtx
eyeplusPlugin.pjx
3. Install the plugin on your robot
Load the application from USB storages to Memory: Unzip the staubli-eyeplusplugin-version.zip file and save the eyeplusPlugin folder on a USB key. Connect the USB key to the SP2 teach pendant of the robot. On SP2, go to
VAL3/Storages, from your USB location select the file eyeplusPlugin and load it. The file will be saved in memory.Save the application in Disk storages: Go to
VAL3/Memory, select the file again and save it to the Disk location without modifying the name.
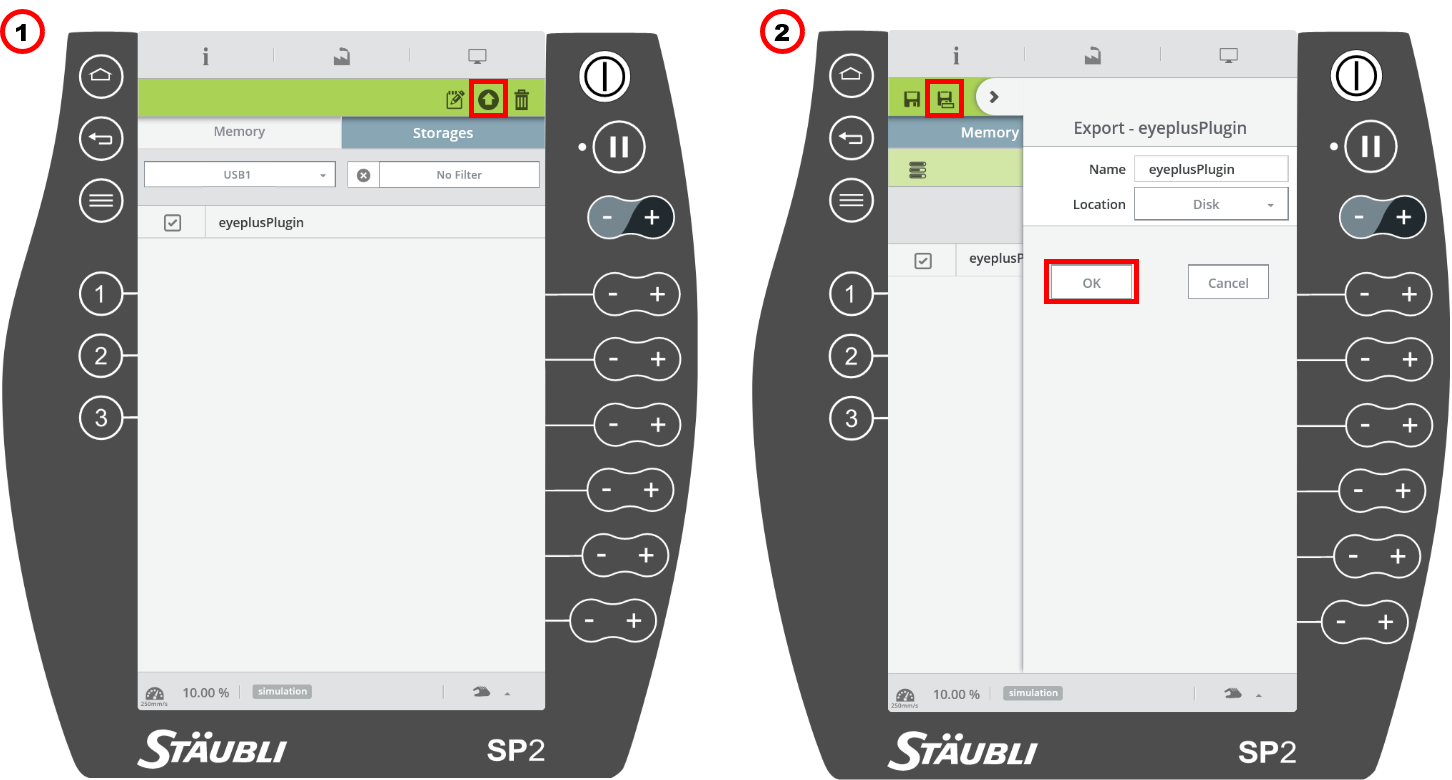
Fig. 2 Plugin installation
Warning
The application name must remained the same in the Disk: eyeplusPlugin.
Note
If you are familiar with Stäubli and SRS, you can use Transfer Manager ![]() to install the plugin.
to install the plugin.
4. Check the plugin version
You can check the plugin version from your SP2 teach pendant once the plugin is installed. Go to VAL3/Storage,
select the Disk and load the plugin application into Memory. From VAL3/Memory, select the plugin application and
click on the edit icon ![]() . The
. The eyeplusPlugin - Datas page should appear. Select the variable EYEVersion
and open it. This variable stores the version of the plugin.
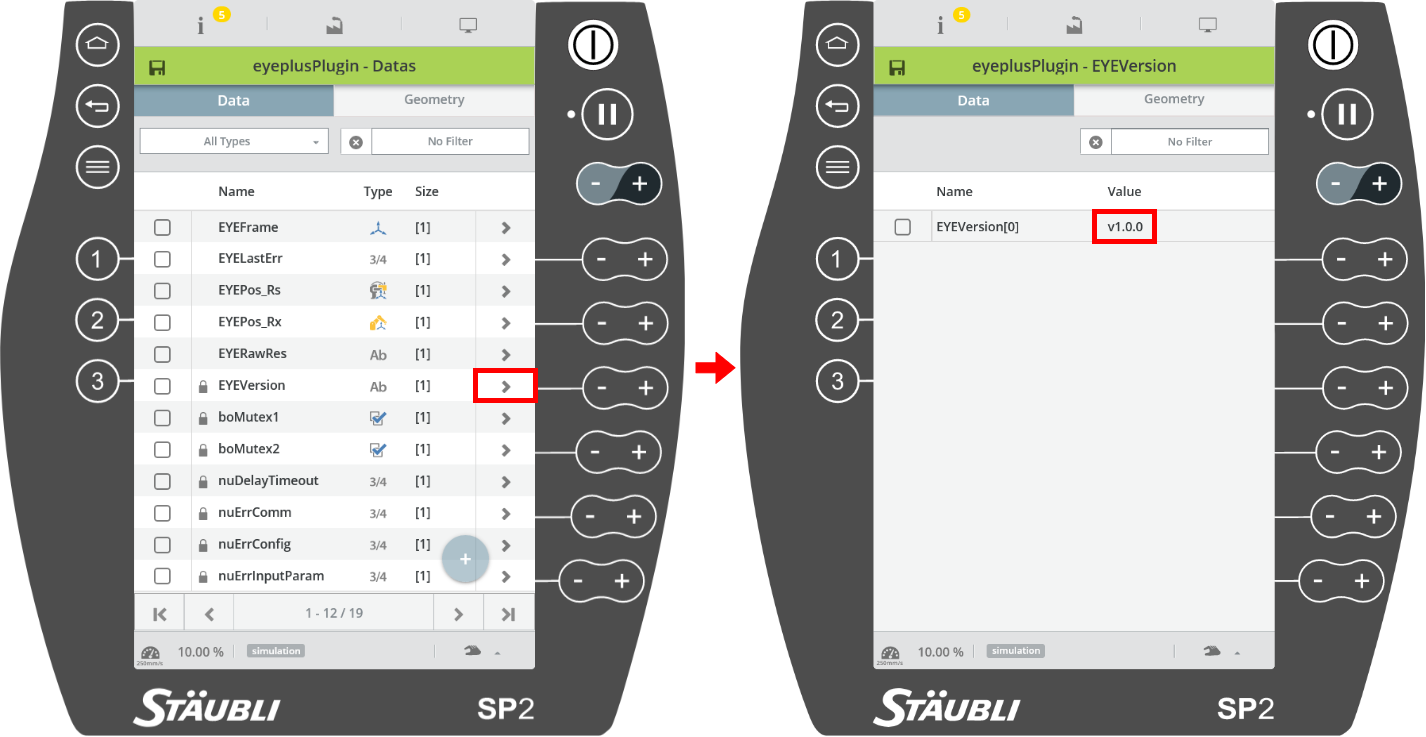
Fig. 3 Check the plugin version