Warning
You are reading an old version of this documentation. If you want up-to-date information, please have a look at 5.4 .4.1 Acquisition Settings
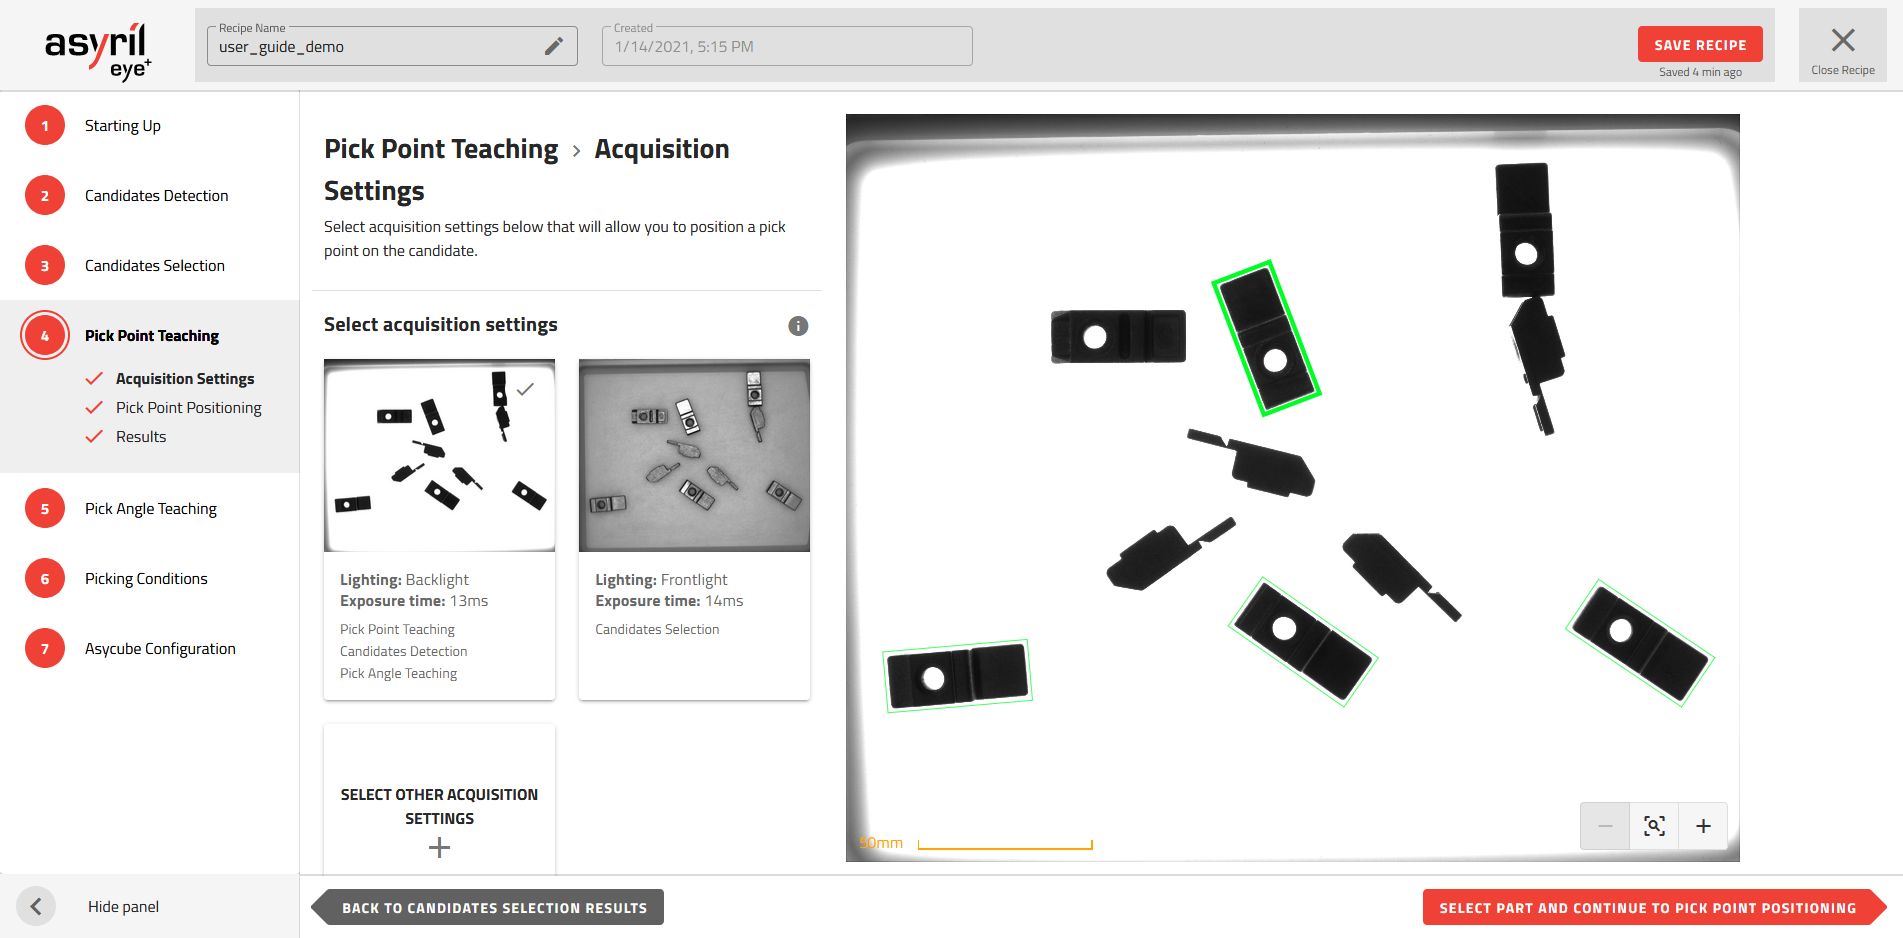
Fig. 87 Pick Point Teaching - Acquisition Settings
Select acquisition settings
You have to define the acquisition settings to be used for the pick point positioning. By default, the same settings as the previous step (candidate selection) are used. If you can not define the pick point position from this image, you should select other acquisition settings by pressing the “+” button. Make sure your chosen acquisition settings highlight enough features on the parts to be able to consistently and systematically place the pick point in the correct position.
The “features” are all the contours detected on the parts. They are shown in blue (Fig. 88).
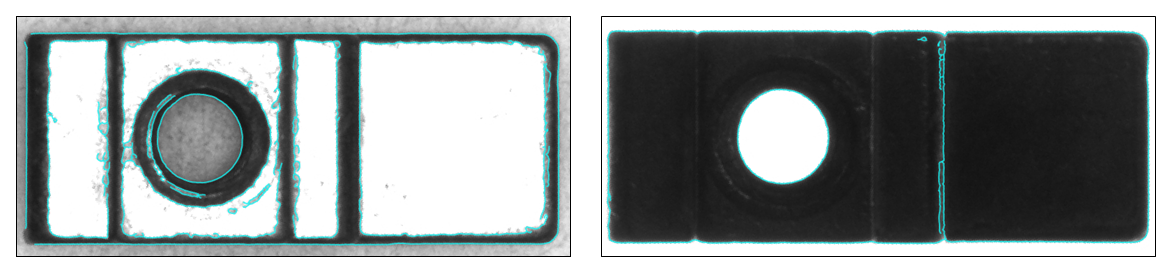
Fig. 88 Features of the part in blue: Frontlight (left), Backlight (right)
Important
The choice of the acquisition settings is critical because if the reference features do not give enough information, there may be several different possible pick points.
Backlight
Backlight should be used instead of frontlight if enough features are found to place the pick point in the correct position.
If you pick the part in the middle of the part.
If you pick the part in a specific position but the part is asymmetrical in backlight.
Frontlight
You can use the frontlight if the features found in the backlight are not enough to reference your pick point.
If your part is symmetrical in backlight and your pick point is located on a specific position (Fig. 89).
If your part is transparent.
If the features that are at the same plane as the pick point are visible only in frontlight.
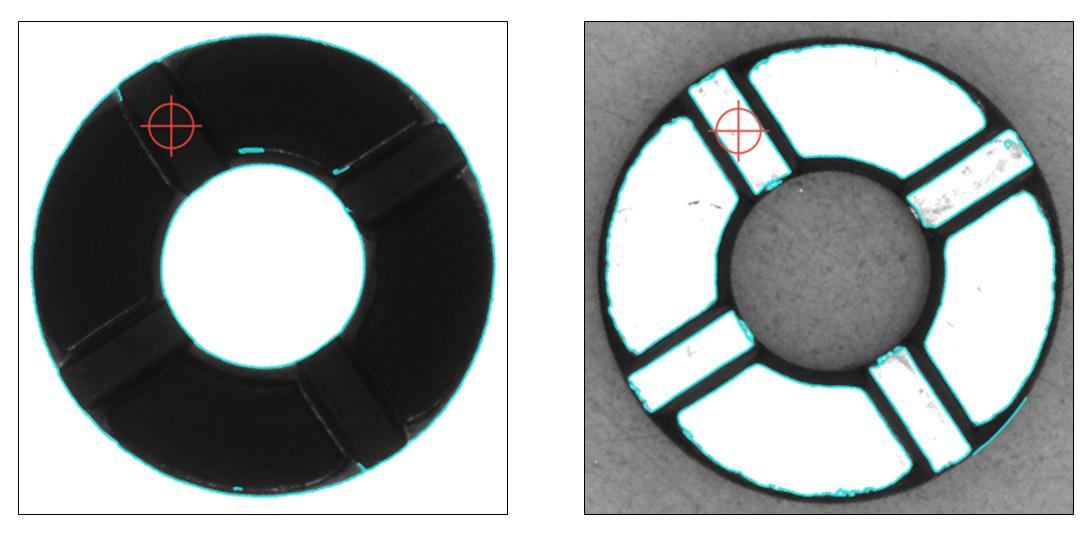
Fig. 89 Pick point positioning on a specific position that requires frontlight (Backlight: left, Frontlight: right)
Note
The frontlight allows the detection of more features. You will need to mask all unrepeatable features.
Select reference part
You must choose a candidate which will be taken as a reference for the positioning of the pick point. You can select it on the main image displayed by clicking on the desired candidate. The selected candidate is surrounded by a larger bounding box.
Note
It is good practice to select a part that is close to the center of the Asycube to avoid the effect of parallax on the reference model.