Warning
You are reading an old version of this documentation. If you want up-to-date information, please have a look at 5.4 .Before you start
The following sections show how to add and configure your EYE+ in Siemens TIA Portal.
GSDML Installation
Please find the GSDML electronic datasheet in the download section PROFINET IO Downloads. Once downloaded, proceed with the installation using the tool Manage general station description files, as shown in the following figure.
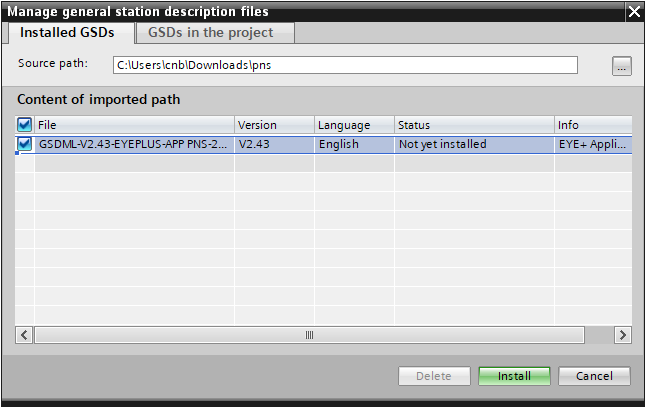
Fig. 234 Importing the GSDML File, the installation is performed when clicking on Install.
Adding & Configuring EYE+
After installing the GSDML, you can add an EYE+ device to your network overview. The EYE+ device is listed in the Hardware Catalog under section Other Field Devices > I/O > Asyril SA > PNS > EYE+ Application as shown in the following figure.
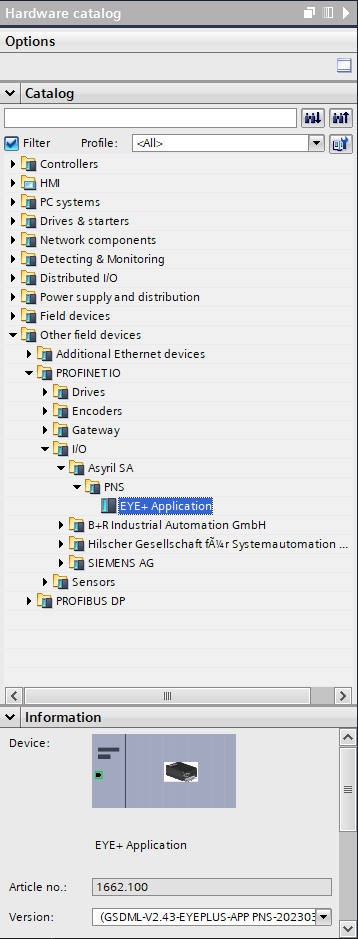
Fig. 235 EYE+ is available in the Hardware Catalog.
The Fieldbus module installed in EYE+ comes without IP settings and a station name.
In order to configure the EYE+ Fieldbus module, starts by adding an EYE+ device to your network overview and connect it to your PROFINET Controller. It should look like the following:
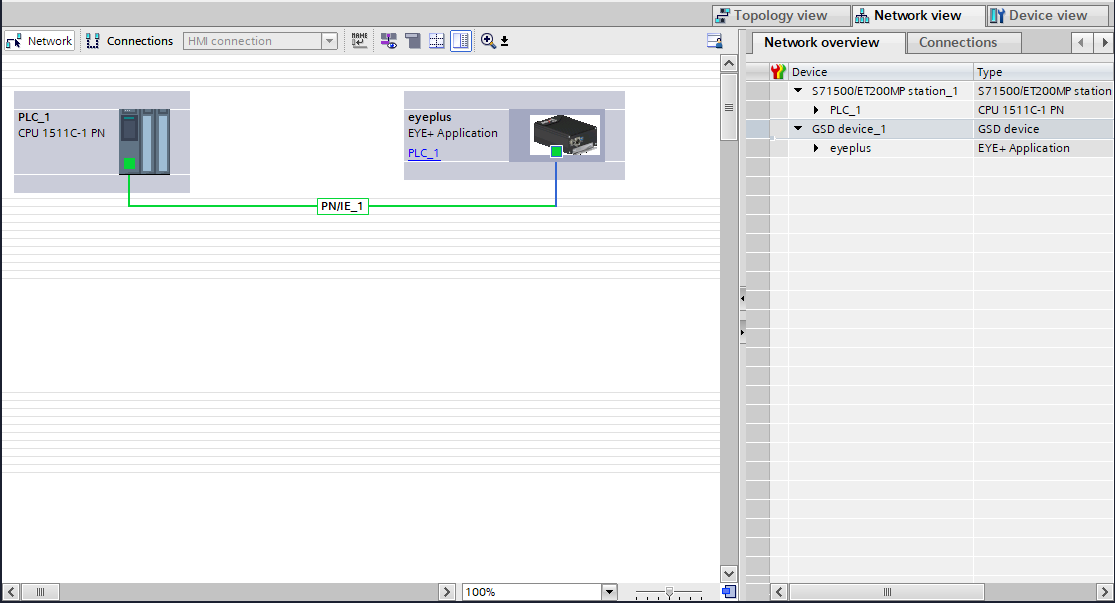
Fig. 236 EYE+ is connected to a PROFINET Controller.
After adding EYE+ to your PROFINET Controller, double-click on EYE+ to open the Device Overview. From there, you can Right click on the device and select the Online & Diagnostics tool, it should show a configuration page where you can select the sub-page Assign IP address.
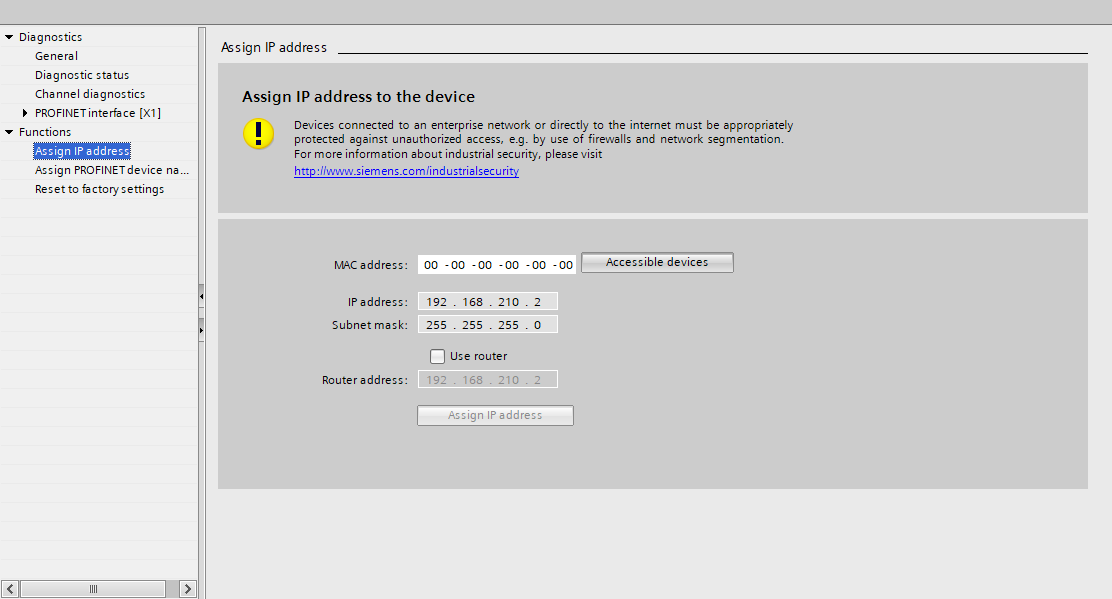
Fig. 237 Using the Online & Diagnostics tool you can assign an IP Address to your EYE+ Fieldbus module.
Once on the Assign IP address page, proceed with locating your EYE+ on the network by clicking on Accessible devices. This action opens a new window where you can locate any devices connected to the PROFINET Controller. Click on Start Search, after a while it should locate your EYE+.
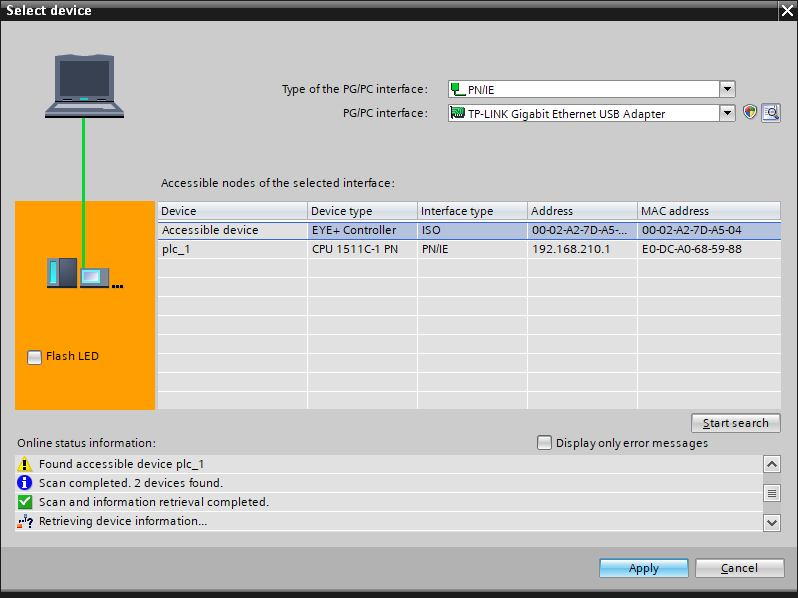
Fig. 238 EYE+ is visible in the Select device window.
Select the correct EYE+ (if you have more than one) and click Apply, your EYE+ is now configured with the IP Address and automatically with a station name.
Note
If you do not see an EYE+, please make sure your EYE+ is properly connected to the PROFINET Controller.