Warning
You are reading an old version of this documentation. If you want up-to-date information, please have a look at 1.1 .Plugin configuration
1. Connect the robot to your EYE+
Connect an Ethernet cable between the FANUC controller Ethernet port #1 and the EYE+ robot port.
2. Setup TCP/IP protocol
You have to specify the TCP/IP configuration of your EYE+ to the robot. From the Tablet TP, go to MENU > SETUP >
Host Comm. Select the TCP/IP protocol. Set the static IP address and subnet mask of the robot to be on the same subnet
as the robot port of your EYE+.
Note
You can try to ping EYE+ by creating a local host with the same IP address as your EYE+ controller and
clicking on PING. The following message should appear Ping ... succeed.
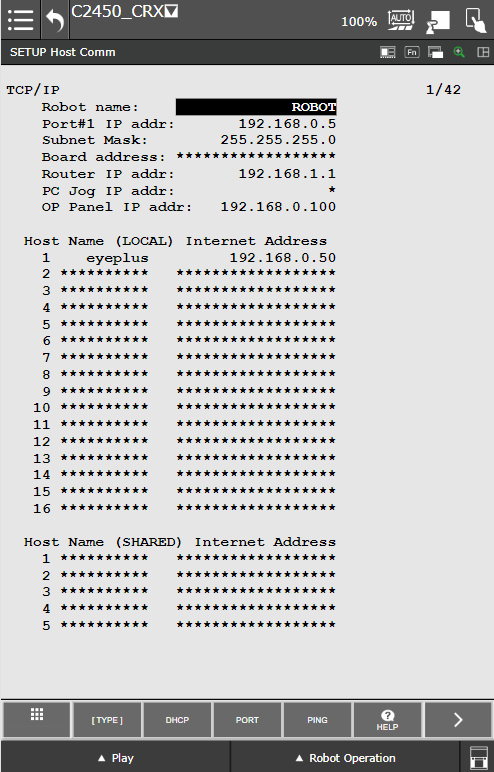
Fig. 2 Configure the EYE+ host
Note
To check the robot port settings, under in EYE+ Studio, go to
Communication > TCP/IP Communication > TCP/IP Communication.
To get more information about network configuration, please refer to communication_network.
3. Network configuration
Configure the client services
Open the network configuration page from MENU > PLUGINS > EYE+ Network Config.
Network settings of your EYE+: Input the network information of your EYE+. You can test the settings using the button .
Communication settings: Chose the clients to be reserved for your EYE+. Client 1 must be different than client 2. Validate the settings with the button . If everything goes well, the following message must appear:
Status: Succeeded.Important
Once the clients are chosen, consider them both reserved by Asyril.

Fig. 3 Configure the clients services
Note
The last section Communication status provides information about the running sockets of the plugin. You
can manually stop the sockets using the button if necessary (not recommended).
Restart the robot controller.
Note
This is only required if the clients you have chosen have never been configured before.
Registers reservation
Three registers will be used by the plugin to save some information. You can chose those registers from the Register
reservation section of the network configuration page.
Important
Once the registers are chosen, consider them reserved by Asyril.
4. Check the end of line character
Your robot can communicate with the EYE+ Controller via TCP/IP protocols. To be able to communicate, you must select the
correct end of line character: LF in EYE+ Studio under , in the section
Communication > TCP/IP Communication > TCP/IP Configuration (Fig. 4).
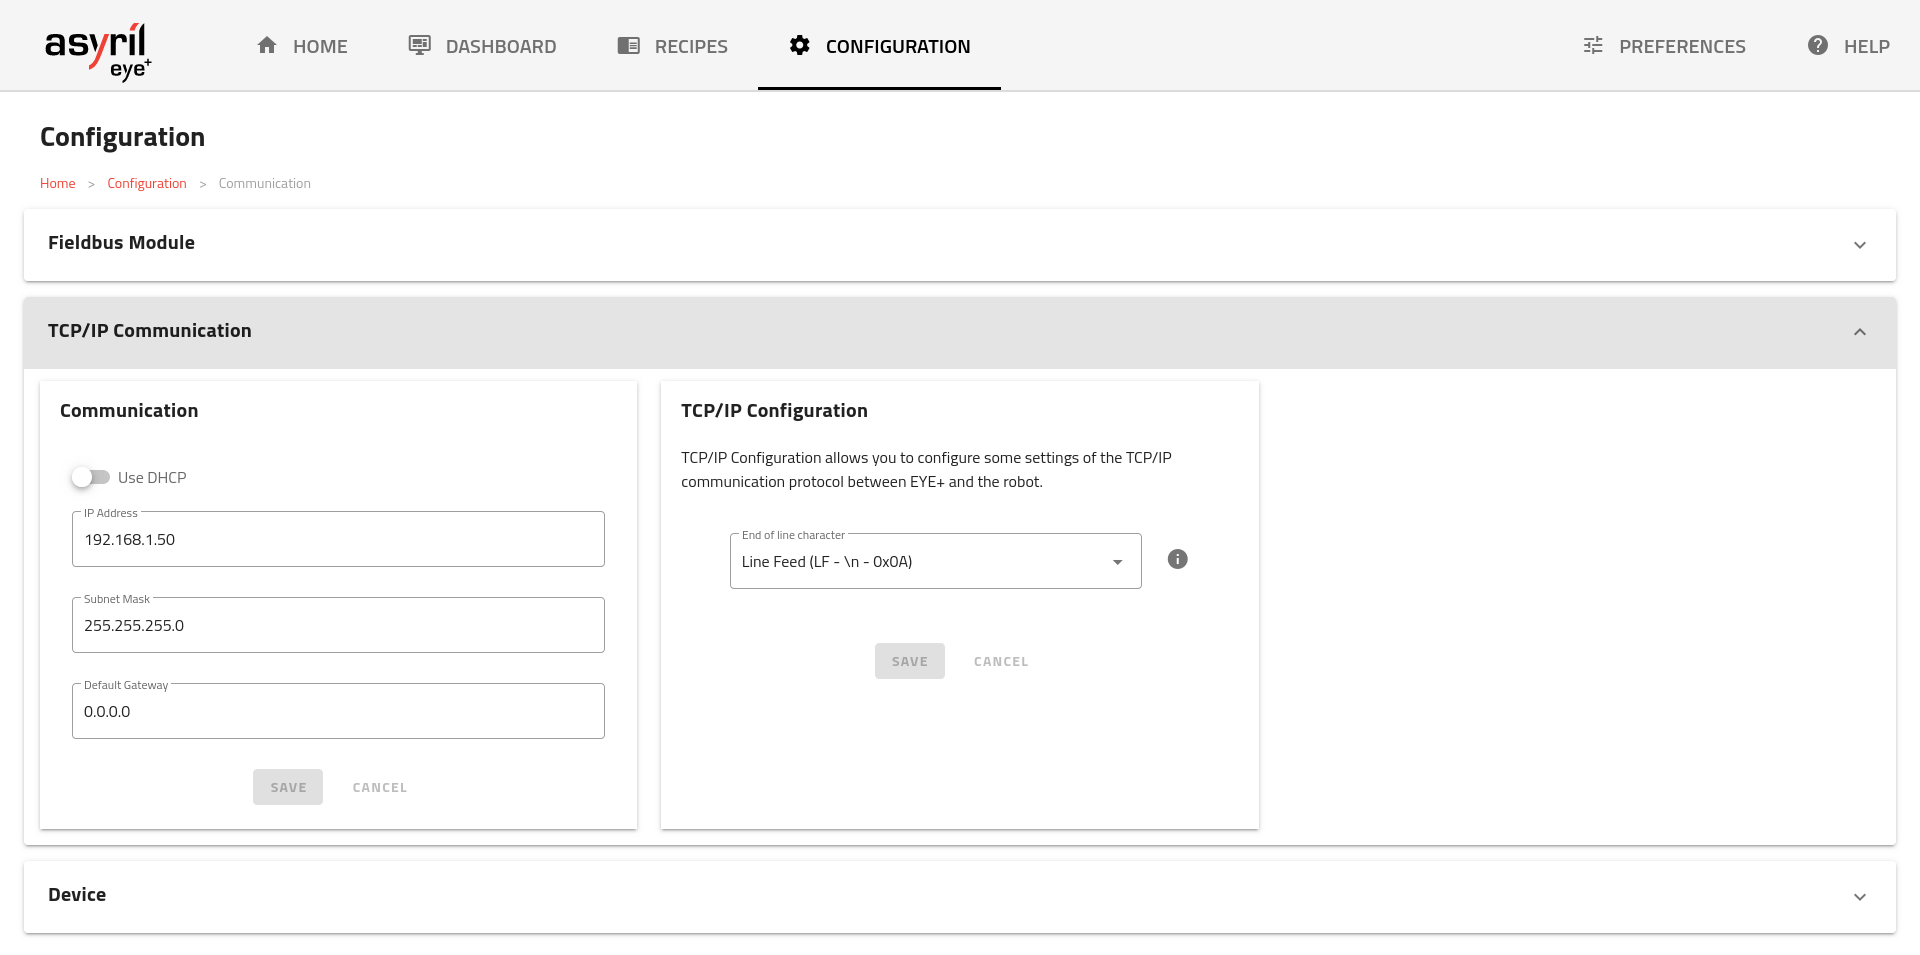
Fig. 4 TCP/IP Configuration - end of line character