Warning
You are reading an old version of this documentation. If you want up-to-date information, please have a look at 1.1 .Plugin hand-eye calibration
You can perform hand-eye calibration via EYE+ Studio or directly using the plugin through the hand-eye calibration page.
To open the page, go to MENU > PLUGINS > EYE+ Hand-Eye Config.
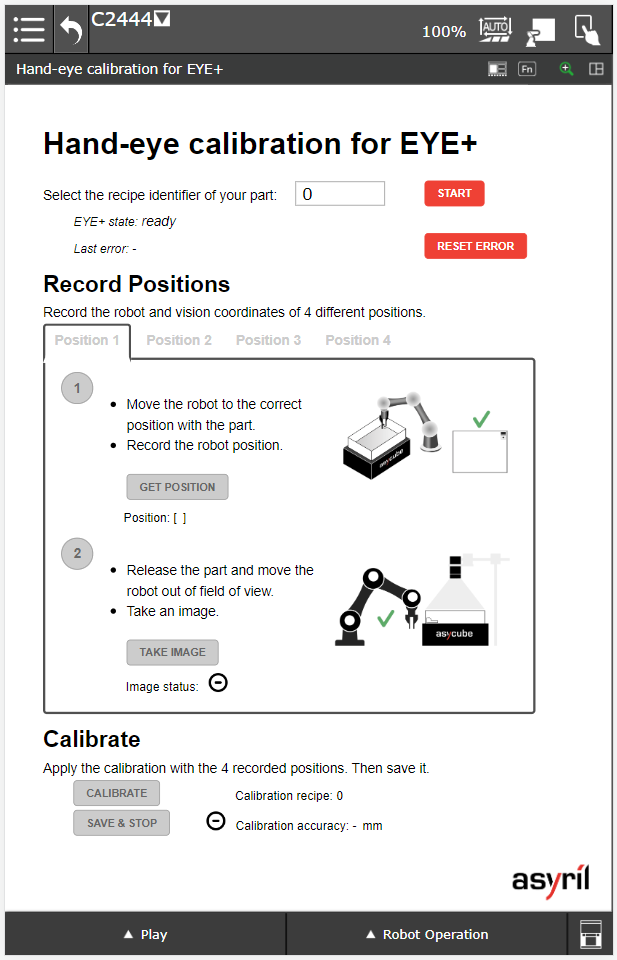
Fig. 5 Hand-eye calibration for EYE+
Requirements before starting
You must be connected to your EYE+ to use this configuration page. If your EYE+ is connected, you should be able to see its current state on the screen next to
EYE+ state: {current state}.Note
If you are not connected, the following error message is displayed:
Last error: 698 Not connectedMake sure to have correctly performed the Plugin configuration steps.You must have prepared a recipe with your calibration part in EYE+ Studio.
Your robot must be configured with the correct tool and frame.
1. Start hand-eye calibration
To start EYE+ in hand-eye calibration, you must enter the recipe identifier of your calibration part in the dedicated field and then click on the button.
Once the calibration is started, the Record Positions section will be available for the next steps.

Fig. 6 Hand-eye calibration correctly started
2. Record Positions
This step is used to record robot and vision coordinates of 4 different positions.
Record position 1
Go to the Position 1 tab and follow the steps below.
1 - Move the robot
Move the robot to one corner of the Asycube with your calibration part already placed in the gripper.
Once the robot is correctly positioned, save the current position by clicking on . The position in
xandyshould be displayed on the screen.For example:
Position: [x=123.45678 y=-128.45789]
2 - Take an image
Release the part on the Asycube without moving it and move the robot out of the field of view.
Once the robot is out of the field of view, take an image by clicking on the button . If the part is properly detected on the plate, the following icon must appear:
 .
.Note
If the image status is
 , it means that your part has not been detected by EYE+. Make sure
you have placed the part in the camera’s field of view and that the recipe you selected is valid.
, it means that your part has not been detected by EYE+. Make sure
you have placed the part in the camera’s field of view and that the recipe you selected is valid.

Fig. 7 Hand-eye calibration - Record position 1
Record position 2
Go to the Position 2 tab and follow the same procedure as presented for position 1. The part must be placed in a
different corner than for position 1.
Record position 3
Go to the Position 3 tab and follow the same procedure as presented for position 1. The part must be placed in a
different corner than for position 1 and 2.
Record position 4
Go to the Position 4 tab and follow the same procedure as presented for position 1. The part must be placed in a
different corner than for position 1, 2 and 3.
3. Calibrate
Once all the positions are recorded, the section Calibrate will be available.
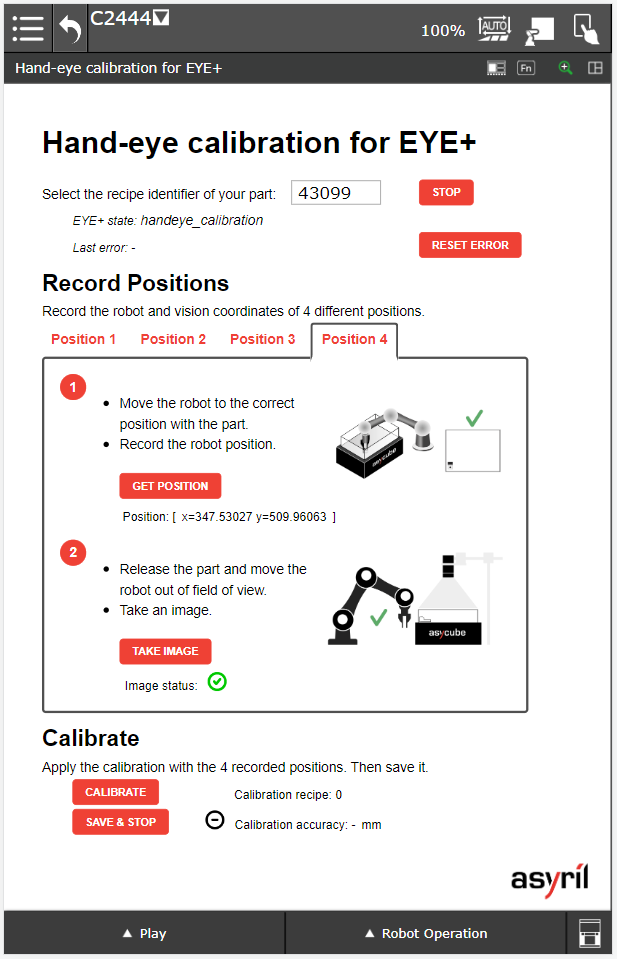
Fig. 8 Hand-eye calibration - All positions recorded
Calibrate
Apply the calibration by clicking on .
If the calibration is a success, ![]() will appear next to the
will appear next to the Calibration accuracy.
The calibration accuracy will inform you about the quality of the hand-eye calibration.
Note
If the calibration failed, ![]() will appear. This means that it is not possible to obtain a
transformation matrix between the recorded positions and the vision coordinates. This can happen in the following
cases:
will appear. This means that it is not possible to obtain a
transformation matrix between the recorded positions and the vision coordinates. This can happen in the following
cases:
You have placed the part in the same corner more than once.
You have matched a robot coordinates with the wrong image acquisition.
The part has moved between the position registration and the image acquisition.
Your recipe does not detect the part correctly.
If you made a mistake, try repeating the 4 steps again.
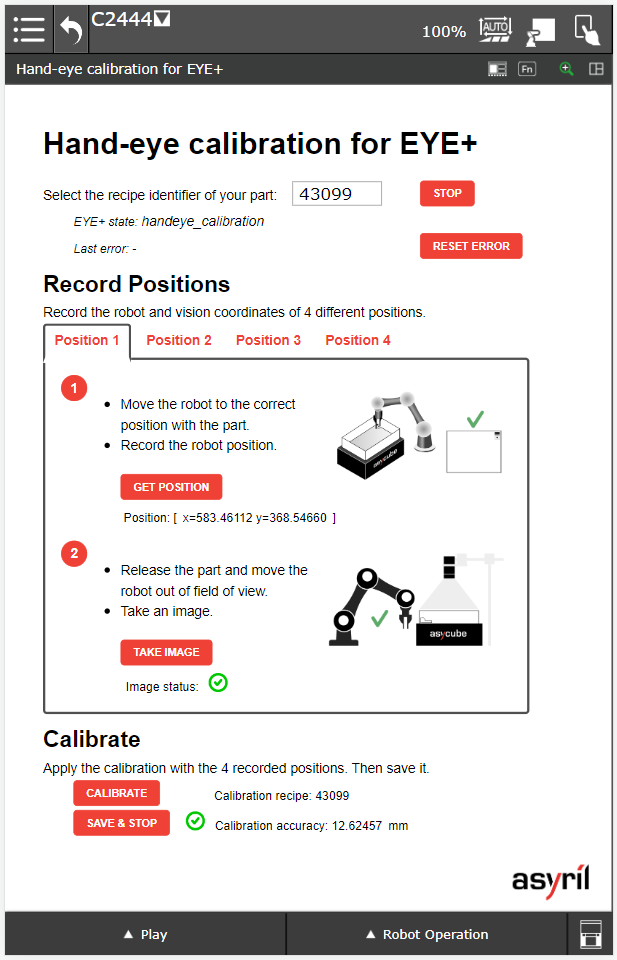
Fig. 9 Hand-eye calibration - Calibration succeeded
Save
If you are satisfied with this accuracy, you can save the calibration by clicking on .
Once the calibration is saved, it will automatically be used in production. If another calibration has been saved before, it will be overwritten by the new calibration.
After saving, your EYE+ will return to the ready state.