Plugin configuration
Step 1: Connect the robot to your EYE+
Connect an Ethernet cable between the Kuka controller port XF5 and the EYE+ robot port.
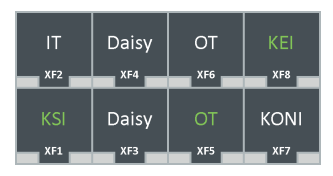
Fig. 5 Kuka Ethernet ports
Step 2: Configure robot network settings
You must set the robot’s IP address to the same subnet as the robot’s port on your EYE+.
On your teach pendant, go to
Start-up > Network configuration.Select the option Fixed IP address and fill the section “IP address” and “Subnet mask” to be on the same subnet as your EYE+ controller.
Save the new settings.
Reboot your robot controller.
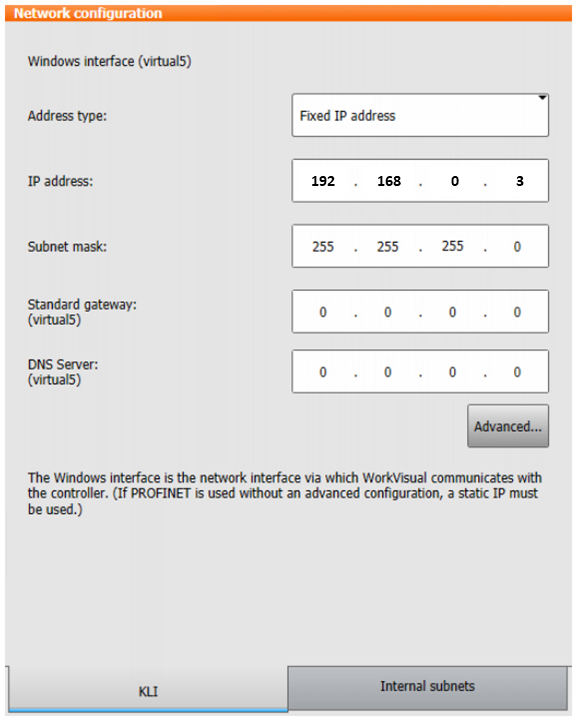
Fig. 6 Kuka KLI configuration
Note
To check the robot port settings, in EYE+ Studio under go to the
Communication > Robot TCP/IP > TCP/IP. To get more information about network configuration, please refer to
Communication.
Step 3: Configure configuration files
You must set the correct configuration settings in the *.xml files you have imported.
Note
Most of the time, the configuration file is already correctly filled. This is true if:
The robot port of your EYE+ controller settings is configured as follow:
IP address/Subnet mask:
192.168.0.50/255.255.255.0Port number:
7171
The following robot flags are free:
$FLAG[21]$FLAG[22]
If you need to modify the communication settings, you must modify the settings as shown bellow:
IP address
Port number
Flag

Fig. 7 Configuration of socket 1
Important
Apply exactly the same changes for socket 2 expect for the flag number. Make sure to have a distinct flag number for each socket.
Important
Do not modify the other configurations.
Step 4: Configure your EYE+ controller
Your Kuka robot can communicate with the EYE+ controller via TCP/IP protocols. To be able to communicate, you must
select the correct end of line character: LF in EYE+ Studio under , in
Communication > Robot TCP/IP > TCP/IP Configuration (Fig. 8).

Fig. 8 TCP/IP Configuration - end of line character