Plugin installation
Step 1: Check your robot options
The plugin uses socket messaging over TCP/IP protocol. You must have the option EthernetKRL installed on your robot to enable socket communication.
If it is correctly installed, the following information should be displayed on the teach pendant under the path
HOME > Start-up > Additional software.
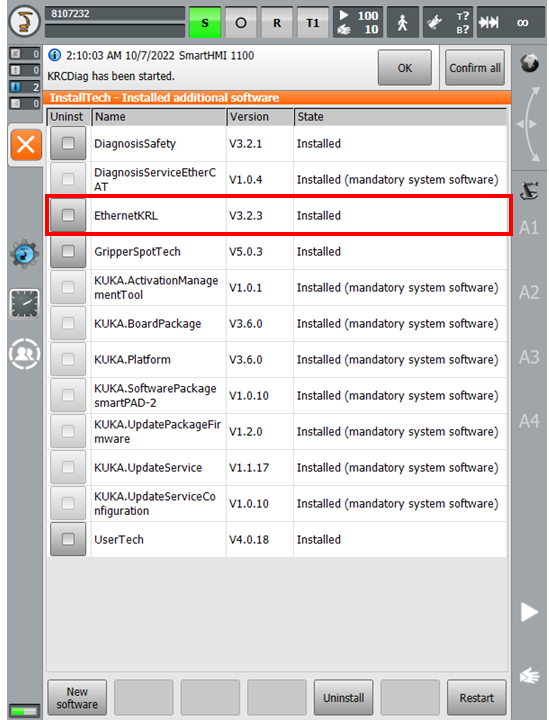
Fig. 1 Additional software
Step 2: Download the plugin
Download the plugin zip file kuka-eyeplusPlugin-version.zip here. It must contain 5 files:
eyeplusPlugin.src
eyeplusPlugin.dat
EYESocket1.xml
EYESocket2.xml
LICENSE_1_0.txt
Step 3: Install the files
Install configuration files
Install the configuration files (EYESocket1.xml, EYESocket2.xml) into your active robot project.
Select the mode
Configuration and commissionningfrom WorkVisual.In the project structure, go under
Filessection and extend the structure folderConfig/User/Common/EthernetKRL.Do a right click on folder
EthernetKRLand select the modeAdd external file. Then select the files EYESocket1.xml, EYESocket2.xml.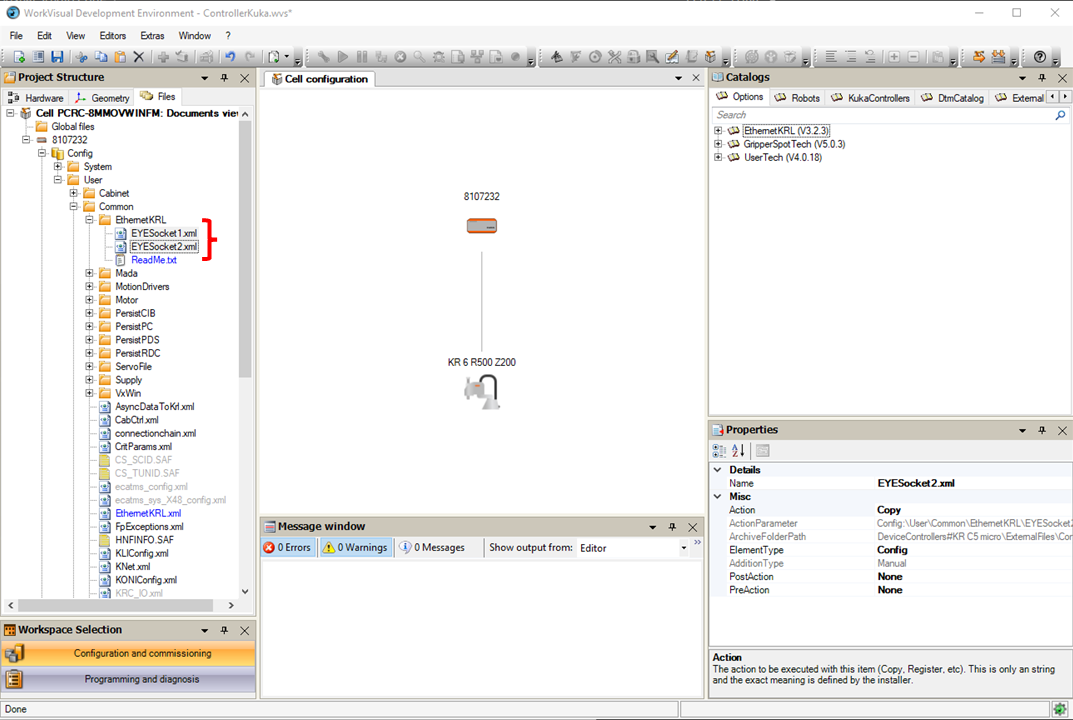
Fig. 2 Load the xml files
Deploy the files to your controller using the command
Deploy....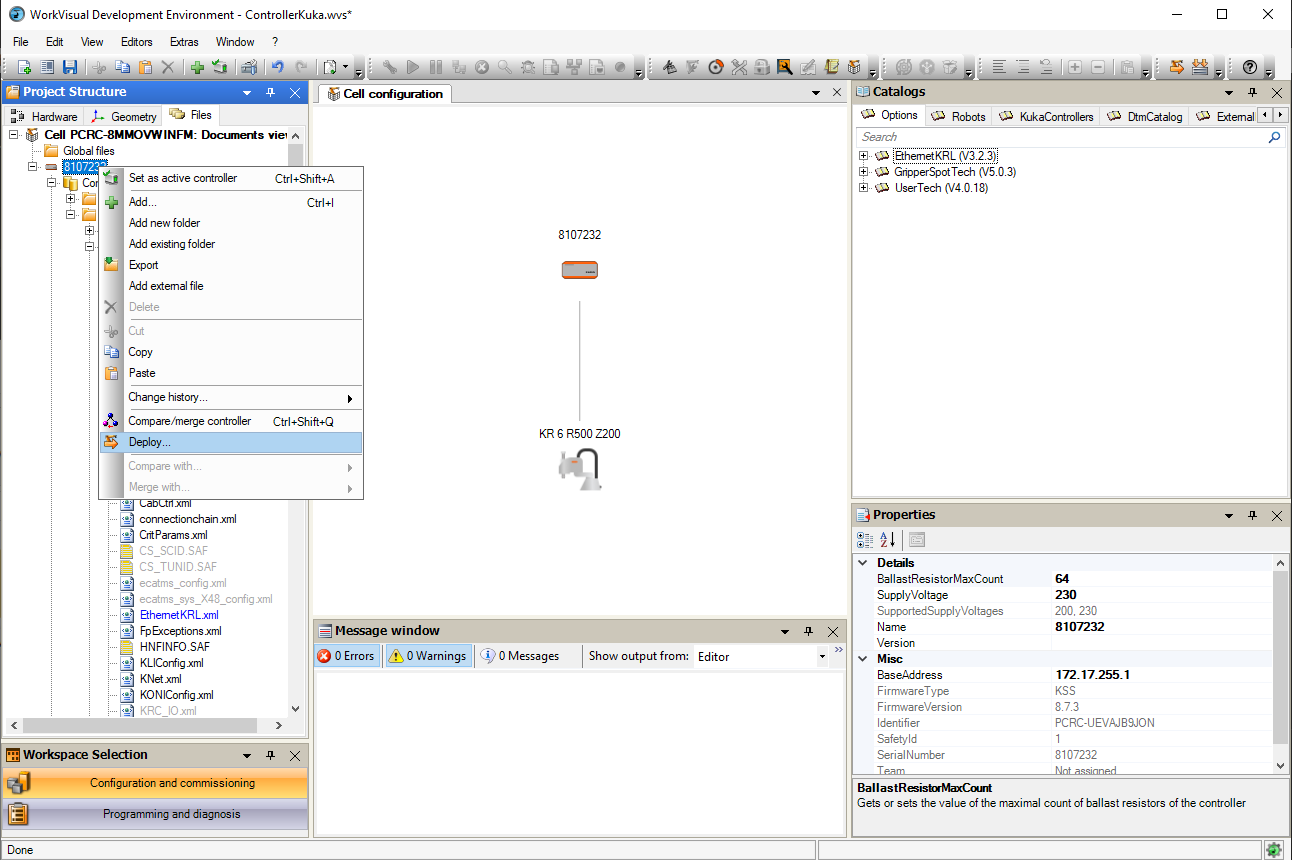
Fig. 3 Deploy the files
Note
You can check that the files are correctly installed on the teach pendant under
KUKA_DISK (C:\)\KRC\ROBOTER\Config\User\Common\EthernetKRL\*.
Install the plugin files
Install the plugin files (eyeplusPlugin.src, eyeplusPlugin.dat) into your active robot project.
Select the mode
Configuration and commissionningfrom WorkVisual.Extend the structure folder
KRC\R1\Program.Do a right click on folder
Programand select the modeAdd external file. Then select the files eyeplusPlugin.src, eyeplusPlugin.dat.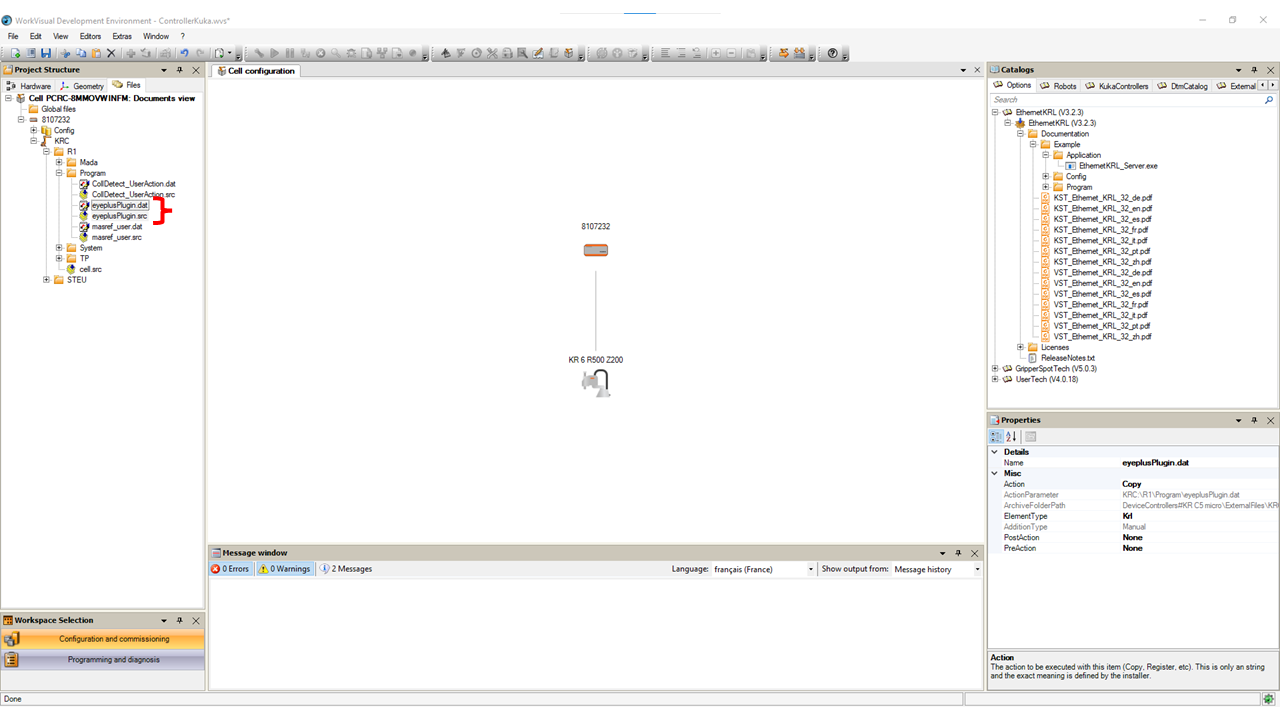
Fig. 4 Load the plugin files
Deploy the files to your controller using the command
Deploy....
Note
You can check that the files are correctly installed on the teach pendant under
KRC\R1\Program\*.