Plugin configuration
The EYE+ URCap is composed of one installation node. It is used to configure the EYE+ with the robot. To access it, go to the Installation tab of the TeachPendant and select the EYE+ Configuration URCap. The following screen should appear Fig. 4.
Before starting
Information
The first tab of the URCap installation gives information on how to enable the connection with your EYE+.
Once all the steps listed are valid, go to the next tab to configure your EYE+.
Choose the plugin mode
It is possible to choose the plugin mode to use.
Basic plugin: By default, the basic plugin is selected. The basic plugin provides only the 4 basic plugin commands in the URCap program: start_production, stop, get_part, prepare_part. It is also not possible to request more than one part with the get_part command.
Advanced plugin: The advanced plugin provides 5 additional plugin commands: force_take_image, can_take_image, get_parameter, set_parameter, feeder. It is possible to request more than one part with the get_part command (up to 5 parts).
Note
For further information on the behavior of the commands, please refer to the chapter Commands.
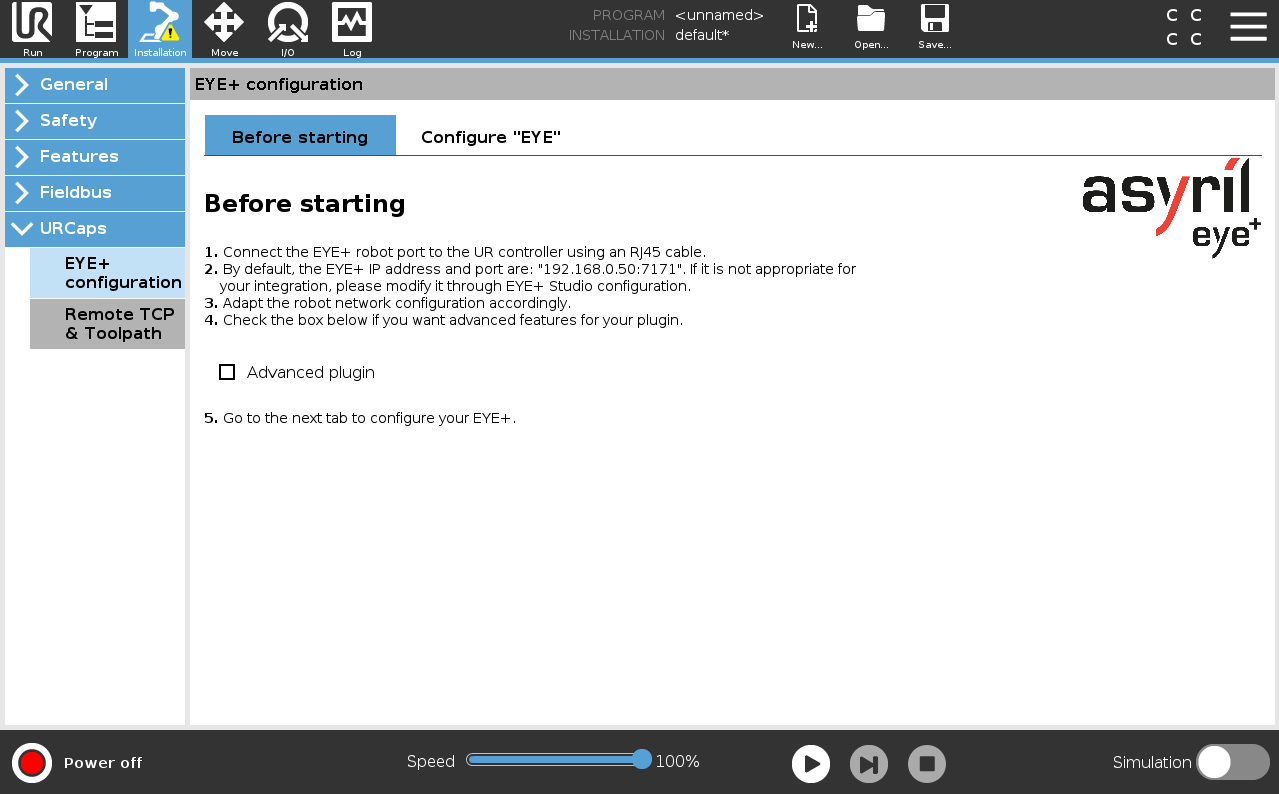
Fig. 4 Before starting
Step 1: Configuration on Universal Robot
Configure your EYE+ by entering the correct IP address and port number in the dedicated fields. These information will be used later in your program when the robot will try to connect to your EYE+.
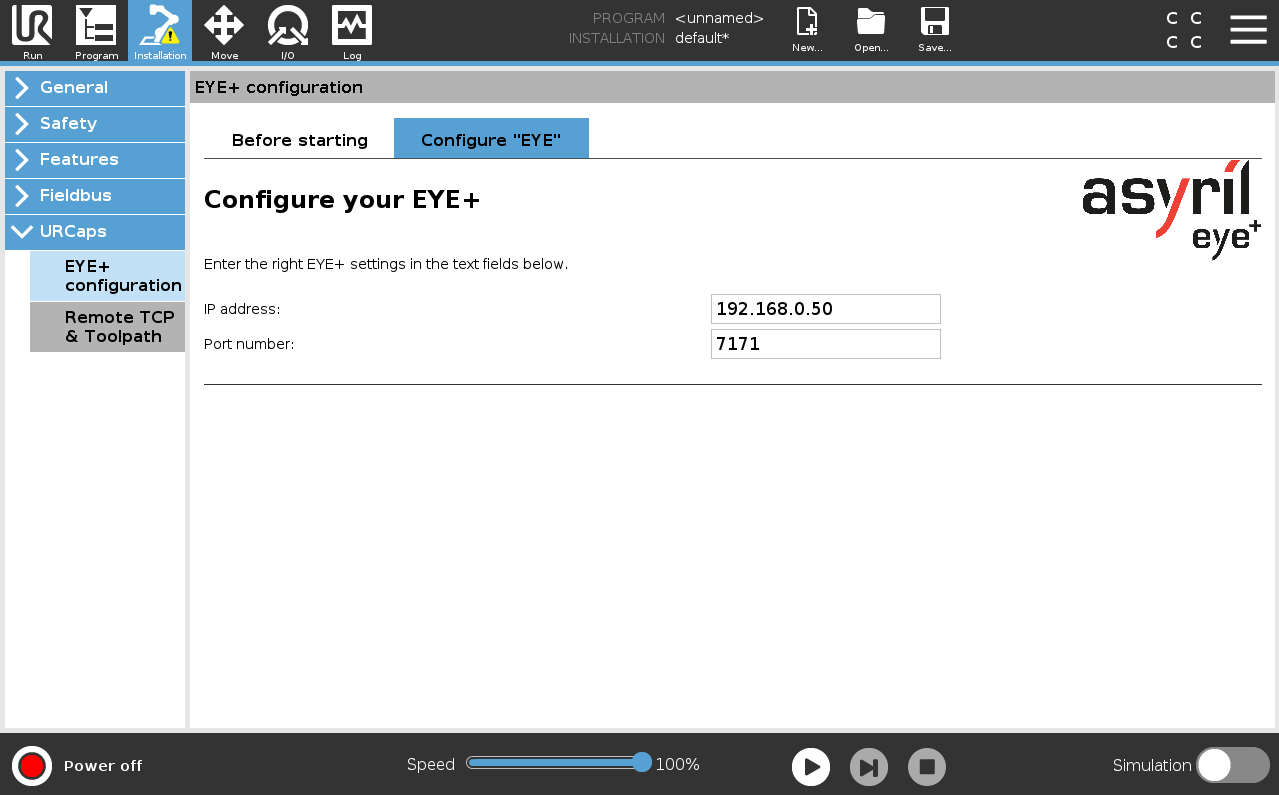
Fig. 5 Configure “EYE”
Step 2: Configuration on EYE+ Studio
Your Universal Robot can communicate with the EYE+ Controller via TCP/IP protocols. To be able to communicate, you must
select the correct end of line character: LF in EYE+ Studio under , in
Communication > Robot TCP/IP > TCP/IP Configuration (Fig. 6).
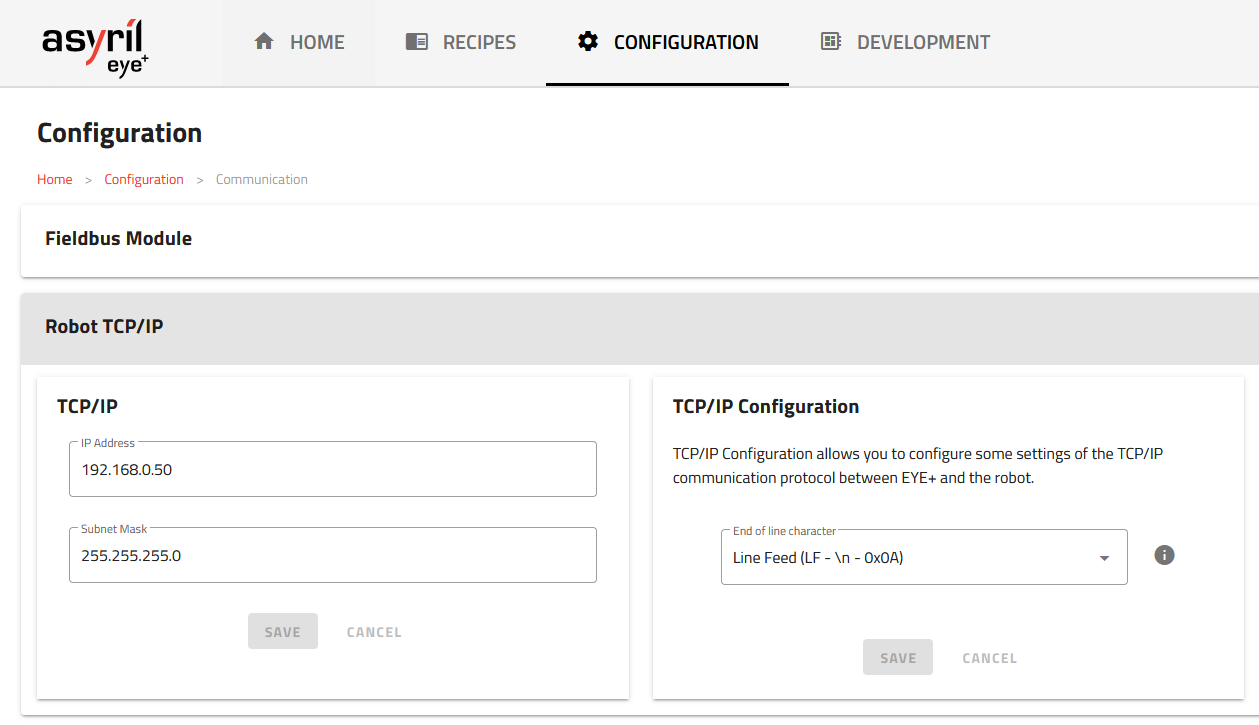
Fig. 6 TCP/IP Configuration - end of line character