Plugin installation
Step 1: Download the plugin
Download the URCap file compatible with your robot from here. The file looks like : eyeplusPlugin-version.urcap. Save this file on a USB key.
Step 2: Install the plugin on your robot
Connect the USB key to the TeachPendant of the robot. On the TeachPendant, go to the Settings/System URCaps tab and
add the plugin by clicking on the  button and then selecting the plugin stored in the key. The name of the
plugin file should look like : eyeplusPlugin-version.urcap. Then restart the robot.
button and then selecting the plugin stored in the key. The name of the
plugin file should look like : eyeplusPlugin-version.urcap. Then restart the robot.
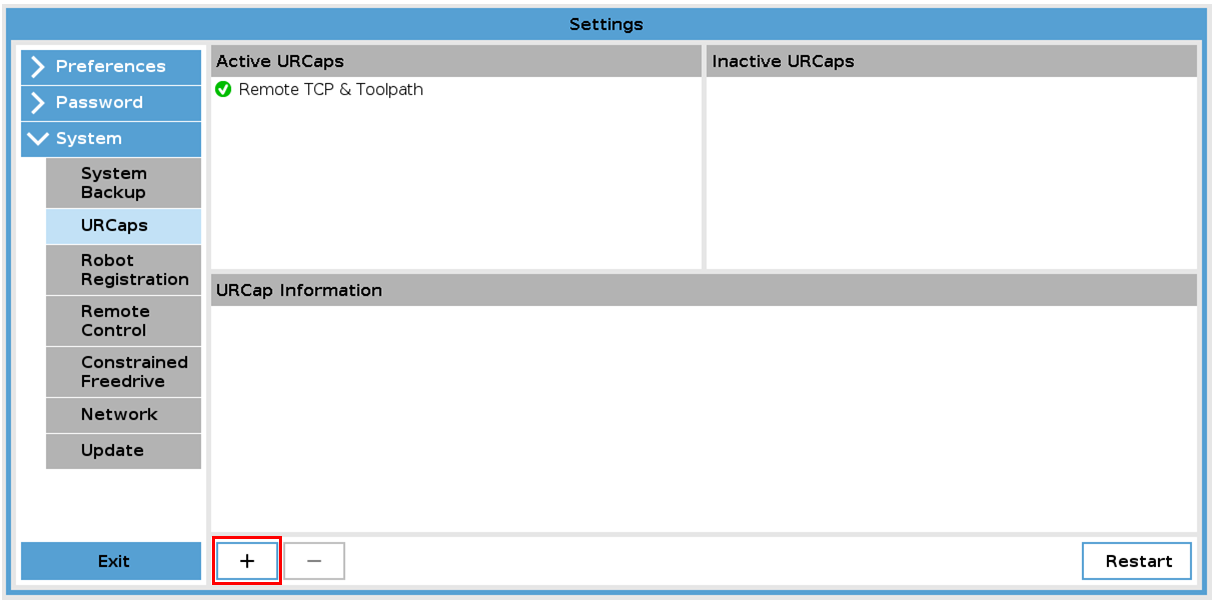
Fig. 1 Click on the “+” button to add the new plugin
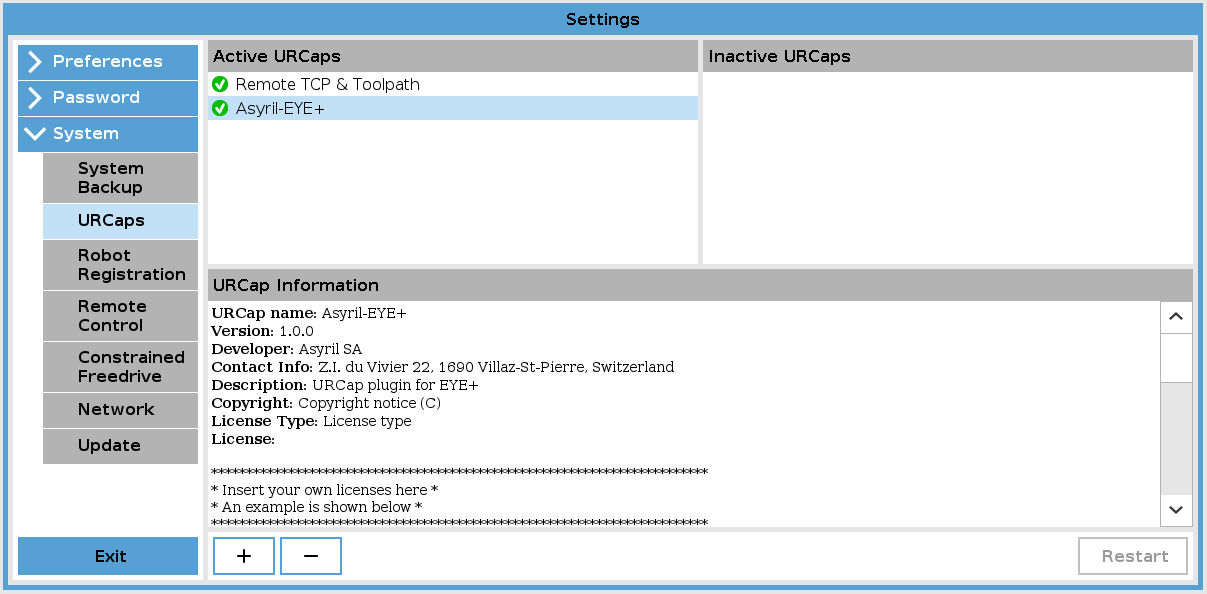
Fig. 2 Plugin correctly installed
Step 3: Connect the robot to your EYE+
Connect an Ethernet cable between the UR controller and the Robot or Comm port of the EYE+ Controller. On the TeachPendant, go to the Settings/Network tab and define a static address. You must choose a static address that is on the same subnet as the Ethernet port EYE+.
Note
To get more information about the right port to use on EYE+, refer to Electrical interfaces.
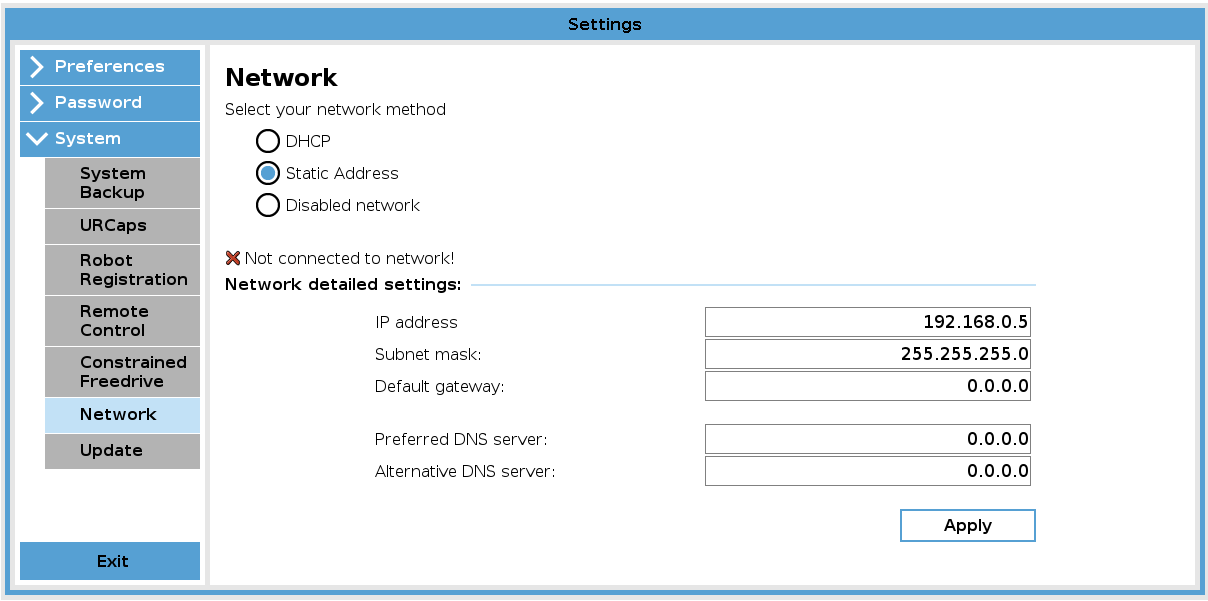
Fig. 3 Network configuration assuming a default Ethernet configuration of EYE+.
Note
To check the Ethernet port settings, under in EYE+ Studio, go to the
Communication > TCP/IP Communication > Communication.
To get more information about network configuration, please refer to TCP/IP communication.