Plugin configuration
1. Connect the robot to your EYE+
Connect an Ethernet cable between the Yaskawa controller port LAN and the EYE+ robot port.
2. Configure robot network settings
You must set the robot’s IP address to the same subnet as the robot’s port on your EYE+.
Restart your robot in
Maintenance Modeand switch toManagement ModeinSYSTEM / SECURITY.Then, go to
SYSTEM / SETUP / OPTION FUNCTION / LAN INTERFACE SETTING. Set the desired IP address.
Note
To check the robot port settings, in EYE+ Studio under , go to the
Communication > Robot TCP/IP > TCP/IP. To get more information about network configuration, please refer to
Communication.
3. Check the network configuration
Try to send a ping request to your EYE+ by clicking on SYSTEM INFO / NETWORK UTILITY and enter the IP address of
your EYE+. Click on EXECUTE to send the ping request.
4. Configure your EYE+ controller
Your robot can communicate with the EYE+ Controller via TCP/IP protocols. To be able to communicate, you must select
the correct end of line character: LF in EYE+ Studio under , in
Communication > Robot TCP/IP > TCP/IP Configuration section (Fig. 6).
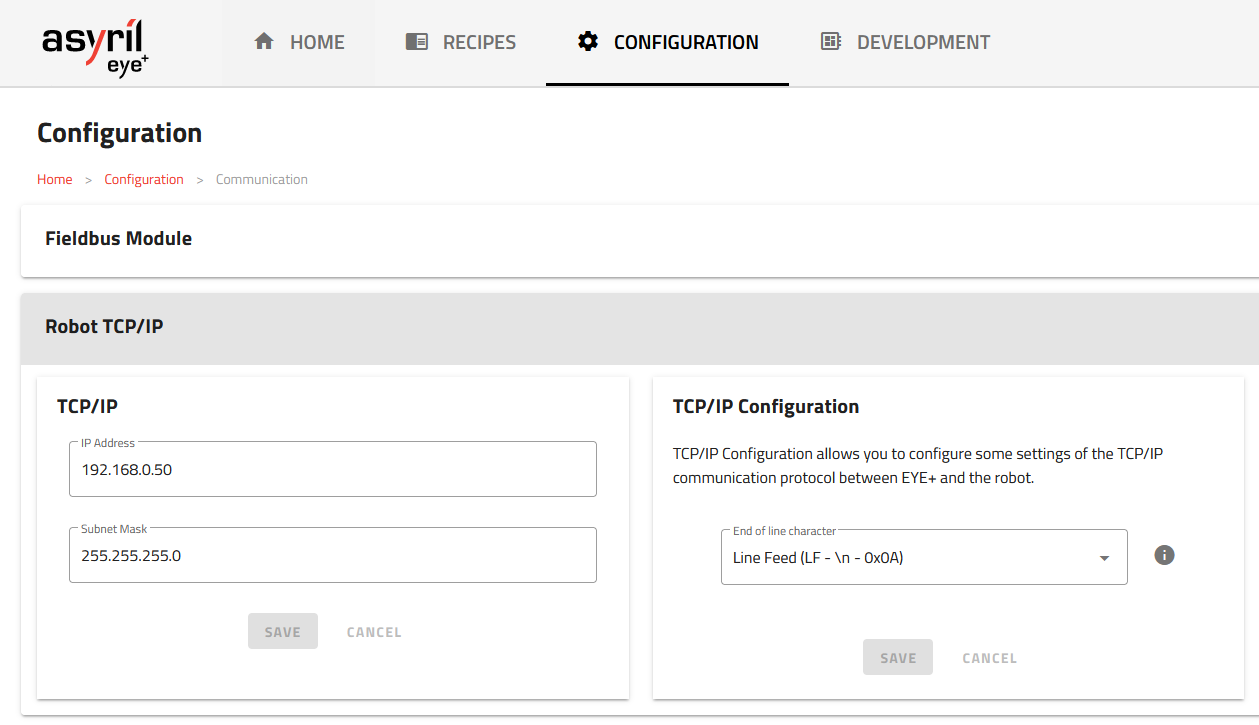
Fig. 6 TCP/IP Configuration - end of line character