Plugin installation
1. Edit variables range of your robot
Restart your robot in Maintenance mode and switch to Management mode in the System / Security menu. The
password is filling the field with 9: 9999999999999999.
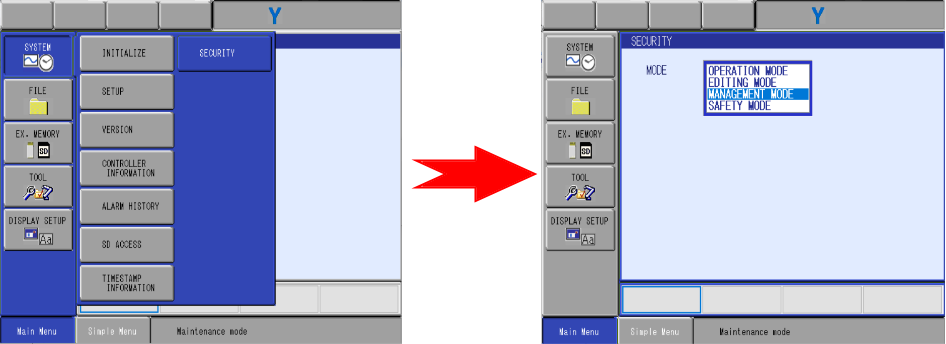
Fig. 1 Change mode to Management Mode
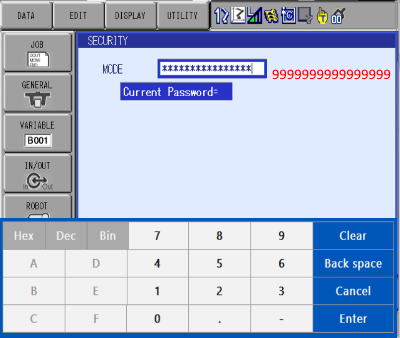
Fig. 2 Password Management mode
Then go to SYSTEM / SETUP / OPTION FUNCTION / VARIABLE ALLOCATION and increase the range of variables to cover all
plugin variables and press ENTER.
Note
Refer to section Reserved memory for more details on the range. The selected range must at least cover the range presented in Table 4.
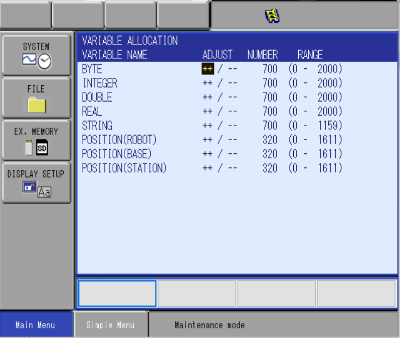
Fig. 3 Increase the range of variables if your starting point is 300
2. Download the plugin
Download the plugin zip file yaskawa-eyeplusplugin-version.zip here. It should contain 16
files with .JBI extension and 1 .txt file:
EYE_CHECK_LAST_ERROR.JBI
EYE_CONFIGURE.JBI
EYE_GET_PART.JBI
EYE_PREPARE_PART.JBI
EYE_RAW_COMMAND.JBI
EYE_START_PRODUCTION.JBI
EYE_STOP.JBI
EYE_INTERNAL_CHECK_CONFIG.JBI
EYE_INTERNAL_CHECK_FLAG.JBI
EYE_INTERNAL_CMD_1.JBI
EYE_INTERNAL_CMD_2.JBI
EYE_INTERNAL_COORDINATES.JBI
EYE_INTERNAL_EXTRACT_VALUE.JBI
EYE_INTERNAL_RAISE_ERROR.JBI
EYE_INTERNAL_START_COMMUNICATION.JBI
EYE_INTERNAL_STOP_COMMUNICATION.JBI
LICENSE_1_0.txt
Note
LICENSE_1_0.txt is the license file for this plugin.
3. Install JOB on your robot
Copy all JBI files on an USB key and insert key in the Teach Pendant. Go to EX. MEMORY / LOAD and choose JOB.
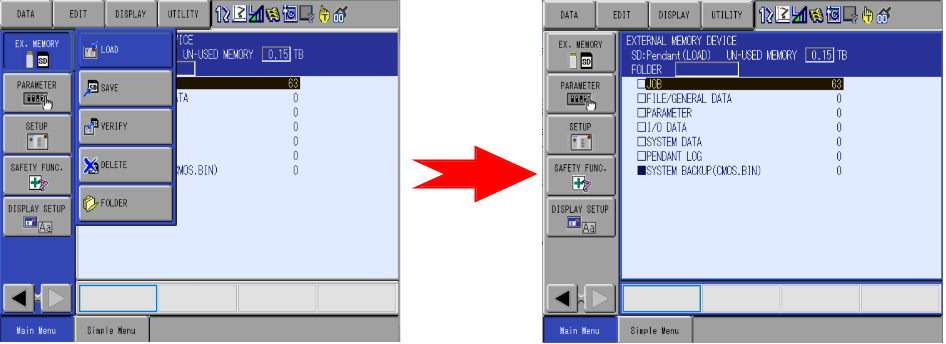
Fig. 4 Load jobs
Go to EDIT / SELECT ALL and press ENTER
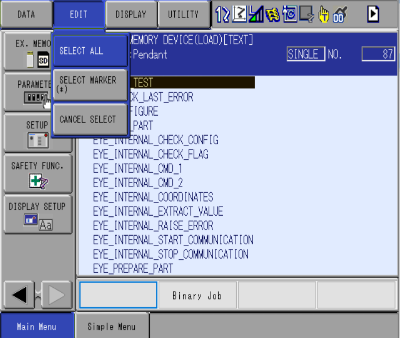
Fig. 5 Select JOBs
Important
If you have not increased the memory range enough, you will get an error when importing the JOBs.
4. Download and install MotoGSI
Download and unzip the SDK of MotoGSI. Install Moto.GSI.LIB and Moto.GSI.JobAPI as explained in the documentation (MotoGSI manual).
Only the following JOB APIs are required:
GSI_MAKEBARRAY.JBI
GSI_CLEARDATA.JBI
GSI_SENDDATA.JBI
GSI_READDATA.JBI
GSI_TCPCONNECT.JBI
GSI_CLOSEHANDLE.JBI