Avertissement
Vous lisez une ancienne version de cette documentation. Si vous souhaitez obtenir des informations actualisées, veuillez consulter 5.4 .Plugin configuration
1. Connect the robot to your EYE+
Connect an Ethernet cable between the FANUC controller port 1 and the EYE+ robot port.
1. Setup TCP/IP protocol
You have to specify the TCP/IP configuration of your EYE+ to the robot. From the IPendant touch, go to MENU/SETUP/
Host Comm. Select the TCP/IP protocol.
Set the static IP address of the robot on the same subnet as the robot port of your EYE+.
Create a local host name called « eyeplus » with the IP address of the robot port of the EYE+.
Try to ping the EYE+ by clicking on
PING. The following message should appearPing ... succeed.
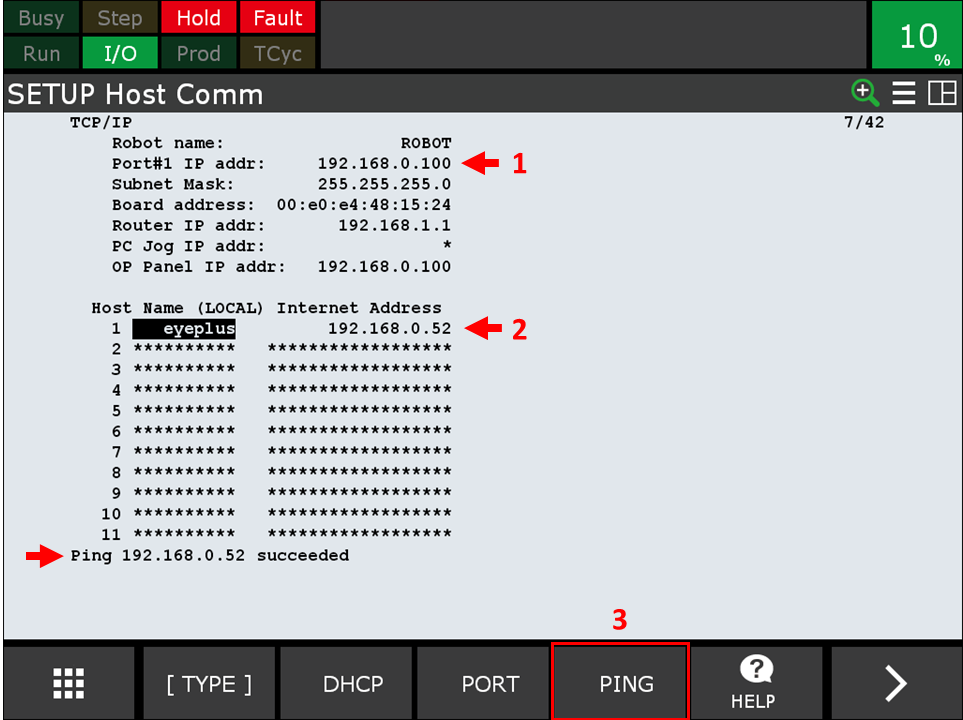
Fig. 207 Configure the EYE+ host
Remarque
To check the robot port settings, go to the Configuration/Network tab in EYE+ Studio. To get more information about network configuration, please refer to Réseau.
3. Configure the client services
Two clients must be properly configured to communicate with the EYE+. From the IPendant touch, go to MENU/SETUP/Host
Comm/[SHOW]/Clients. Configure two clients with the following settings:
Server IP/Hostname = “eyeplus”
Remote Port = 7171
Current State = DEFINED
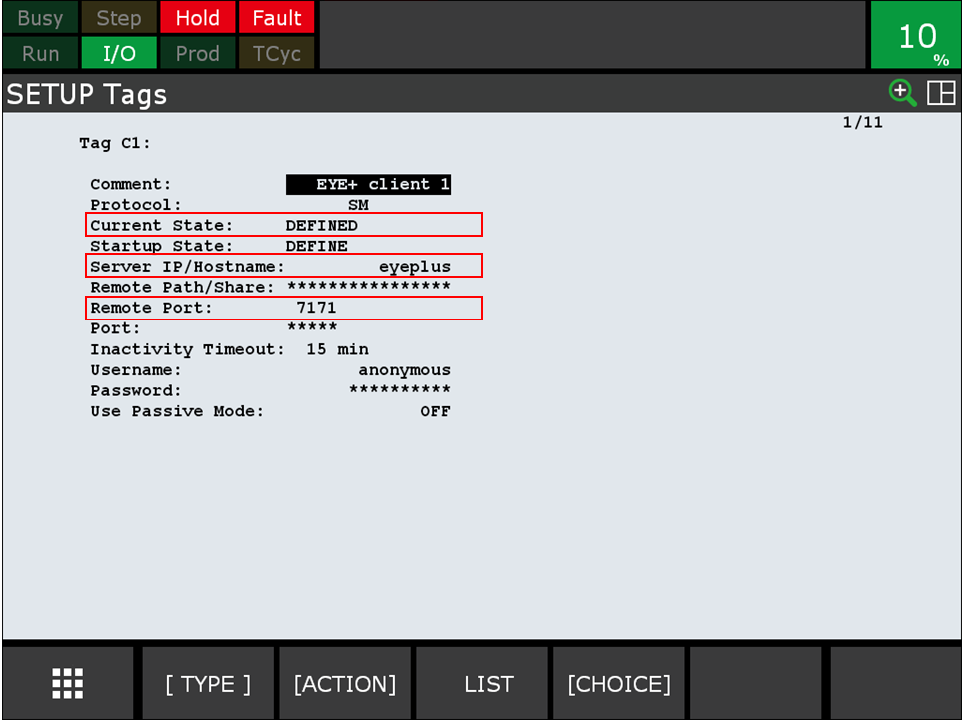
Fig. 208 Configuration of Client 1

Fig. 209 Configuration of Client 2
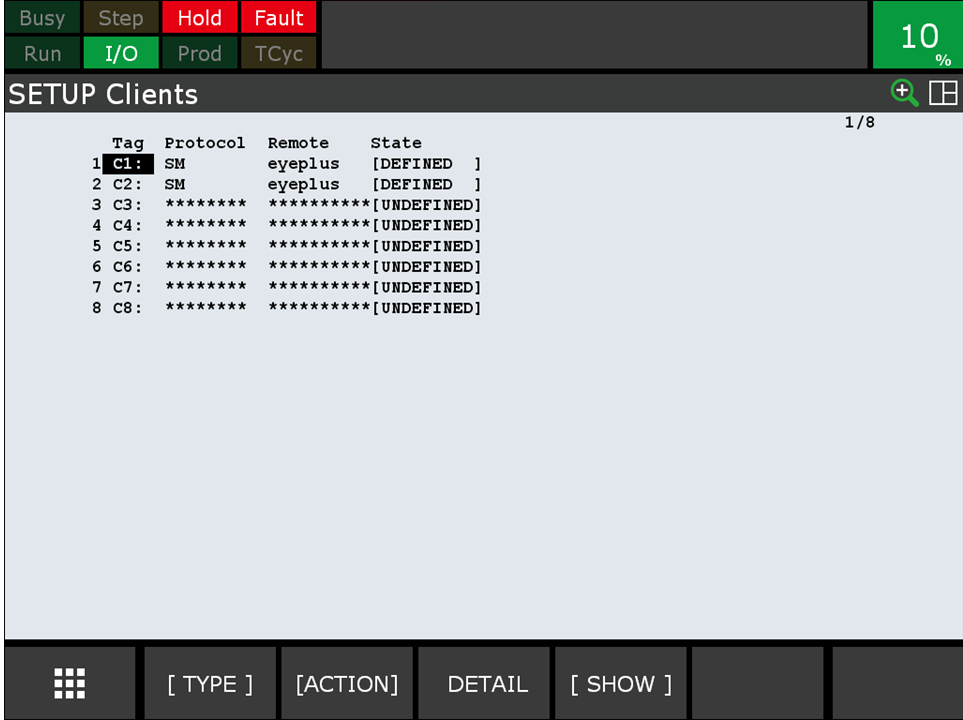
Fig. 210 List of clients in SETUP Clients