Warning
You are reading an old version of this documentation. If you want up-to-date information, please have a look at 5.4 .Lighting
Access the lighting configuration through and Lighting.
Acquisition lighting settings
This page gives you the possibility to configure backlight and frontlight acquisition settings:
by providing maximum and minimum exposure time in milliseconds
by providing exposure time increment (interval) in milliseconds
by indicating which lighting is installed on the system
This settings will define the available acquisition settings that you can choose when editing a recipe.
Note
Exposure time is the time during which the camera is exposed to light when acquiring images. The longer the exposure time, the brighter the image is. You must choose an exposure time range that ensures good part detection.
Tip
First, try using the default settings. If the images are too dark, return to this page and increase the minimum and maximum exposure times. If the images are too bright, decrease the minimum and maximum exposure times.
For example, configuration from Fig. 125 enables following image acquisition settings:
Backlight: 1, 2, 3, 4, …, 20ms
Frontlight: None because lighting is disabled
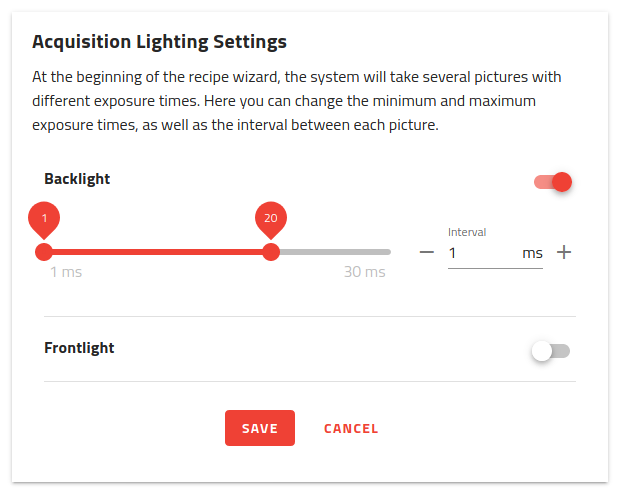
Fig. 125 Acquisition lighting settings configuration
Note
If your system does not have a backlight or a frontlight, disable it with the switch on top right.
Warning
Changing these settings will affect all your recipes when re-starting image acquisition. It will not modify the settings already saved if they are unchanged.