Warning
You are reading an old version of this documentation. If you want up-to-date information, please have a look at 5.4 .1. Starting Up
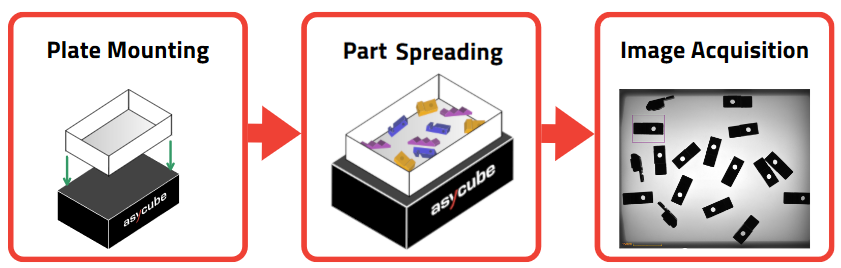
Fig. 243 Multi-model - Starting up overview
In this first step, you must place a reasonable quantity of parts so all models are visible and about equally represented (randomly distributed). If you know some orientations/parts are to be discarded (BAD model), make sure they’re also well represented on the plate. EYE+ will generate a database of images with different exposure times using the acquisition lighting settings.
Important
Make sure that one part is visible on this image for each model. This reference part is needed for each model to teach its pick point and pick angle. If that is not the case, you will be blocked later in the recipe and will have to come back and restart the image acquisition.
Note
If you have not calibrated your camera, a pop-up window will appear prompting you to do this before creating the recipe. We strongly recommend that you do so before starting your recipe creation. For more information on this wizard, please refer to the Camera configuration wizard section.
Note
Name your recipe with a distinctive name. If you do not specify a name, EYE+ will name the recipe My Recipe by default.
Model Recipe
To create a multi-model recipe, you have to create a vision recipe for each model. The candidate selection step is common for all models, but the rest of the vision-related steps must be performed once for each model. These are displayed in the side panel under a group which title is the current model name.
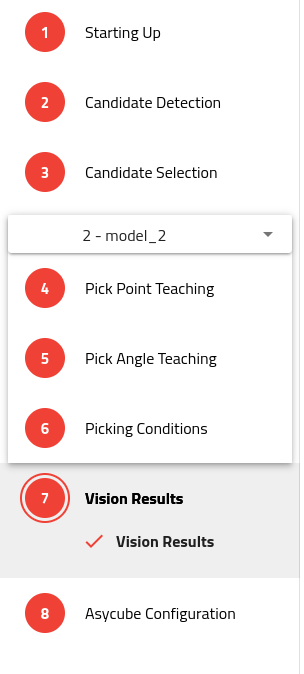
Fig. 244 Multi-model - Side Panel
Note
You must complete all steps for the current model before moving on to the next. Once a model is complete, you may go back to it at any time using the selector showing the model name.