Warning
You are reading an old version of this documentation. If you want up-to-date information, please have a look at 5.4 .5.2 Pick Angle Positioning
The angle is defined on the pick point defined in the previous step.
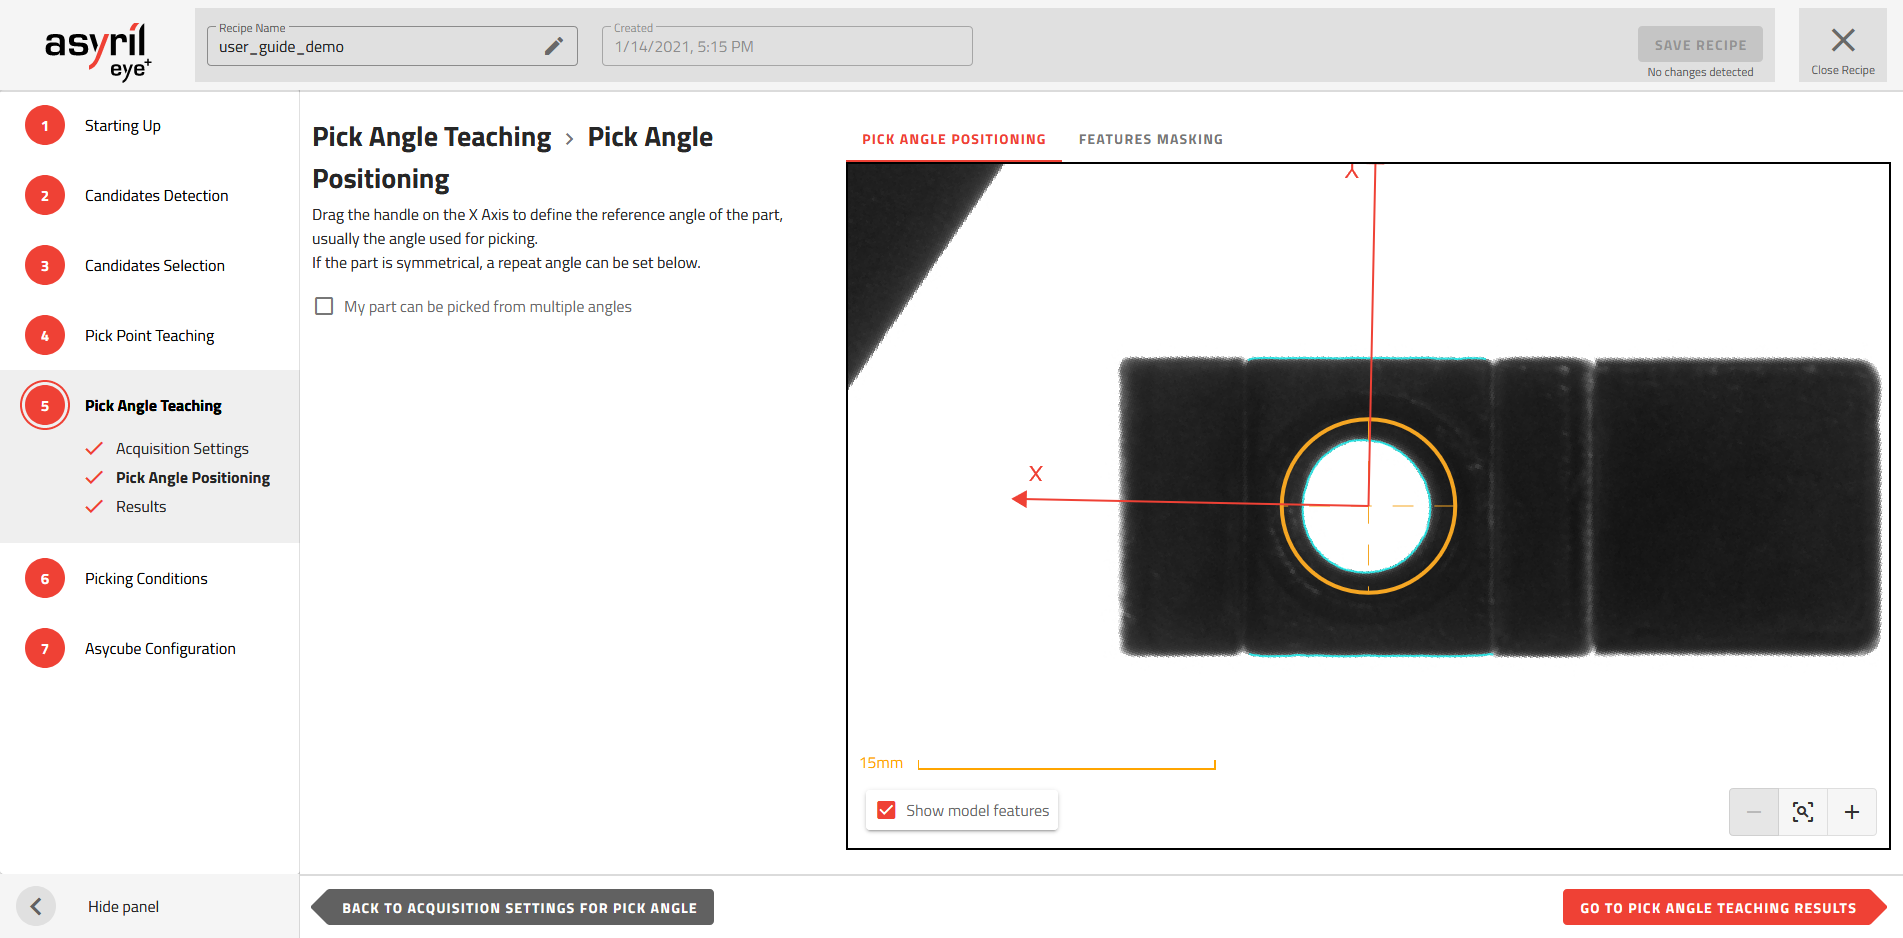
Fig. 104 Pick Angle Teaching - Pick Angle Positioning
Part with multiple pick angles
Some parts can have multiple pick angles due to symmetries, as illustrated in Fig. 105. By specifying the number of pick angles, the robot will be able to pick the part from any of these angles. This is useful when one of the pick angles is not possible in case of contact with another part or with the edges of the Asycube. If this happens, one of the other pick angles will be used.
To specify the number of pick angles, you must check the box “My part can be picked from multiple angles” and enter the correct number of angles. Each angle will be represented by an arrow on the image.
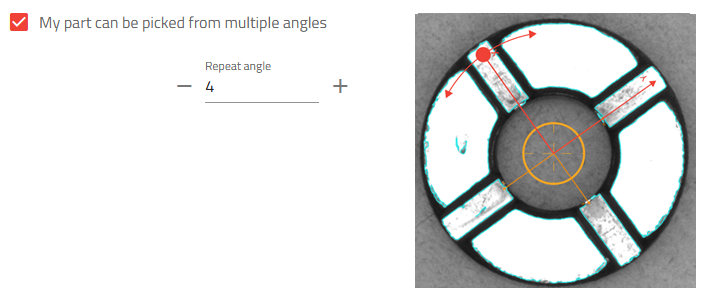
Fig. 105 Part with 4 pick angles
Pick angle positioning
Rotate the X/Y frame until it is aligned in the right direction for robot pickup.
Note
This operation must be done carefully because it determines the accuracy of the RZ angle that will be sent to the robot.
Feature masking
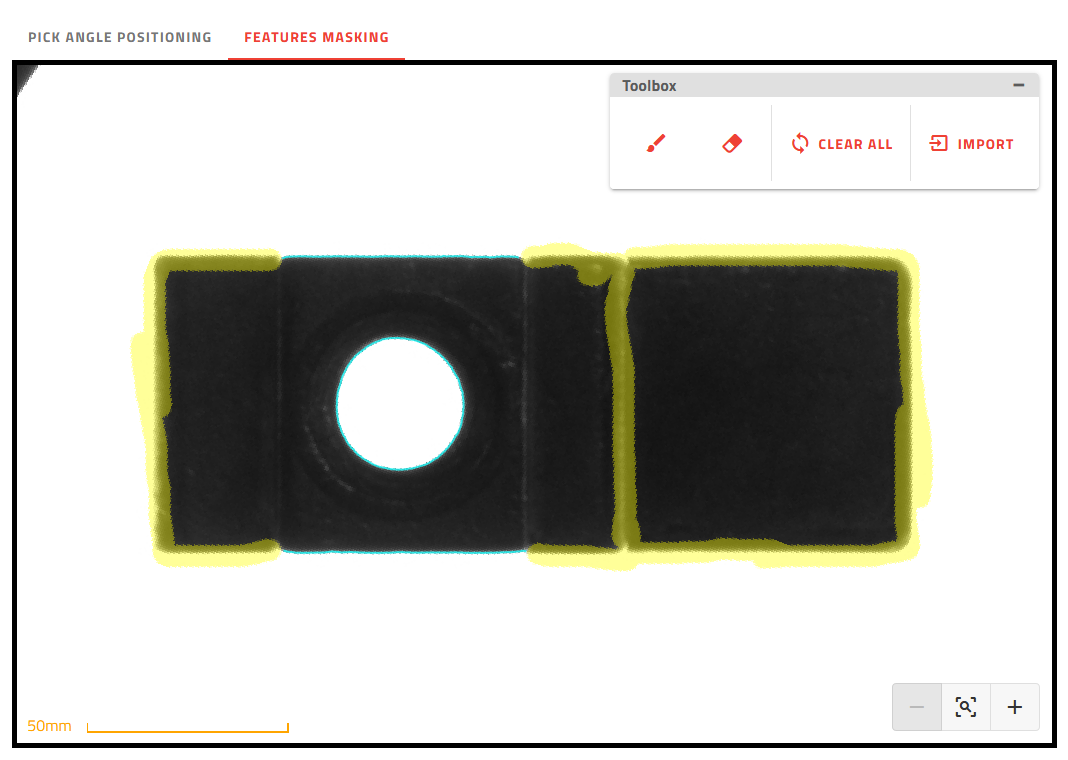
Fig. 106 Feature masking so that the orientation of the pick angle is aligned with the long side of the part
The objective of the feature masking step is to define the reference features (residual features after masking) that will be used as a model to orient the angle of the pick.
Not all features are relevant to define the reference model.
Features at the same height: Features that are not placed at the same level as the pick point must be masked out. Use only one height of features (e.g. the same height used for the pick point). Adding features that are not at the same level may alter the accuracy of the positioning of the pick angle due to parallax (these features on a different level will not always have the same relative position depending on the position of the part in the Asycube).
Reproducible features: It is essential that the reference model reflects a general description of the candidates. Any features that are not reproducible from one candidate to another must be masked.
Enough features: There must be enough features to ensure that there is only one possible pick angle identified by the algorithm.
Use the brush ![]() to mask undesired features.
to mask undesired features.
Tip
You can import the mask used to mask the features of the pick point by clicking on .
Advanced options
The advanced options provide additional settings that can be adjusted in case the default settings do not give good enough results, for example when some important features are not detected.
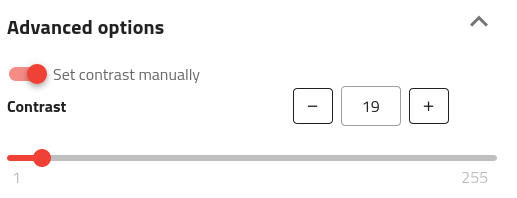
Contrast
By default, EYE+ automatically determines a contrast value that is used to extract features. The contrast value of a pixel is the gray value difference from its neighbors. If the pixel contrast exceeds the value specified, the pixel is selected to determine the model features.
Tweaking the contrast parameter allows creating a model that has more features than the automatically-computed one. For certain applications, it can help to precisely align the pick angle.
The contrast setting can be manually set by toggling “Set contrast manually” on, as shown below:
The effect of the contrast setting is shown below:
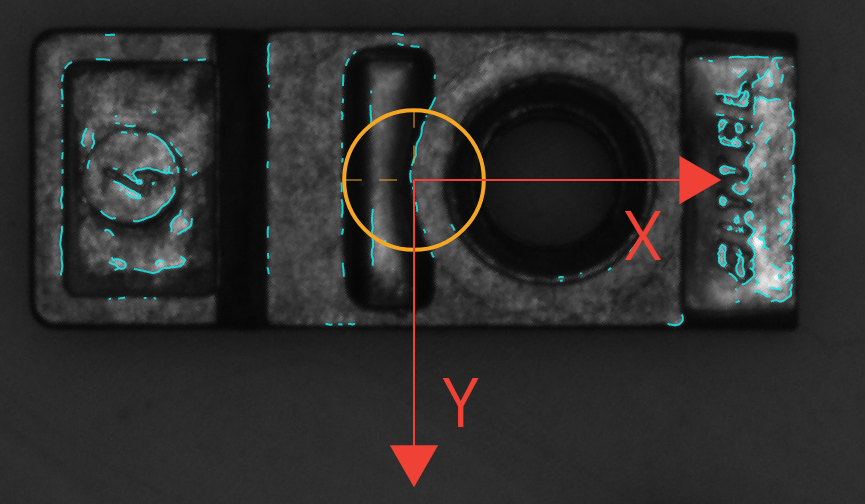
Fig. 107 Pick angle model where contrast is automatically computed by EYE+
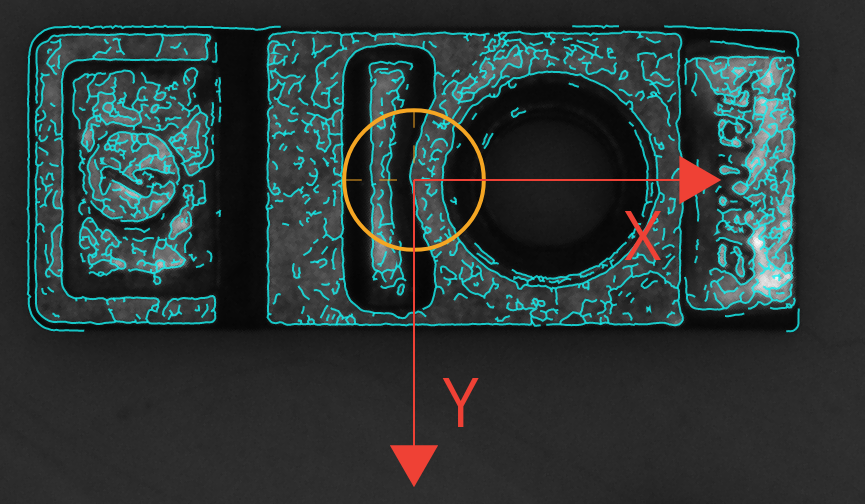
Fig. 108 Pick angle model where contrast is manually set to a lower value (e.g. 19)
Tip
The more features detected the more time it takes to run the pick angle step, remove as many features as possible using the mask functionality.