Avertissement
You are reading an old version of this documentation. If you want up-to-date information, please have a look at 5.3 .Configuration
Configuration connection
Access to EYE+ Studio is necessary to configure devices (camera, robot), create recipes or to visualize the dashboard. The dashboard of EYE+ Studio is also accessible during the production state (see the page Home).
The Configuration port can be connected either directly to your computer or through a company network. The Ethernet cable must be at least Cat5e SF/UTP.
Note
This Ethernet cable is not supplied by Asyril.
Direct connection
Direct connection is a direct Ethernet connection between your computer and EYE+. To do so, connect the RJ45 port of your computer to the Configuration port of the EYE+ Controller using an Ethernet cable. The Configuration port is set to a fixed IP address by default (Tableau 19).

Fig. 32 Direct connection through the port Configuration
Change the IPv4 configuration of your computer by choosing an IP address and subnet mask so that it is on the same network as the EYE+ Controller. For example, apply the configuration presented in Tableau 18.
Ethernet port |
IP address |
Subnet mask |
|---|---|---|
Computer RJ45 |
192.168.1.1 |
255.255.255.0 |
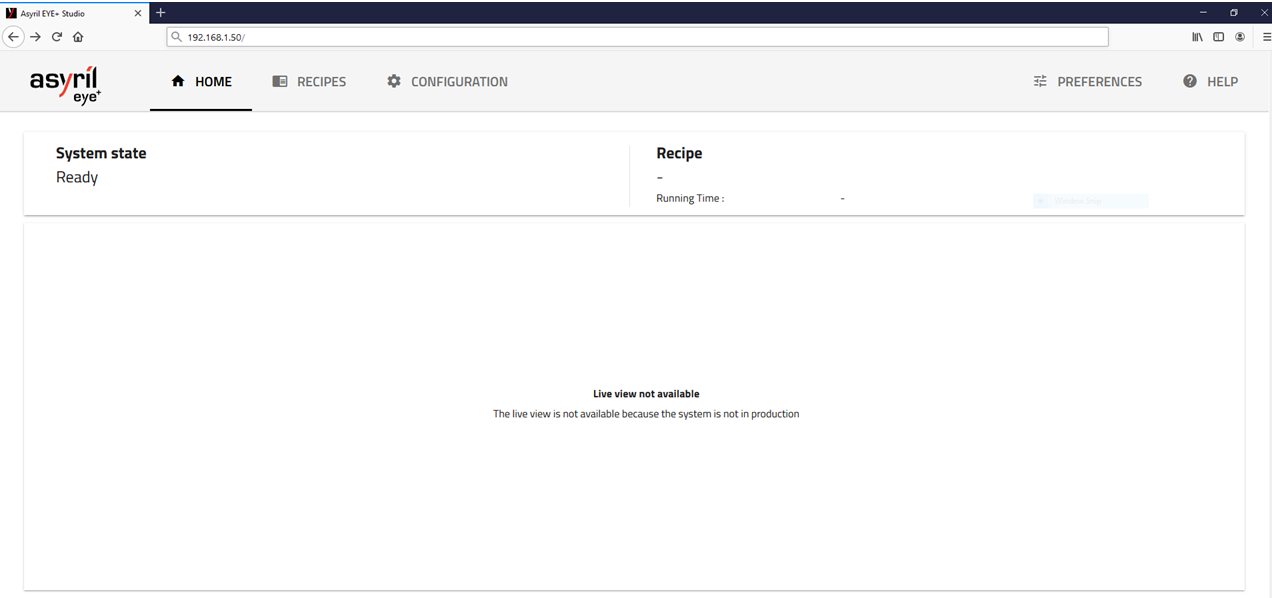
Once your computer is properly configured, open your web browser and enter the IP address of the Configuration port in the address bar (for example 192.168.1.50). The home page (Fig. 33) should appear.
Note
If the home page does not appear, please refer to Connection lost?.

Fig. 33 Dashboard with EYE+ in ready state
Note
If the home page does not have the same display as in Fig. 33, refer to the sections Recommended web browsers and Interface display.
Indirect connection
The indirect connection is an Ethernet connection where a network (a company network for example) is between your computer and the Configuration port of EYE+. To establish this kind of connection, you must either configure the EYE+ port with the correct IP address, subnet mask and gateway, or enable DHCP protocol for automatic configuration. In both cases, you must access EYE+ Studio to set the new port Configuration.
Note
Check with your company IT department to find out the correct settings for IP address, subnet mask and gateway.
Astuce
Use direct connection to access EYE+ Studio.

Fig. 34 Indirect connection via the Configuration port
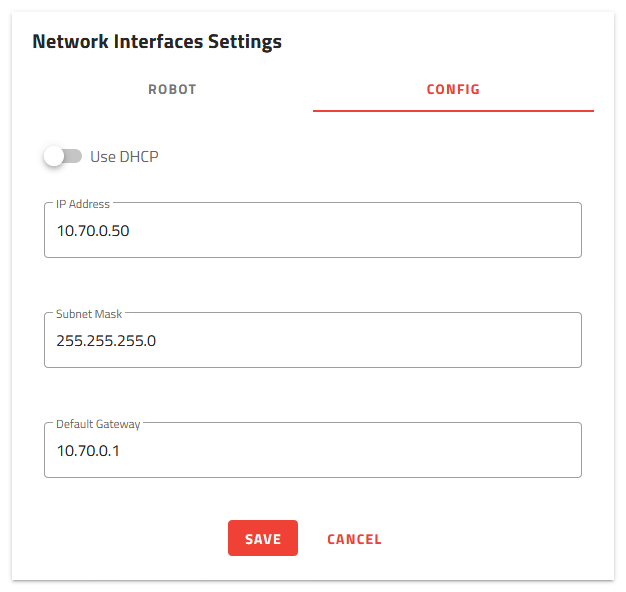
Once you have access to EYE+ Studio, go to , Network and click on CONFIG. You can now enter your company’s network configuration (e.g. Fig. 35).

Fig. 35 Enter your company’s network configuration
Avertissement
Once you have changed the Configuration port configuration and clicked , you will lose the connection to EYE+ Studio.
You can now reconnect to EYE+ Studio via your company network using the newly configured IP address. To do so, connect the Configuration port of EYE+ to your company network using an Ethernet cable and connect the RJ45 port of your computer to your company network with another cable. Change your computer’s IPv4 configuration so that it is on the same network as your company’s network.
Once the configuration is complete, open your web browser and enter the IP address of the Configuration port of EYE+ in the address bar (e.g. 10.70.0.50). The interface displayed in Fig. 33 should appear.
Note
If the home page does not have the same display as in Fig. 33, refer to the sections Recommended web browsers and Interface display.
Note
If the home page does not appear, please refer to Connection lost?.
Astuce
Indirect connection can also be made using DHCP protocol. The procedure is the same but the DHCP server automatically gives an IP address, subnet mask and gateway to the Configuration port of EYE+. To find out the configuration applied by the DHCP server, you must ask your company’s IT department which IP address has been linked.
Configuration specifications
The default configuration of the EYE+ Configuration port is presented in Tableau 19.
Ethernet port |
Default IP address |
Default subnet mask |
Default gateway |
|---|---|---|---|
Configuration |
192.168.1.50 |
255.255.255.0 |
0.0.0.0 |
Note
Refer to Network interfaces settings section to change the computer connection configuration. You can either change the configuration manually or switch it to DHCP protocol.