Warning
You are reading an old version of this documentation. If you want up-to-date information, please have a look at 5.4 .2.1 Select acquisition settings
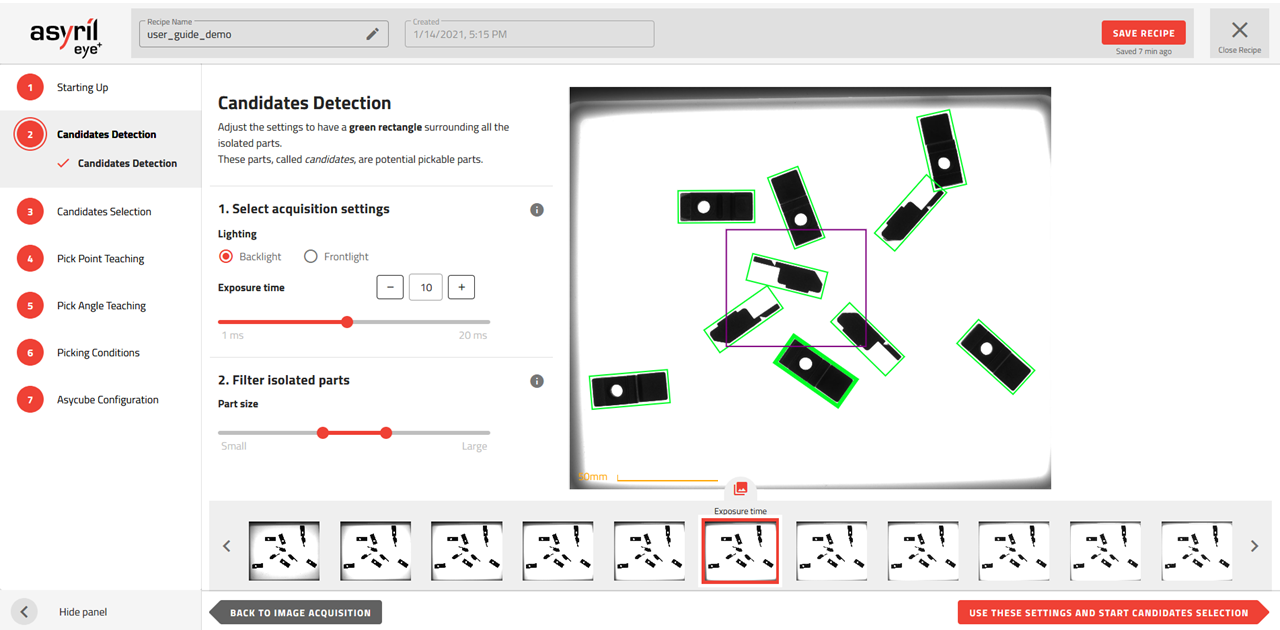
Fig. 48 Candidate Detection - Select acquisition settings
Lighting
The type of lighting must be adapted to your parts and the type of production plate you use. The choice of lighting must allow good detection of the parts and good rejection of undesired elements.
For good part detection, the lighting must highlight the edges of the parts. EYE+ detects the edges of the parts when the contrast between the part and the production plate is high.
In the Fig. 49, we see that the contrast is the best on the backlight image. This image should thus be used for the candidate detection step. Note that it is not possible to differentiate the orientation of the part on this backlight image, thus the frontlight will be used in the Candidate Selection step.
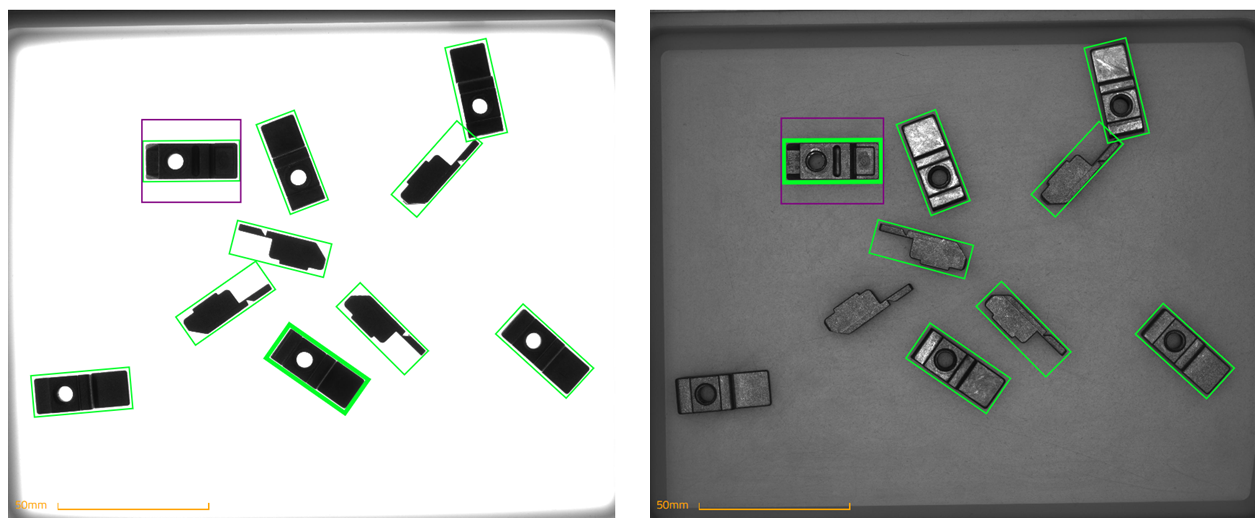
Fig. 49 Best Candidate Detection with Backlight 13ms (left) and best Candidate Selection with Frontlight 14ms (right)
Backlight
In most cases, using the backlight is adequate for part detection. This type of lighting has the same effect as a “silhouette” and thus is usually offering a good contrast between an opaque part and the translucent background of the Asycube plate.
Frontlight
In some cases, using the frontlight in this candidate detection step can be useful:
Transparent parts: If your parts are transparent, you shall use the frontlight to make the part reflect. The EYE+ detection algorithm will be able to detect the part if the contrast between the reflection of the part and the background is high enough.
Black production plate: In order to increase the contrast between a part and the Asycube plate it can sometimes be useful to use a black plate combined with a frontlight.
Note
Using the frontlight in a standard situation may highlight many undesirable elements that would not appear in the backlight. It is more difficult to choose the size of the parts in order to filter only the desired candidates.
Note
If the lighting settings you want to use are not available on this page, you can easily change the acquisition lighting settings in the configuration window. Once you have changed these settings, you must go back to the 1.2 Image Acquisition page and click on the to take new images with the new settings defined.

Fig. 50 Starting up - restart image acquisition
Exposure time
Exposure time is the time during which the camera is exposed to light when acquiring images. The longer the exposure time, the brighter the image.
Increasing or decreasing the exposure time affects the contrast between the parts and the production plate. You have to find the optimal exposure time for part detection.
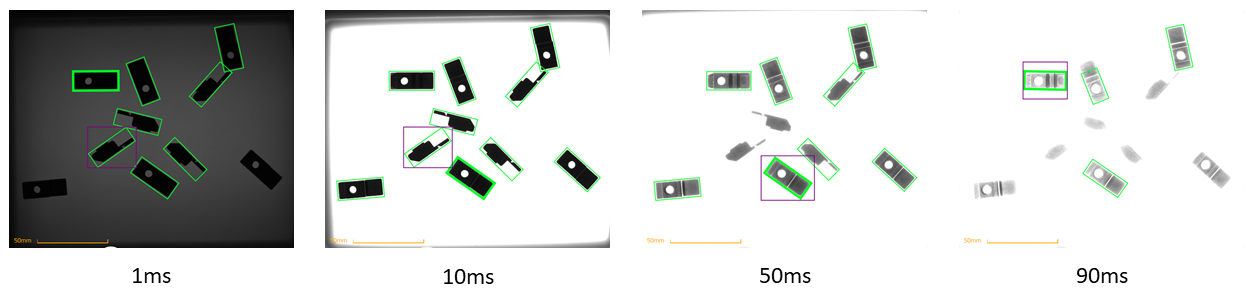
Fig. 51 Images with different exposure times using backlight
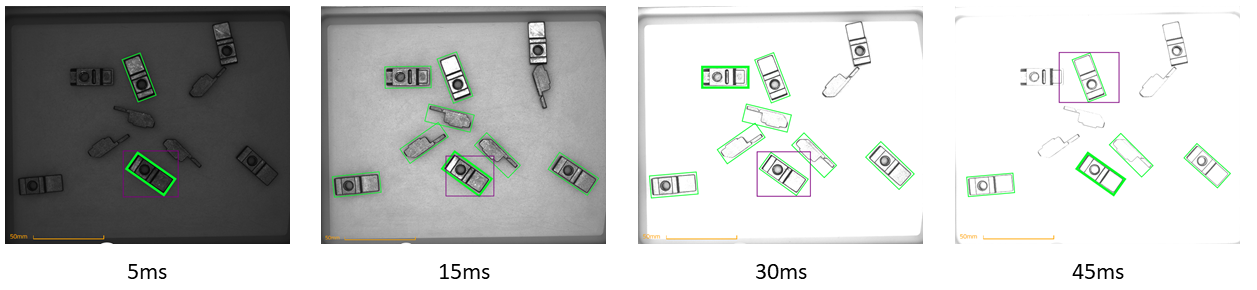
Fig. 52 Images with different exposure times using frontlight
Too short of an exposure time
The EYE+ detection algorithm may not detect parts if it cannot determine the difference between the part and the background.
The EYE+ detection algorithm could detect undesirable elements such as the shape or shadow of the production plate.
Too long of an exposure time
An over-saturated image might erode the edges of the parts. The size of the parts could then be different from one position in the image to another. Detection will not be robust enough for small part sizes.