Warning
You are reading an old version of this documentation. If you want up-to-date information, please have a look at 5.4 .Plugin configuration
The EYE+ URCap is composed of one installation node. It is used to connect the EYE+ to the robot. To access it, go to the Installation tab of the TeachPendant and select the EYE+ Configuration URCap. The following screen should appear Fig. 175.
Before starting the connection
Information
The first tab of the URCap installation gives information on how to start the connection with your EYE+.
Once all the steps listed are valid, go to the next tab to connect your EYE+.
Choose the plugin mode
It is possible to choose the plugin mode to use.
Basic plugin: By default, the basic plugin is selected. The basic plugin provides only the 4 basic EYE+ commands in the URCap program: start production, stop, get_part, prepare_part. It is also not possible to request more than one part with the get_part command.
Advanced plugin: The advanced plugin provides 5 additional EYE+ commands: force_take_image, can_take_image, get_parameter, set_parameter, feeder. It is possible to request more than one part with the get_part command (up to 5 parts).
Note
For further information on the behavior of the commands, please refer to the chapter Commands.
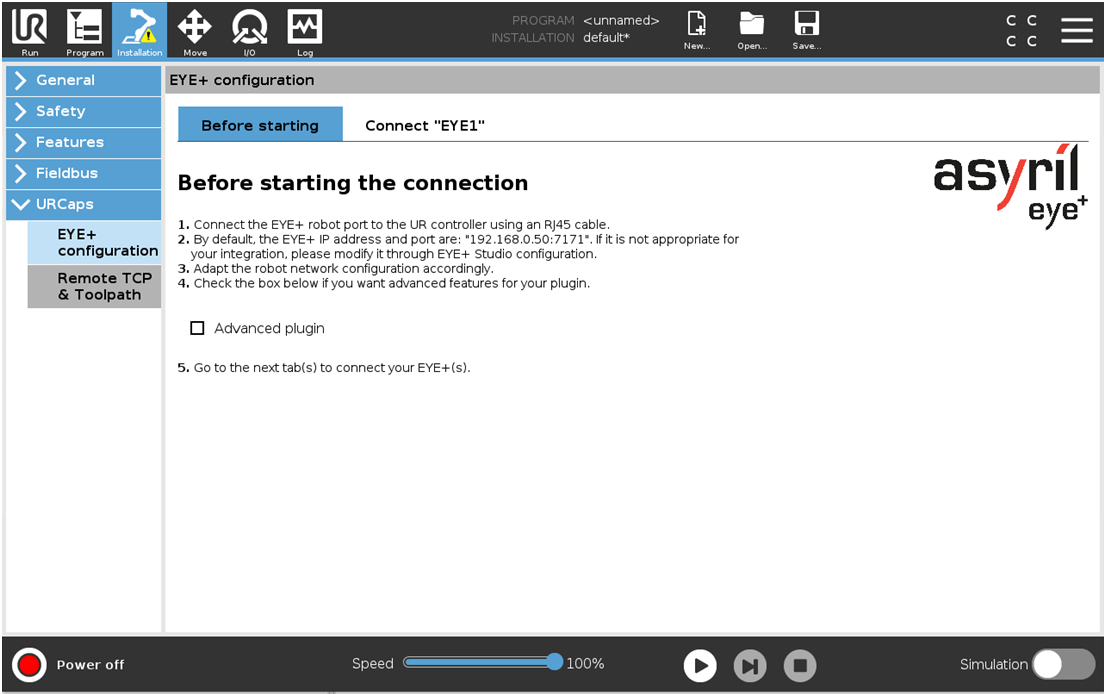
Fig. 175 Before starting the connection
Connect “EYE1”
To connect your EYE+, enter the correct IP address and port number in the dedicated fields and then click Connect. When the EYE+ is connected (Fig. 178), the connection status changes to “Connected” in green and the current status of the EYE+ is displayed.
Note
If the connection failed, the following error message pops up. Check if you have correctly connected the Ethernet cable between your robot and the EYE+ and check if the robot is configured on the same subnet as the robot port of the EYE+.
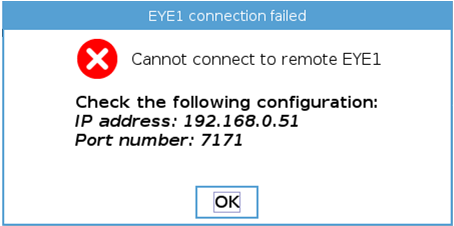
Fig. 176 Connection failed - popup error
The Refresh button is used to refresh the connection and EYE+ state on the view.
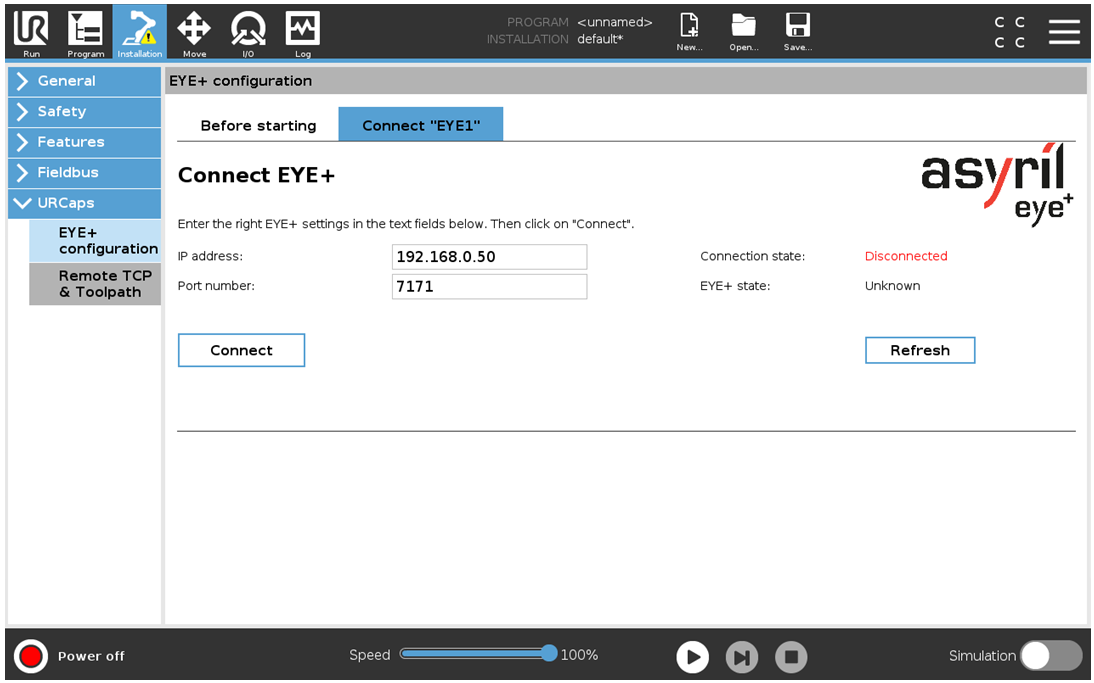
Fig. 177 Connect “EYE1” (default connection tab) - Disconnected EYE+

Fig. 178 Connect “EYE1” (default connection tab) - Connected EYE+