Warning
You are reading an old version of this documentation. If you want up-to-date information, please have a look at 5.4 .Sample program
Here we introduce an example of a program to perform a basic pick and place. This example program uses only the basic plugin level.
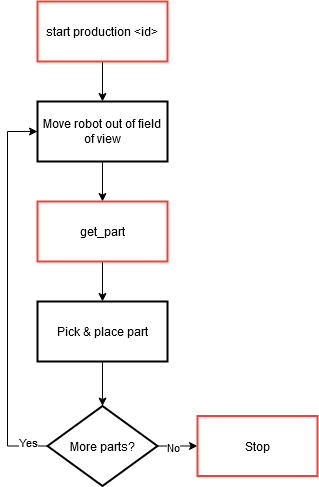
Fig. 197 Production scenario with get_part
It is necessary at this stage to have already performed the camera configuration, as well as the creation of a recipe with its hand-eye calibration.
BeforeStart
The BeforeStart section of the program is the part of the program that is executed only once. It is therefore recommended to prepare the robot and the EYE+ here.
1. Prepare the robot: Move the robot out of the field of view and prepare the gripper.
2. Start EYE+ in production: Stop the current state of the EYE+ if necessary and start the production with the desired recipe.
Robot Program
The robot program is the part that will loop through basic scenario (Fig. 197).
3. Get the part coordinates: Call the get_part command to get the coordinates of the part to pick. These coordinates will be stored in the global variable EYE1Pos.
4. Check if no error occurs while requesting the part coordinates: Call the EYEcheckLastError() function and check if it returns 0. If it does not, an error has occurred (for example, a timeout).
5. Calculate position: Create an intermediate position EYE1PosDZ from the EYE1Pos to make sure to not hit anything when picking the part, whether it is the Asycube or another part.
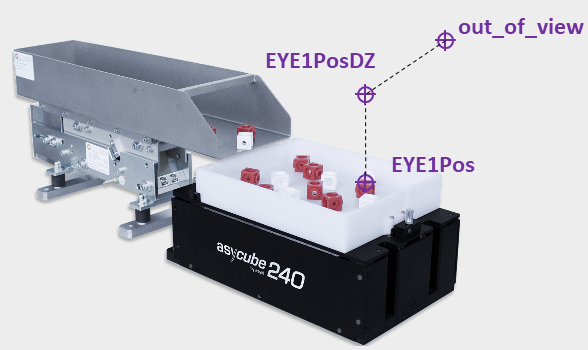
Fig. 198 Path to pick the part
6. Pick: Follow the path from out_of_view to EYE1PosDZ to EYE1Pos and pick the part with your gripper.
7. Place: Follow the path from EYE1Pos to EYE1PosDZ to out_of_view to place_pos and place the part with your gripper.
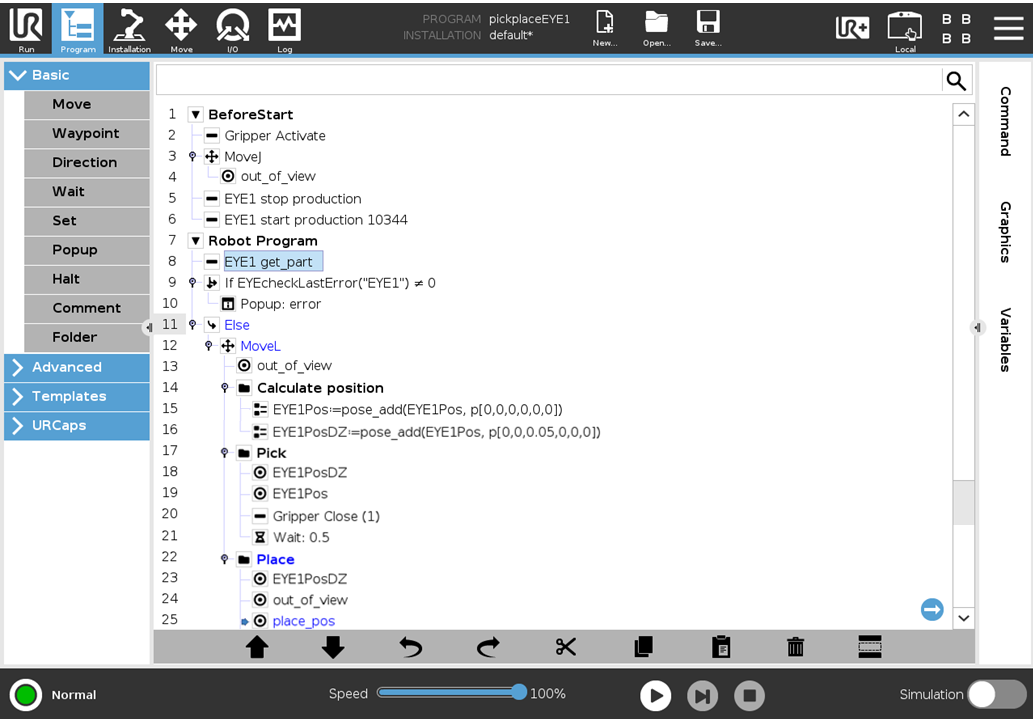
Fig. 199 Sample program - get_part scenario