警告
あなたはこのドキュメントの古いバージョンを読んでいます。 最新の情報を知りたい場合は、以下を参照してください 5.4 .Plugin installation
Step 1: Check robot software
The plugin uses socket messaging over TCP/IP protocol. You must have the optional "User Socket Msg" software (R648) installed on your robot to enable socket communication.
If it is correctly installed, the following information should be displayed on the IPendant touch under the path
MENU/STATUS/Version ID/Media and select NEXT/ORDER FI.
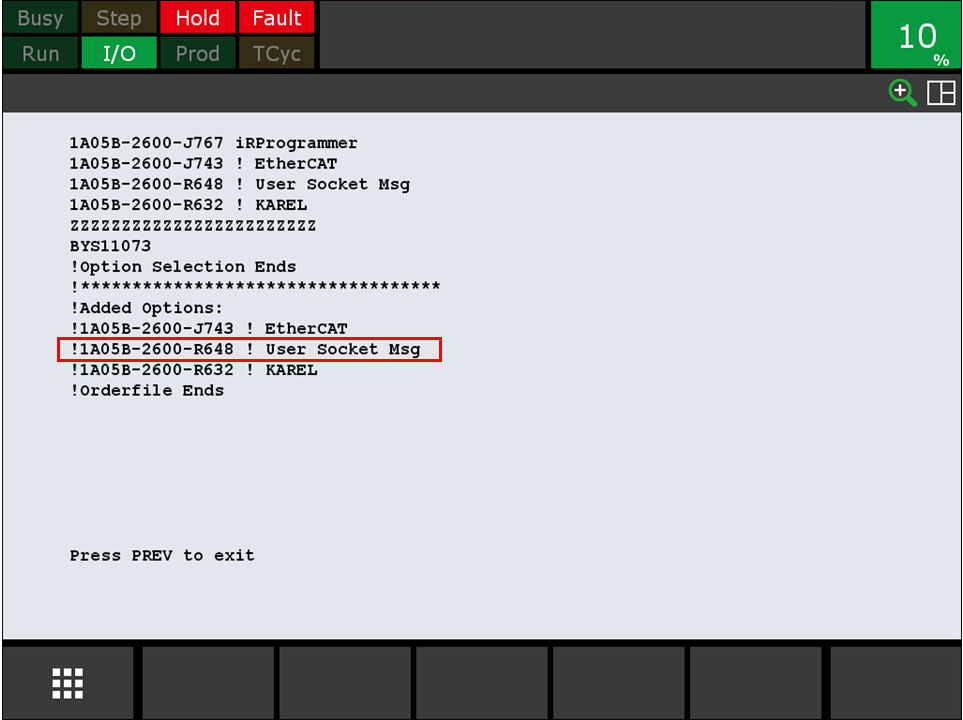
図 202 User Socket Messaging - R648
重要
If the software is not installed on your robot, please contact FANUC support to get it.
Step 2: Download the plugin
Download the plugin zip file fanuc-eyeplusPlugin-version.zip here. It must contain 9 p-code files (extension .pc).
eye_check_last_error.pc
eye_comm1.pc
eye_comm2.pc
eye_configure.pc
eye_get_part.pc
eye_prepare_part.pc
eye_raw_command.pc
eye_start_production.pc
eye_stop.pc
Step 3: Install the plugin on your robot
Unzip the fanuc-eyeplusPlugin-version file and save the 9 files on a USB key.
警告
Your USB key must be formatted to FAT or FAT32 (File Access Tables) to be detected by the controller.
Connect the USB key to the IPendant touch of the robot. On the IPendant touch, go to MENU/FILE/UTILE/Set Device/Select
your device. Then, for each file, select the file and click LOAD.
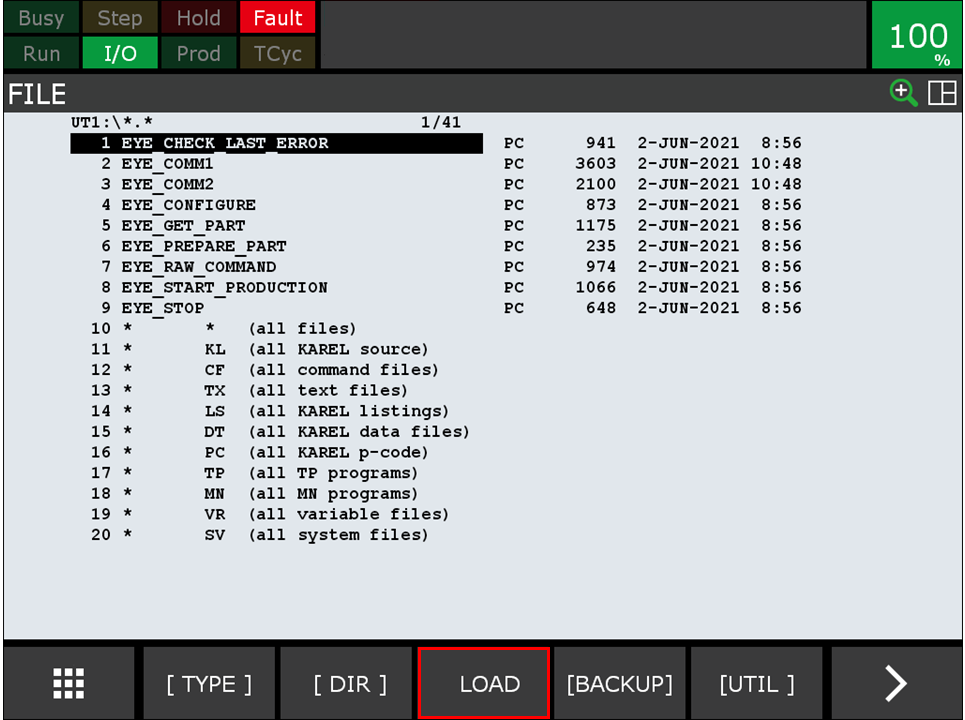
図 203 Select the .pc file and click on LOAD
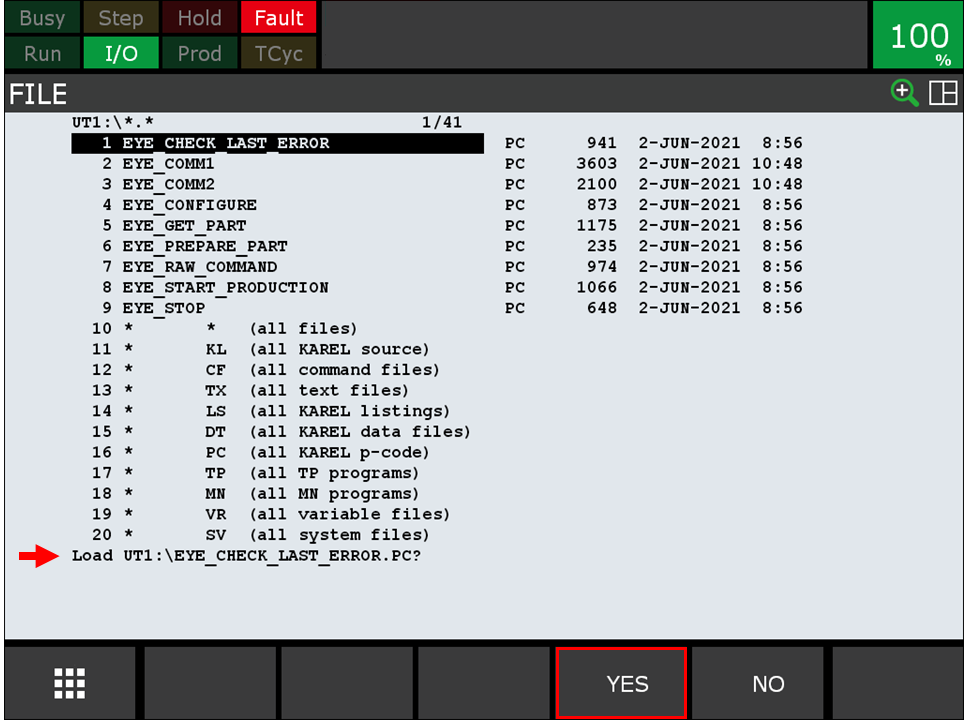
図 204 Click on YES to load the file

図 205 Wait until the message Loaded UT1:\EYE_CHECK_LAST_ERROR.PC is displayed on the IPendant touch.
Step 4: Check if the files are correctly installed
From the IPendant touch, go to SELECT/[TYPE]/KAREL Progs. Then check if the 9 files are listed in this window as
shown in 図 206.
注
The version of the plugin you downloaded must be displayed on the side.
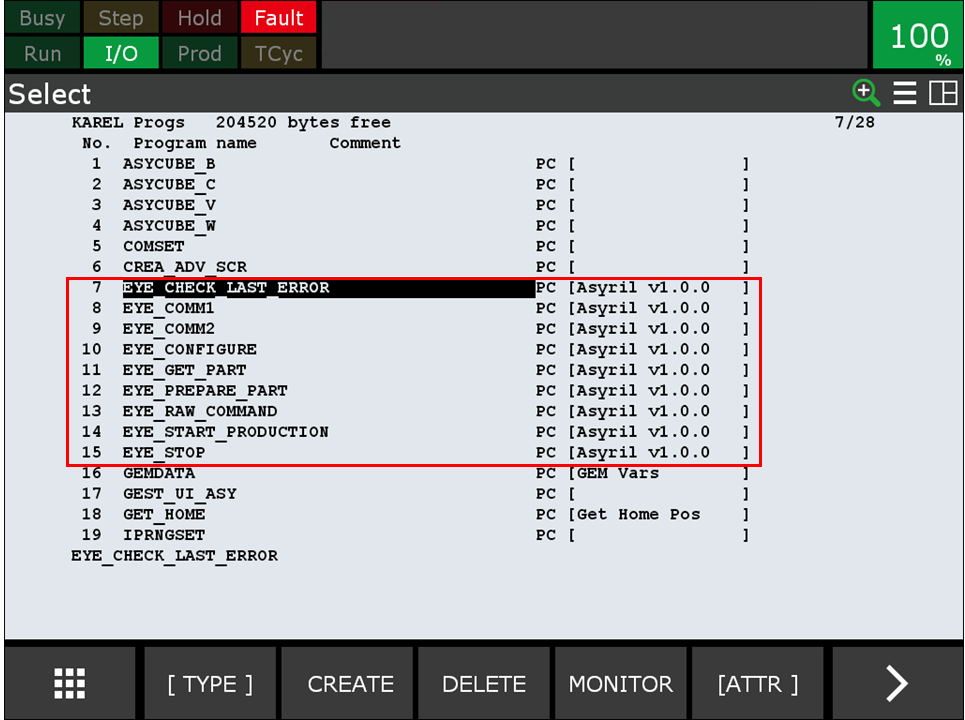
図 206 Check the installation of the files