Warning
You are reading an old version of this documentation. If you want up-to-date information, please have a look at 5.4 .Camera configuration
Why do I need to perform the camera configuration?
The camera configuration wizard is used to:
Set up the aperture and the focus of the camera lens.
Make sure that the camera is centered on the Asycube vision calibration plate.
Inform the system about the relative orientation of the Asycube with the camera.
Measure the working distance for optimal parallax correction.
Calibrate the camera using a checkerboard to correct the distortion of the camera lens and work in a more convenient unit (millimeters or inches instead of pixels).
Important
The camera field of view orientation must match the Asycube orientation. If the camera has a 90°-shift with the correct orientation, calibration will fail with the following error message “wrong orientation detected”. In that case, you will have to remount the camera correctly (see step First startup).
Access camera configuration wizard
Your system is now mounted and connected to EYE+ Studio. You now need to calibrate your camera in order to obtain a good image quality for the next step.
The camera calibration is the first step of the onboarding tool. From the page, simply click on to open the wizard.

Fig. 9 HOME page onboarding - Step 1 - Camera Configuration
You can also access it from the CONFIGURATION page. Click on , then on Vision and finally on .
Perform the camera configuration
Follow the wizard steps to perform the camera configuration.
Once it’s done, you should see a similar window to that in Fig. 10.
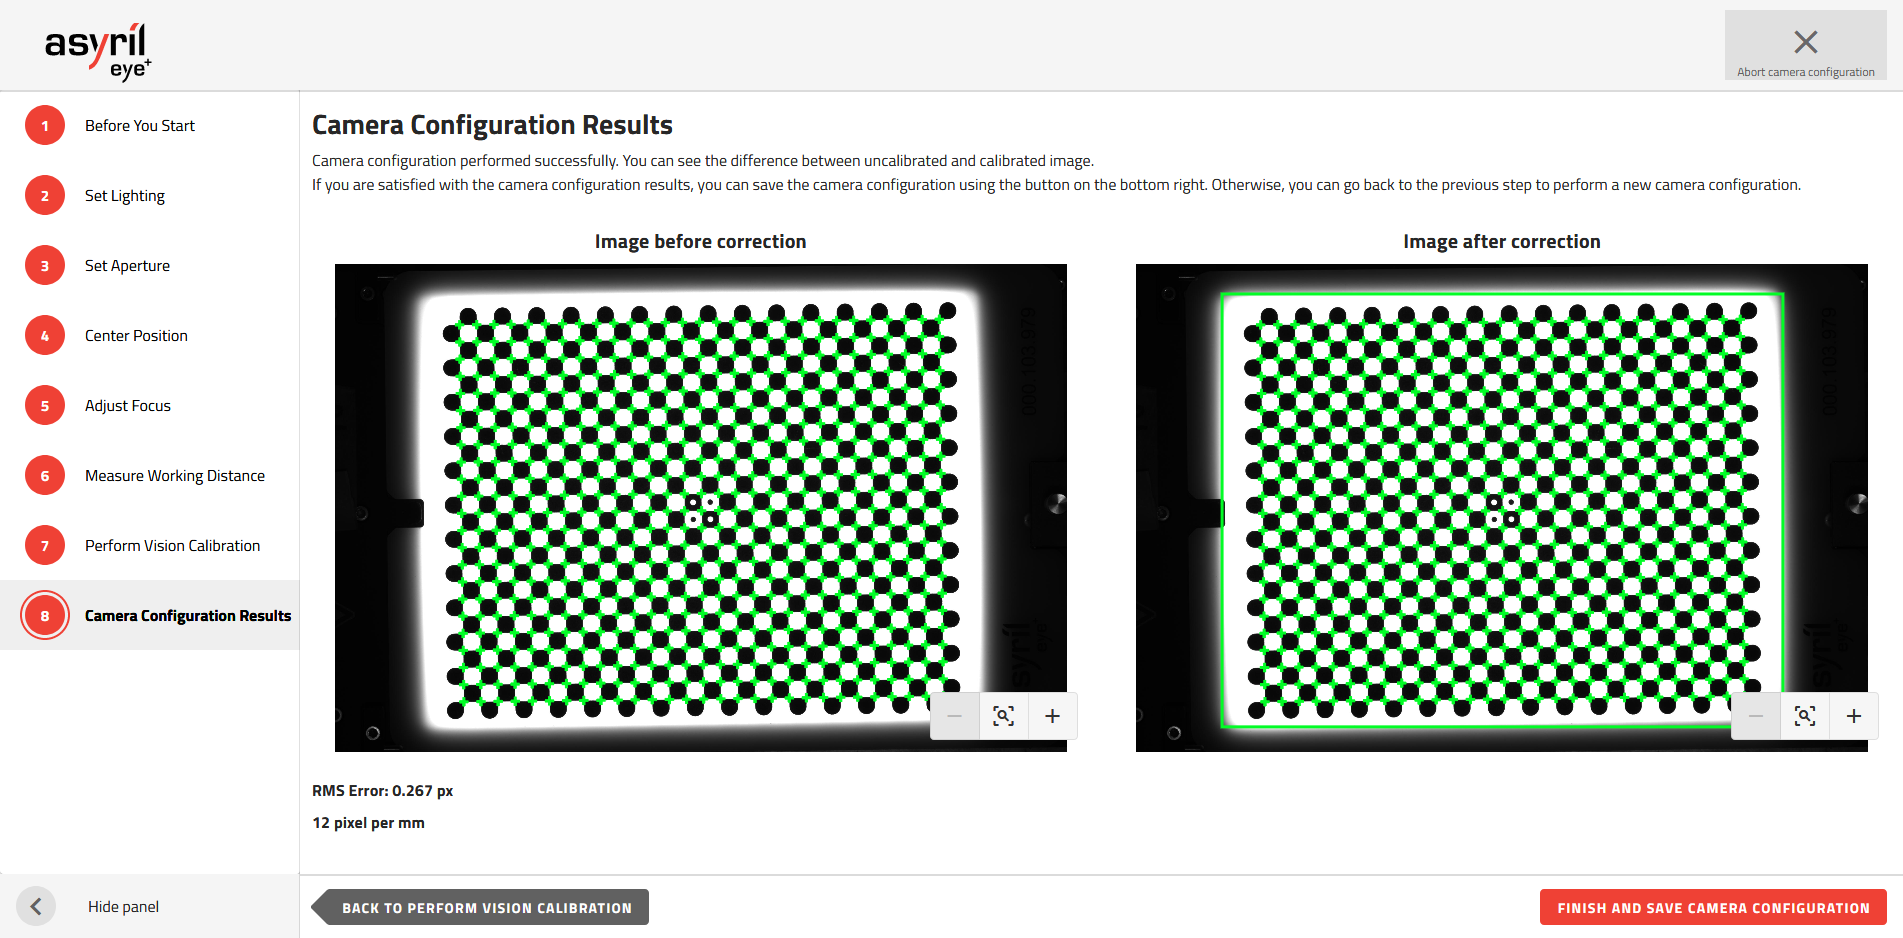
Fig. 10 Camera configuration results
Now your camera is ready for the next step. You can click on .
Note
Further information on camera configuration can be found in the chapter Camera configuration wizard.
Go back to the page. You will notice that the first step is now completed (Fig. 11).
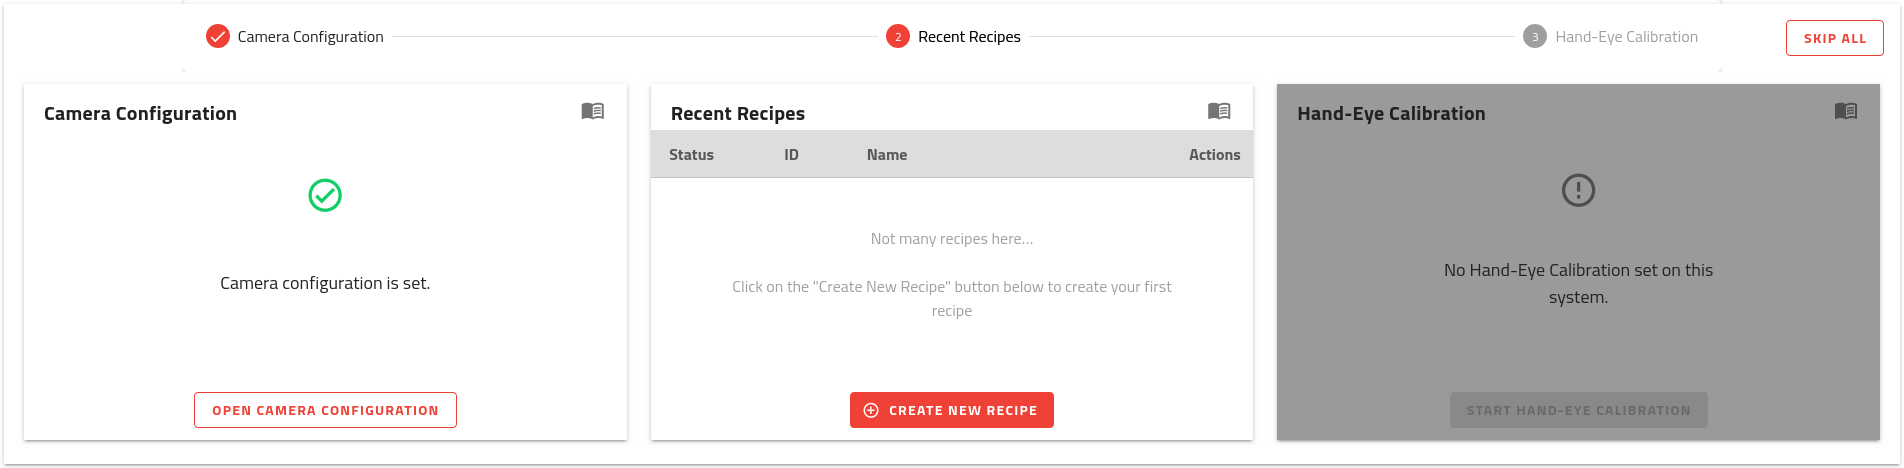
Fig. 11 HOME page onboarding - Camera configuration is set
You can now continue with the second step: Create your first recipe.