Warning
You are reading an old version of this documentation. If you want up-to-date information, please have a look at 5.4 .Home
The page is the first page you see when accessing EYE+ Studio (Fig. 51). The page is separated in two different areas.
The upper area displays system status, useful resources and support information. The lower area acts as an easy way to set up your system during the first use of EYE+.
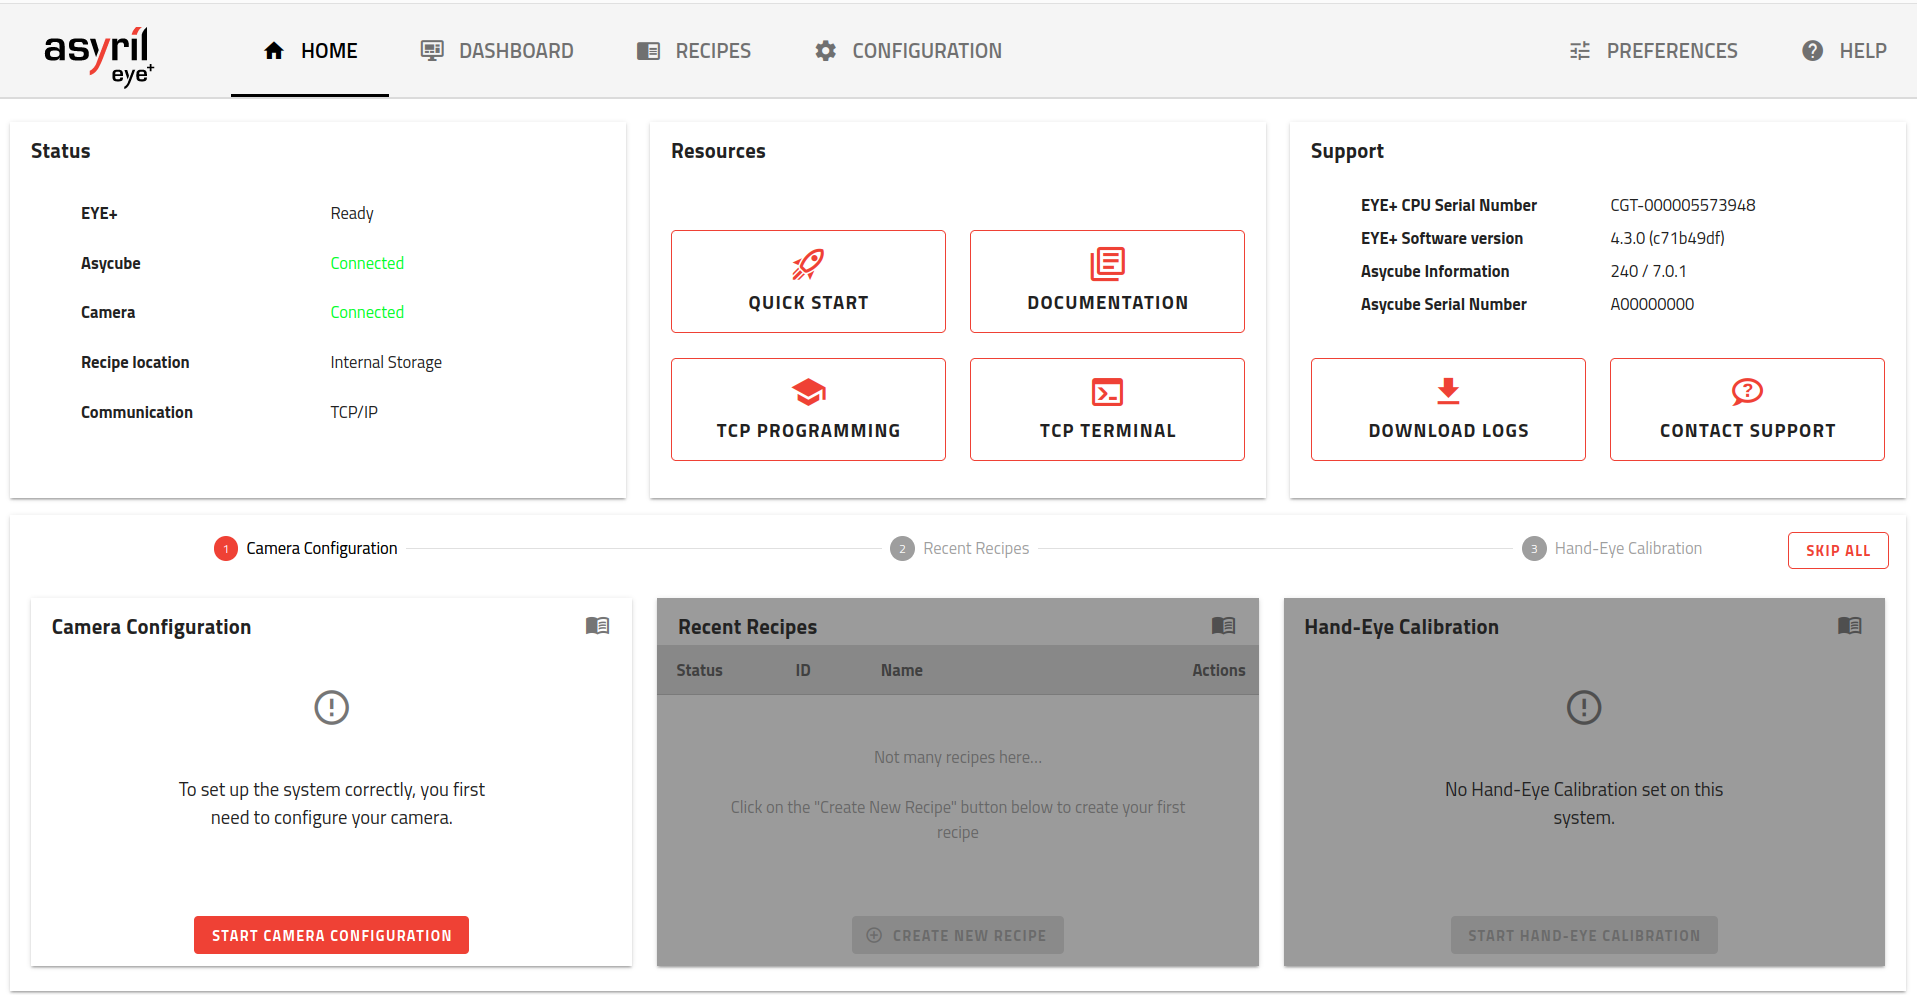
Fig. 51 HOME the first time you connect to EYE+
Upper area
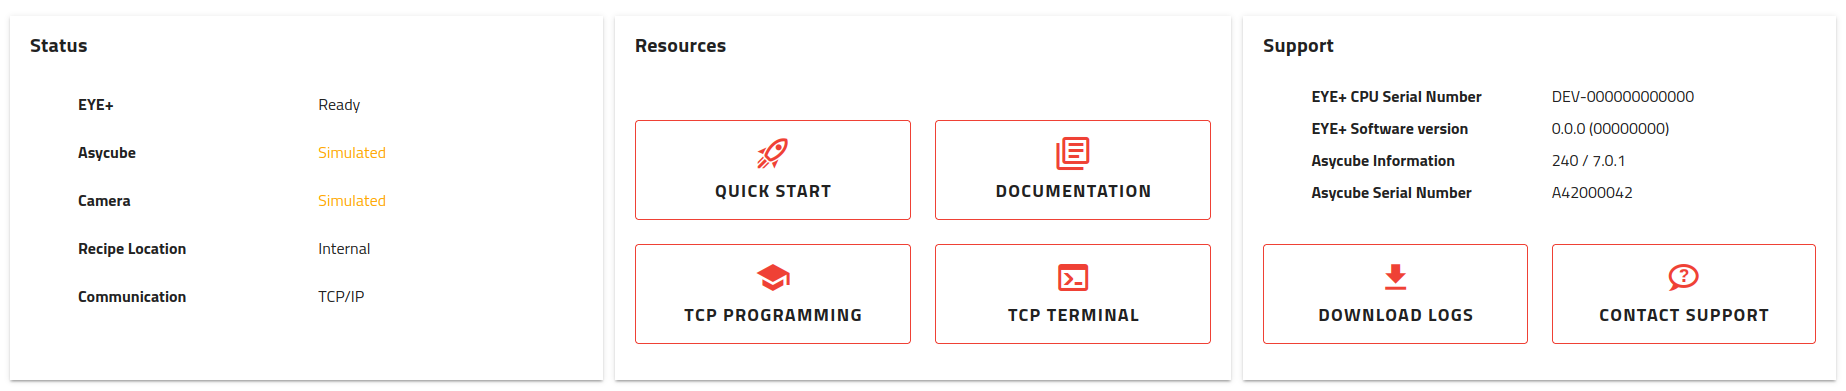
Fig. 52 HOME upper area
The upper area displays information about the system, resources and is divided into 3 areas:
Status area
The status area displays general information about your EYE+ system.
Eye+: Current EYE+ state, for a detailed explanation of the different states, refer to EYE+ states.
Asycube: This indicates whether the Asycube is connected or not. If this shows the Asycube as disconnected even though it looks like it is, refer to Asycube to troubleshoot the issue.
Camera: This indicates whether the camera is connected or not. This can be useful to troubleshoot some issues you may have with your system, refer to Vision.
Recipe Location: This shows where your recipes are saved/loaded from by default. This can be either local storage (out of the box default) or remote storage if you have one configured, see Remote storage for more information.
Communication: This reflects the means of communication you are using, either TCP/IP or a specific fieldbus module.
Resources area
The resources area provides you with useful content to start using EYE+.
Quickstart: This will take you to the guide to help you unpack your system and connect to EYE+ Studio for the first time.
Documentation: You will be redirected to the welcome page of the EYE+ documentation.
TCP programming: This redirects you to the TCP programming guide section of the documentation.
TCP terminal: This redirects you to the TCP terminal communicate with the EYE+ Controller through TCP/IP.
Support area
This section contains all the useful information you can provide us with in case you require support.
EYE+ CPU Serial Number
EYE+ Software version
Asycube Information
Asycube Serial Number
Download logs: The system logs are used by support team to help troubleshoot your issue.
Contact support: If you require support for your EYE+ system, clicking here will show you the email addresses of our support centers.
Important
The contact support button will open a dialog where you can select one of our support centers according to their (and your) location. Doing so will create a new email, prefilled with the information we need to assist you as best we can. We also kindly ask you to download the System logs and attach them to the same email.
Note
The Asycube Serial Number is displayed only for Asycube Firmware versions equal or greater than 7.0.0.
Lower area
The lower area is used as an onboarding tool during the first set up of the system. Once completed, the area provides relevant information about the system.
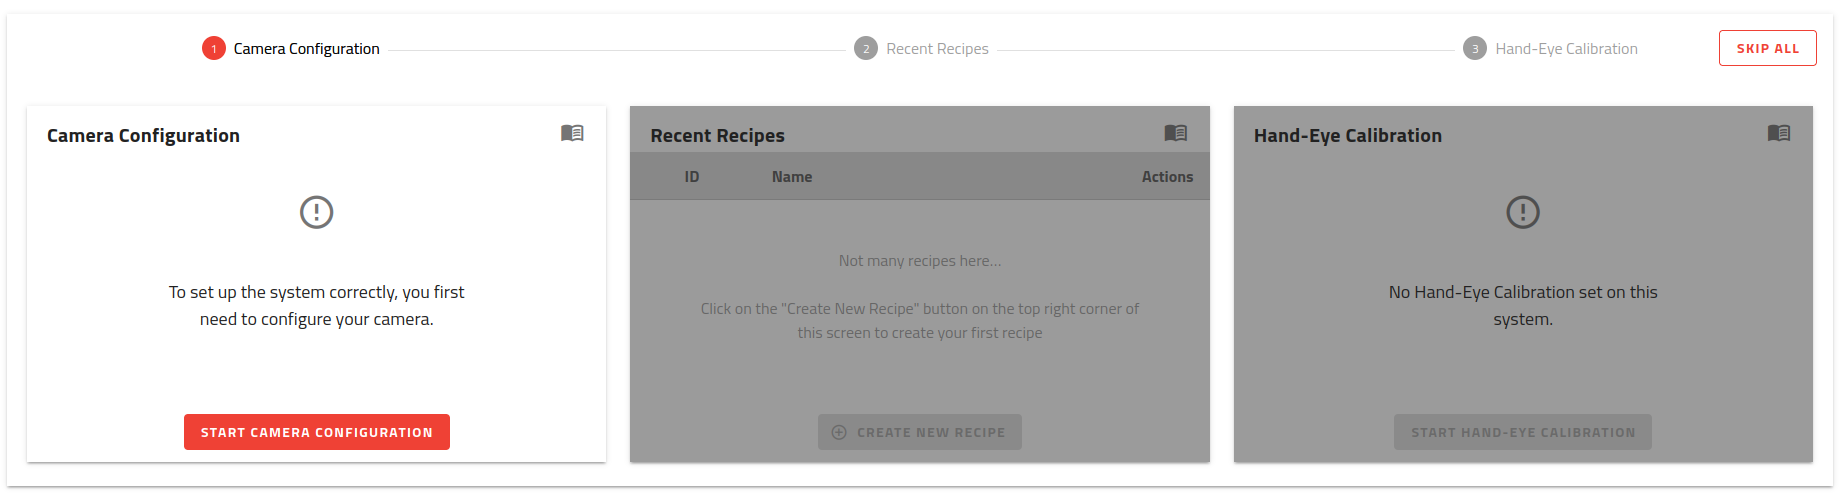
Fig. 53 HOME lower area
System initialization
To assist you with the onboarding on EYE+ Studio, a three-step tool is used:
Camera configuration: Allows you to directly open the Camera configuration wizard as it is the first required step to use your EYE+.
Recent recipes: Allows you to open the recipe wizard to create your first recipe.
Hand-eye calibration: Allows you to open the hand-eye calibration wizard.
To have an optimal experience with EYE+ in production we recommend you complete these three steps.
Note
If you are already familiar with EYE+, you can skip the onboarding with the button.
System information
Once you have either completed or skipped the onboarding, the progress bar at the top will disappear while the sections will remain. This allows you to have an overview of your EYE+ system and provides you easy shortcuts to the most important features.
Note
If you are discovering EYE+ using our online simulation, the onboarding will differ from a physical EYE+ system. The three steps for the simulation onboarding are:
Part selection
Recent recipes
Your opinion