Warning
You are reading an old version of this documentation. If you want up-to-date information, please have a look at 5.4 .Vision calibration plates
EYE+ is supplied with a calibration plate specific to your Asycube size.
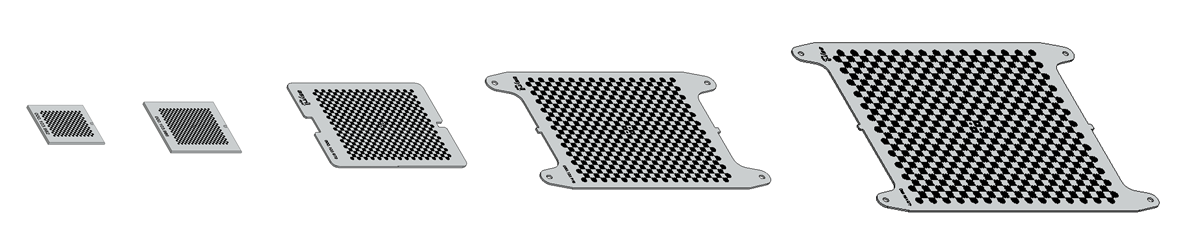
Fig. 28 Calibration plate for Asycube 50 to 530
Purpose
Vision calibration plate is used to perform the camera configuration that will:
Check the camera orientation.
Define the region of interest (ROI).
Display information in millimeters/inches rather than pixels in the interface.
Correct distortion of the lens.
Mounting vision calibration plate
Follow these two steps to mount the vision calibration plate:
Remove Asycube plate from the Asycube.
Place the vision calibration plate.
Once your vision calibration plate is mounted, please make sure that:
The vision calibration plate is flat.
The vision calibration plate has no play.
The vision calibration plate is mounted in the correct orientation: the Asyril logo must face upwards.
Important
The Asycube 380/530 vision calibration plates must be tightened using the screws in each corner.
Asycube 50/80
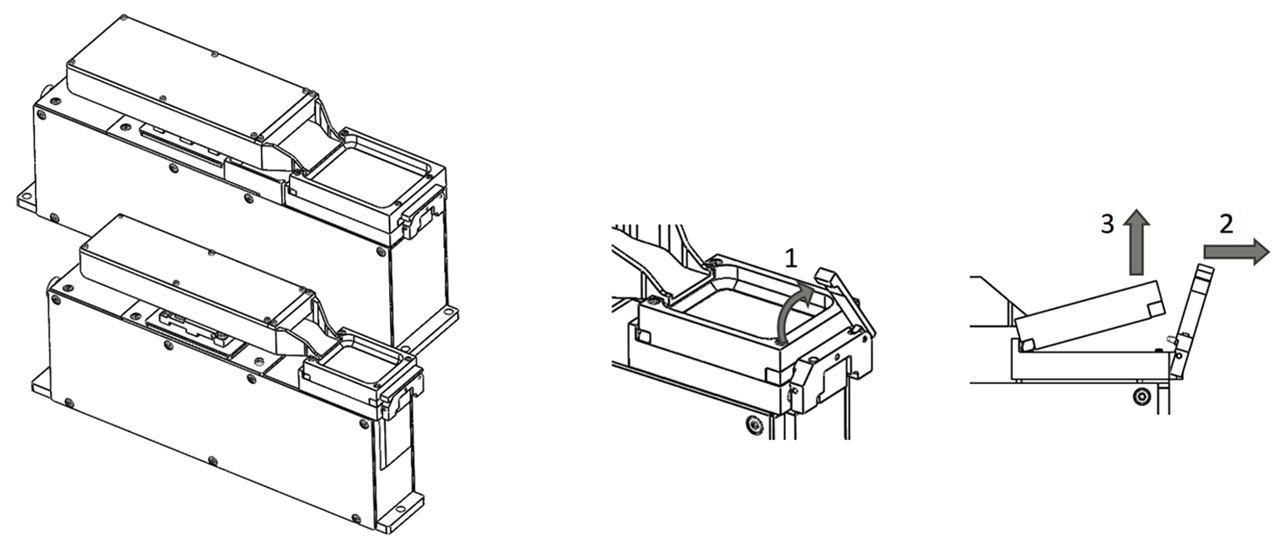
Fig. 29 Procedure to remove Asycube 50/80 plate
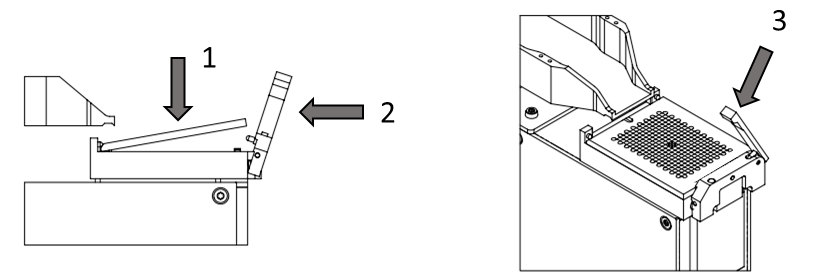
Fig. 30 Procedure to mount the vision calibration plate on Asycube 50/80
Asycube 240
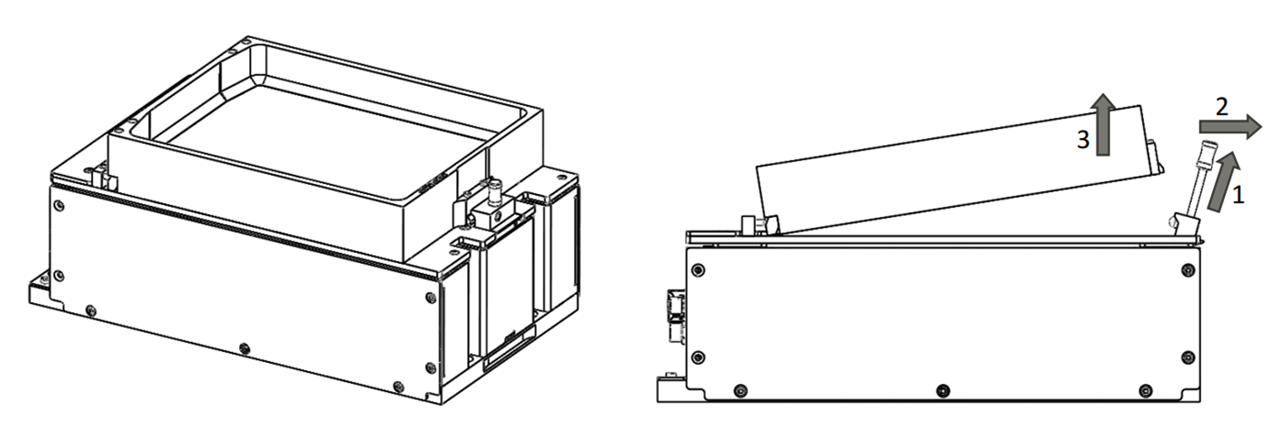
Fig. 31 Procedure to remove Asycube 240 plate
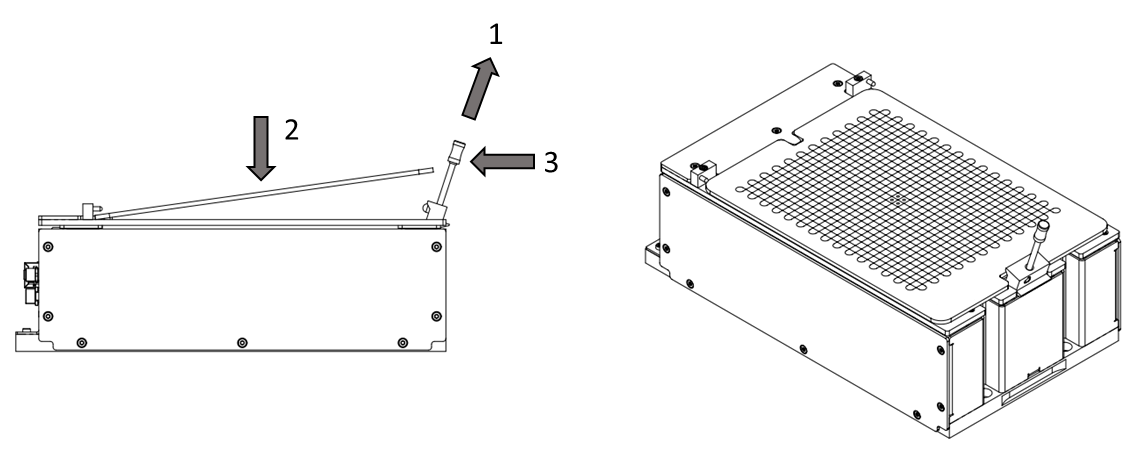
Fig. 32 Procedure to mount the vision calibration plate on Asycube 240
Asycube 380/530
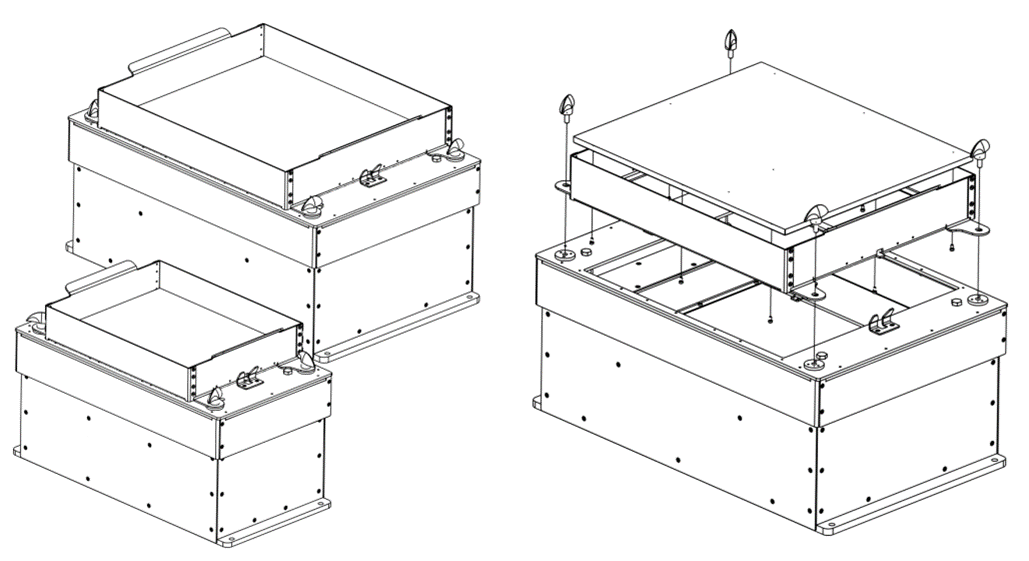
Fig. 33 Procedure to remove Asycube 380/530 plate
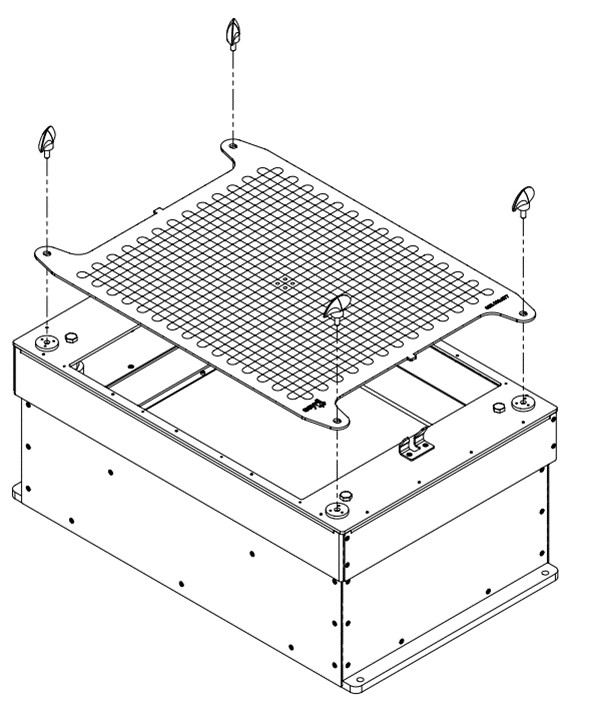
Fig. 34 Procedure to mount the vision calibration plate on Asycube 380/530